400 Series
400 Series
Installation Information
2-7
427 and 427R using screws passing through the door
frame from the rear, into the panel. The handle is
attached to the panel.
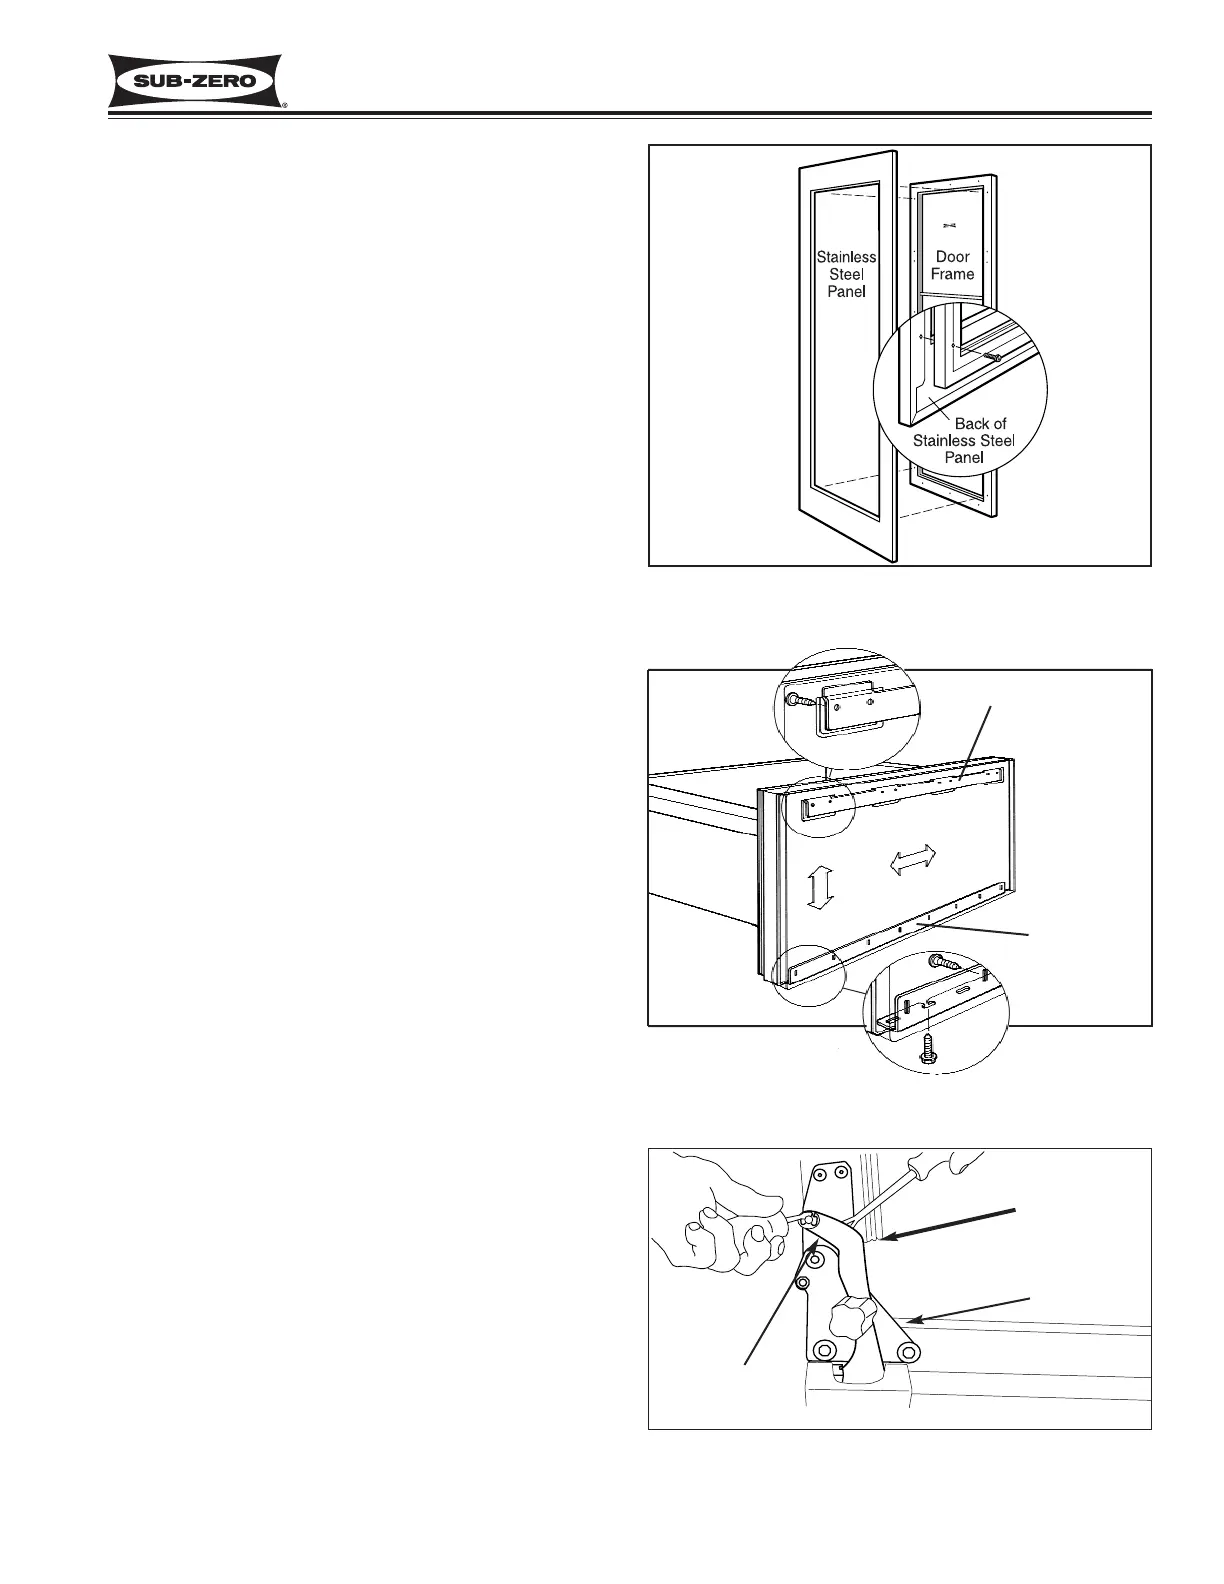
To remove a door panel, open the door and locate the
Poly-tape under the gasket which covers the panel
mounting screw holes. (See Figure 2-15.) Remove the
tape, then extract the panel mounting screws. Now,
pull the panel from the door. (See Figure 2-18.)
To install a new door panel on a 427 or 427R, refer to
the Installation Manual. If reinstalling the existing panel,
reverse the steps above.
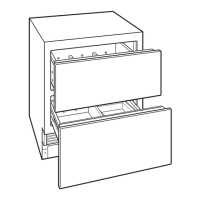
Drawer Panel Removal and Installation
(Model 427R)
NOTE: The model 427R is NOT supplied with panels
from the factory. Panels are purchased separately.
Drawer panels are attached to the drawers of a 427R
using screws passing through mounting brackets at the
bottom of each drawer, and a dog-eared bracket on the
back of the panel fitting into slots in the face of the
drawers. (See Figure 2-19.) Handles are attached to
the panels.
To remove a drawer panel, open the drawer and locate
the six screws at the bottom. Remove the screws, then
pull the bottom of the drawer panel out slightly while
pulling downward.
To install a new drawer panel on a 427R, refer to the
Installation Manual. If reinstalling the existing panel,
reverse the steps above.
Carbon, Platinum and Stainless Steel Door Panel
Removal and Installation (Model 430)
NOTE: The models 430G/B, 430HAG/B, 430S/B,
430G/P, 430HAG/P, 430S/P, 430G/S, 430HAG/S, and
430S/S are shipped from the factory with decorative
steel panels and handles in place.
To remove the stainless steel panel you will need to
remove the door from the unit. If a door stop has been
installed, it must also be removed at this time. (See the
“DOOR STOP INSTALLATION, (Model 430)” section in
this manual.) First, detach the door closer assembly
from the bottom door hinge by opening the door until
the hole in door closer arm aligns with the hole in bot-
tom cabinet hinge, then insert a stubby screwdriver
(1/4” diameter or less) up into the two holes. With a
small straight-blade screwdriver, remove the E-ring
which holds the door closer arm to the stud on the bot-
tom door hinge. Then, pry the door closer arm down off
of the door hinge stud. (See Figure 2-20, and CAU-
TION on next page)
Figure 2-18. Model 427, 427R
Door Panel Removal
Figure 2-19. Model 427R
Drawer Panel Removal
Figure 2-20. Model 430
Detaching Door Closer
Drawer Panel
Mounting Bracket
- Upper
Drawer Panel
Mounting
Bracket
- Bottom
Pry Down
Screwdriver
up into holes
E-ring
 Loading...