Planning Information
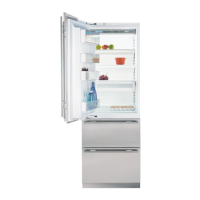
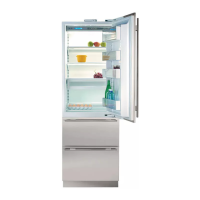
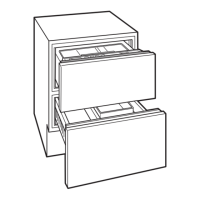
Model 700TC(I)
Dimensions in parentheses are in
millimeters unless otherwise specified.
5
INSTALLATION NOTES
R
efer to the illustrations and specifications
for overall dimensions, finished rough opening
dimensions and installation specifics.
T
he depth of Model 700TC(I) is 24" (610)
from the front of the unit to its back. Your
design may necessitate moving the unit back,
or cabinets forward to achieve a flush fit. This
will require a minimum rough opening depth of
25" (635). Refer to the installation illustration.
The anti-tip bracket must be installed to
prevent the unit from tipping forward.
Integrated units are compatible with virtually
any style of cabinetry. They can be used with
framed as well as frameless cabinets.
Refer to the full-scale illustrations at the end
of this section for specifics on panels and door
openings.
Door panels can grow beyond the 80" (2032)
height to accommodate any size of door as long
as you stay below the recommended door panel
weight limit of 40 lbs (18 kg). Door panels must
be a minimum of
5
/8" (16) thick.
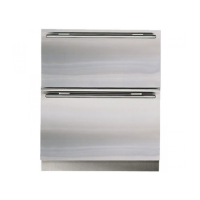
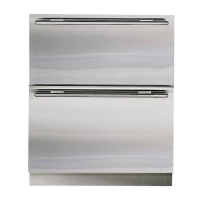
The weight of each drawer panel cannot
exceed 12 lbs (5 kg). Drawer panels must be a
minimum of
5
/8" (16) thic
k.
For the bottom drawer, the maximum panel
height is 16
11
/16" (424). You must keep a
minimum space of 4" (102) clear below the
bottom edge of the lower drawer panel, so the
unit can be properly vented. In addition, any
decorative base molding must be removable for
possible servicing and cleaning of the
condenser.
We recommend using D-style handles, which
should be located on the opposite side fr
om the
hinge
, centered on the cabinet door and the top,
center area of the drawer panel.
Two Integrated units may be installed next to
one another. Refer to page 11 for additional
information.
For Integrated models with an automatic ice
maker, rough in the water supply line. Connect a
1
/4" OD copper line to the house supply, being
sure to use an easily accessible shut-off v
alve
between the supply and the unit. This shut-off
valve should not be installed behind the unit.
D
o not use self-piercing valves. A saddle
valve kit (4200880) is available from your
Sub-Zero dealer. To obtain local dealer informa-
tion, visit the Locator section of our website,
s
ubzero.com.
A line filter is required when water condi-
tions have a high sediment content. The ice
maker operates on water pressure of 20 psi
(1.4 bar) to 100 psi (6.9 bar). In some cases a
reverse osmosis water filter system may not be
able to maintain the minimum water pressure
consistently.
When routing the water through the side
walls, you must place the water line within
1
/2"
(13) of the floor and as close as possible to the
back wall. The line must be routed around the
anti-tip br
acket so it clears the bracket and
leveling feet of the unit. Refer to the installation
illustration for placement of the water line.
Do not route water supply line in front of the
compressor tray. The tray must be slid forward
for service.
Regardless of the routing, allow for 27"
(686) of excess copper tubing to remain outside
the wall or floor for easy connection to the unit,
as shown in the installation illustr
ation.
A 115 volt, 6OHz, 15 amp circuit breaker and
electrical supply are required
. A separate circuit,
servicing only this appliance is necessary.
All Integrated models are equipped with a
power supply cord with a 3-prong grounding
plug, which must be plugged into a mating
3-prong grounding type wall receptacle. The
electrical outlet must be placed so the ground-
ing pr
ong is to the right of the thinner blades.
The outlet must be flush with the back wall.
Locate electrical within the shaded area shown
in the installation illustr
ation.
Do not use an extension cord or two pr
ong
ada
pter
. Electrical gr
ound is required
.
You must follow all National Electrical Code
regulations. In addition, be aw
are of local codes
and ordinances when installing your service.
The Integrated Installation Guide packed with
the appliance will give you step-by-step proce-
dures for making sure the unit is installed
properly.
 Loading...