Planning Information
Model 700TF(I)
Dimensions in parentheses are in
millimeters unless otherwise specified.
11
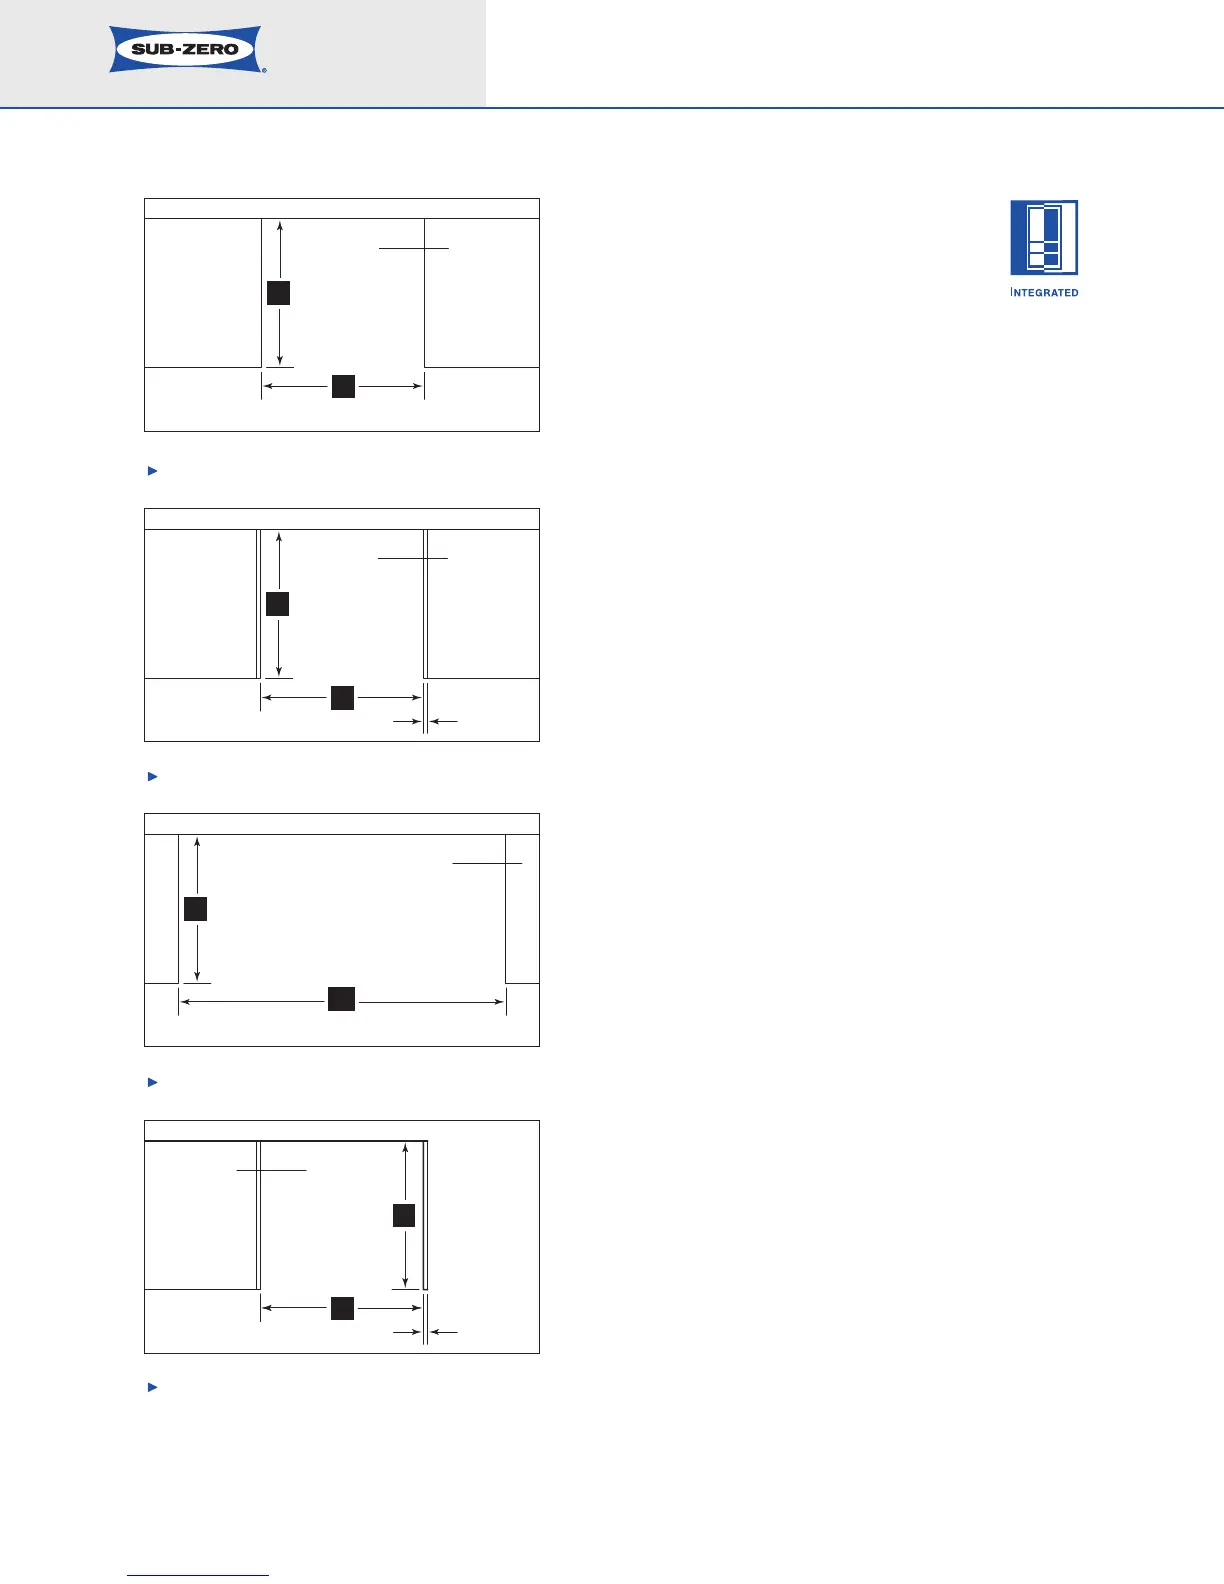
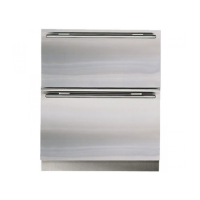
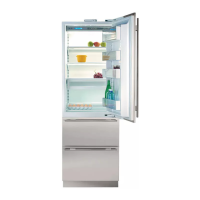
INSTALLATION OPTIONS
The illustrations on this page show some typical
installations and their dimension considerations.
The depth dimension in the illustrations may vary
depending on cabinet styles, treatment of counter-
tops or other design options.
IMPORTANT NOTE: The depth of each Integrated
unit is 24" (610) from the front of the unit to its
back. Your design may necessitate moving the unit
back, or cabinets forward to achieve a flush fit. This
will require a minimum rough opening depth of 25"
(635). Refer to the illustrations.
DUAL INSTALLATIONS
If two or more Integrated models are installed side
by side where there is 2" (51) or less of space
between the units, a heater kit is recommended—
TTDUAL for two tall units installed side by side and
BBDUAL for two base units or a base unit and a tall
unit installed side by side. These optional compo-
nents are available through your Sub-Zero dealer. To
obtain local dealer information, visit the Locator
section of our website, subzero.com.
Installation without side panels.
Installation with side panels.
Installation of two units side b
y side
.
Installation at end of run.
T
OP VIEW
CABINETS
25
(
635)
C
2
7
(686)
2
CABINETS
25
(
635)
T
2
7
(
686)
2
MINIMUM
5
/8" (16) SIDE PANELS
M
TOP VIEW
CABINETS
54
(1372)
25
(635)
C
CABINETS
25
(635)
2
27
(686)
MINIMUM
5
/8" (16) SIDE PANELS