400 Series
400 Series
Component Access and Removal
6-11
Upper Evaporator Thermistor Access and Removal
(Model 424)
NOTE: See ELECTRIC SHOCK WARNING at begin-
ning of this section.
The upper evaporator thermistor is attached to the right
side evaporator bracket with a Phillips-head screw.
To remove the upper evaporator thermistor, first remove
the two wine racks, all cabinet slides, cabinet slide
spacers and cabinet slide support spacers in the upper
compartment. Then, remove the evaporator fan cover
mounting screws, the evaporator fan cover and the
evaporator cover. Extract the screw from the thermis-
tor, and the screw from the P-clamp holding the ther-
mistor electrical leads. Now, disconnect the thermistor
electrical leads. (See Figure 6-21)
Lower Evaporator Thermistor Access and Removal
(Model 424)
NOTE: See ELECTRIC SHOCK WARNING at begin-
ning of this section.
The lower evaporator thermistor is attached to the right
side evaporator bracket with a Phillips-head screw.
To remove the lower evaporator thermistor, first remove
the three wine racks in the lower compartment. Then,
remove the evaporator fan cover mounting screws, the
evaporator fan cover and the lower evaporator cover.
Extract the mounting screws from the right side evapo-
rator support cover and pull the evaporator support
cover out. Extract the screw from the thermistor, and
the screw from the P-clamp holding the thermistor elec-
trical leads. Now, disconnect the thermistor electrical
leads. (See Figure 6-22)
Upper Evaporator Fan Assembly Access and
Removal (Model 424)
NOTE: See ELECTRIC SHOCK WARNING at begin-
ning of this section.
The upper evaporator fan assembly is attached to the
rear wall by four Phillips-head screws.
To remove the upper evaporator fan assembly, first
remove the two wine racks, all cabinet slides, cabinet
slide spacers and cabinet slide support spacers in the
upper compartment. Then, remove the evaporator fan
cover mounting screws, the evaporator fan cover and
the evaporator cover. Pull the fan blade from the fan
motor shaft. Extract the screw from the P-clamp hold-
ing the fan wires. Then remove the four screws from
the fan bracket and disconnect the fan motor electrical
leads. (See Figure 6-22)
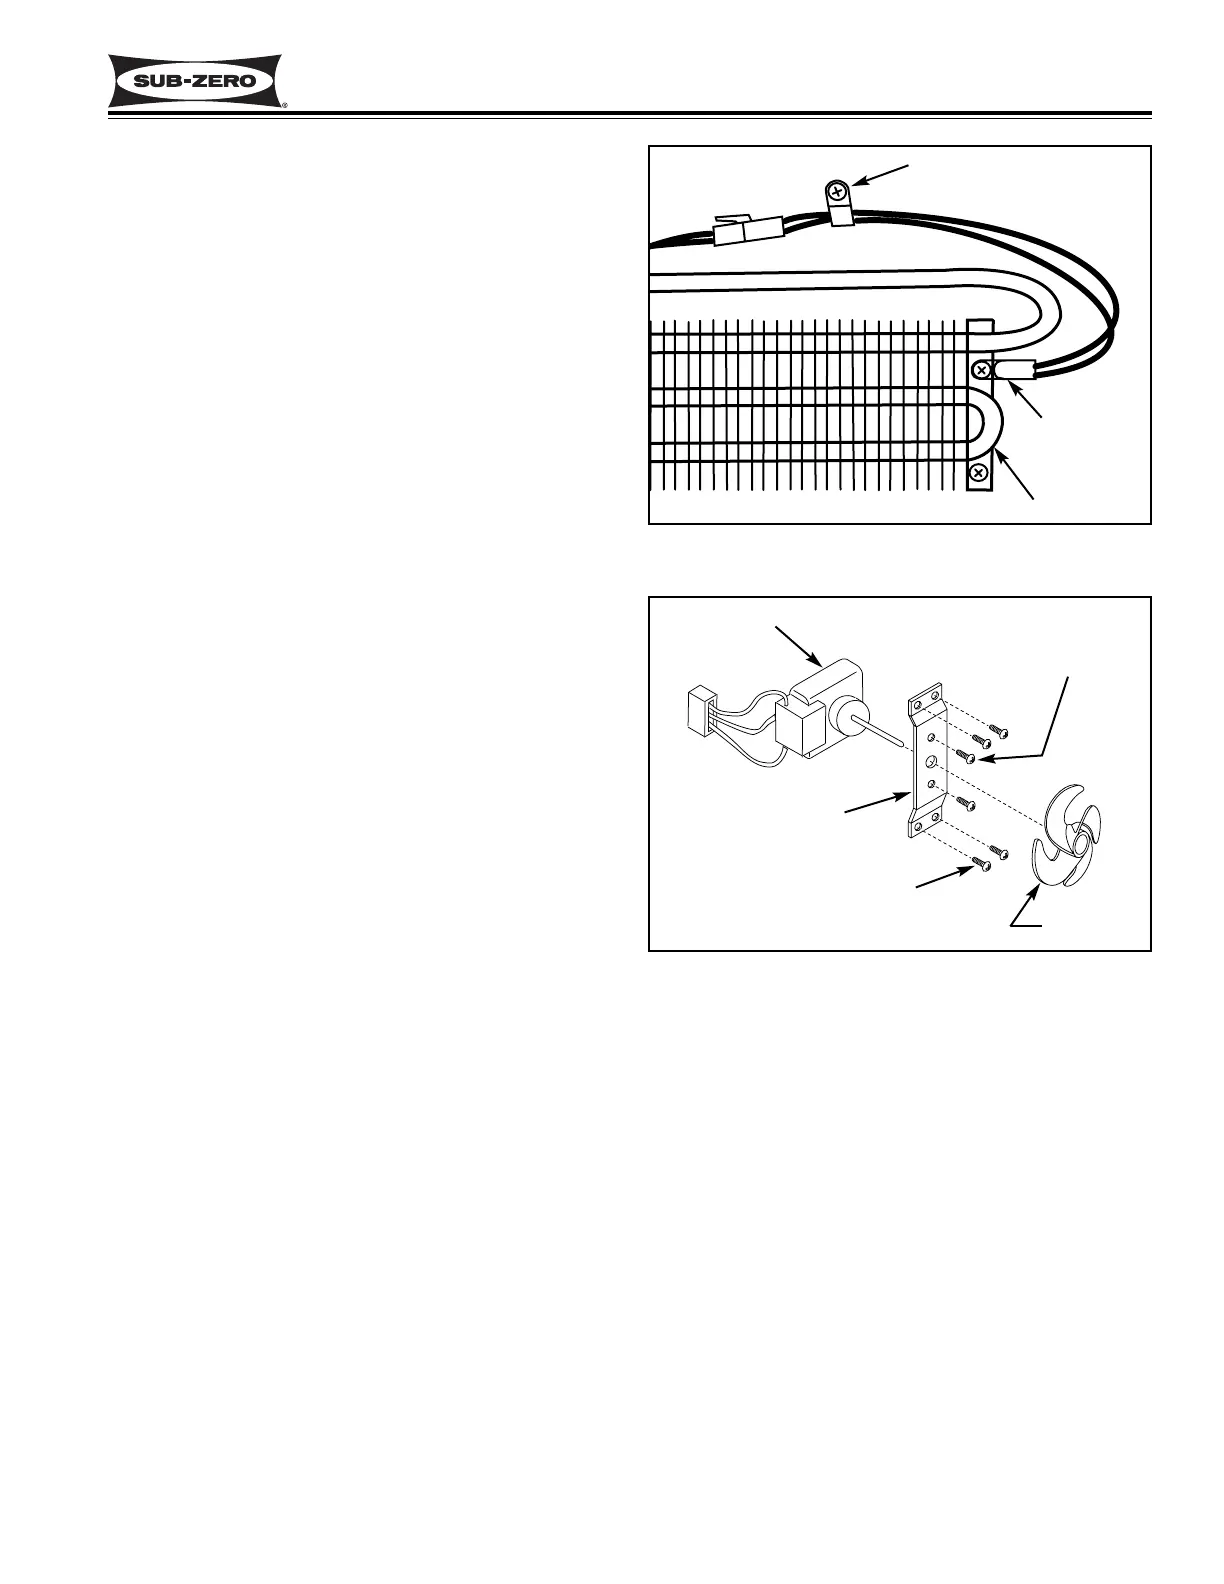
Figure 6-21. Evaporator Thermistor
Figure 6-22. Evaporator Fan Assembly
Lower Evaporator Fan Assembly Access and
Removal (Model 424)
NOTE: See ELECTRIC SHOCK WARNING at begin-
ning of this section.
The lower evaporator fan assembly is attached to the
rear wall by four Phillips-head screws.
To remove the lower evaporator fan assembly, first
remove the three wine racks, all cabinet slides, cabinet
slide spacers and cabinet slide support spacers in the
lower compartment. Then, remove the evaporator fan
cover mounting screws, the evaporator fan cover and
the lower evaporator cover. Pull the fan blade from the
fan motor shaft. Extract the screw from the P-clamp
holding the fan wires. Then remove the four screws
from the fan bracket and disconnect the fan motor elec-
trical leads. (See Figure 6-22)
Thermistor
Screw & P-Clamp
Evaporator
Fan Motor
Fan Bracket
Motor Mounting
Screws
Bracket Mounting Screws
Fan Blade
 Loading...