400 Series
400 Series
Component Access and Removal
6-19
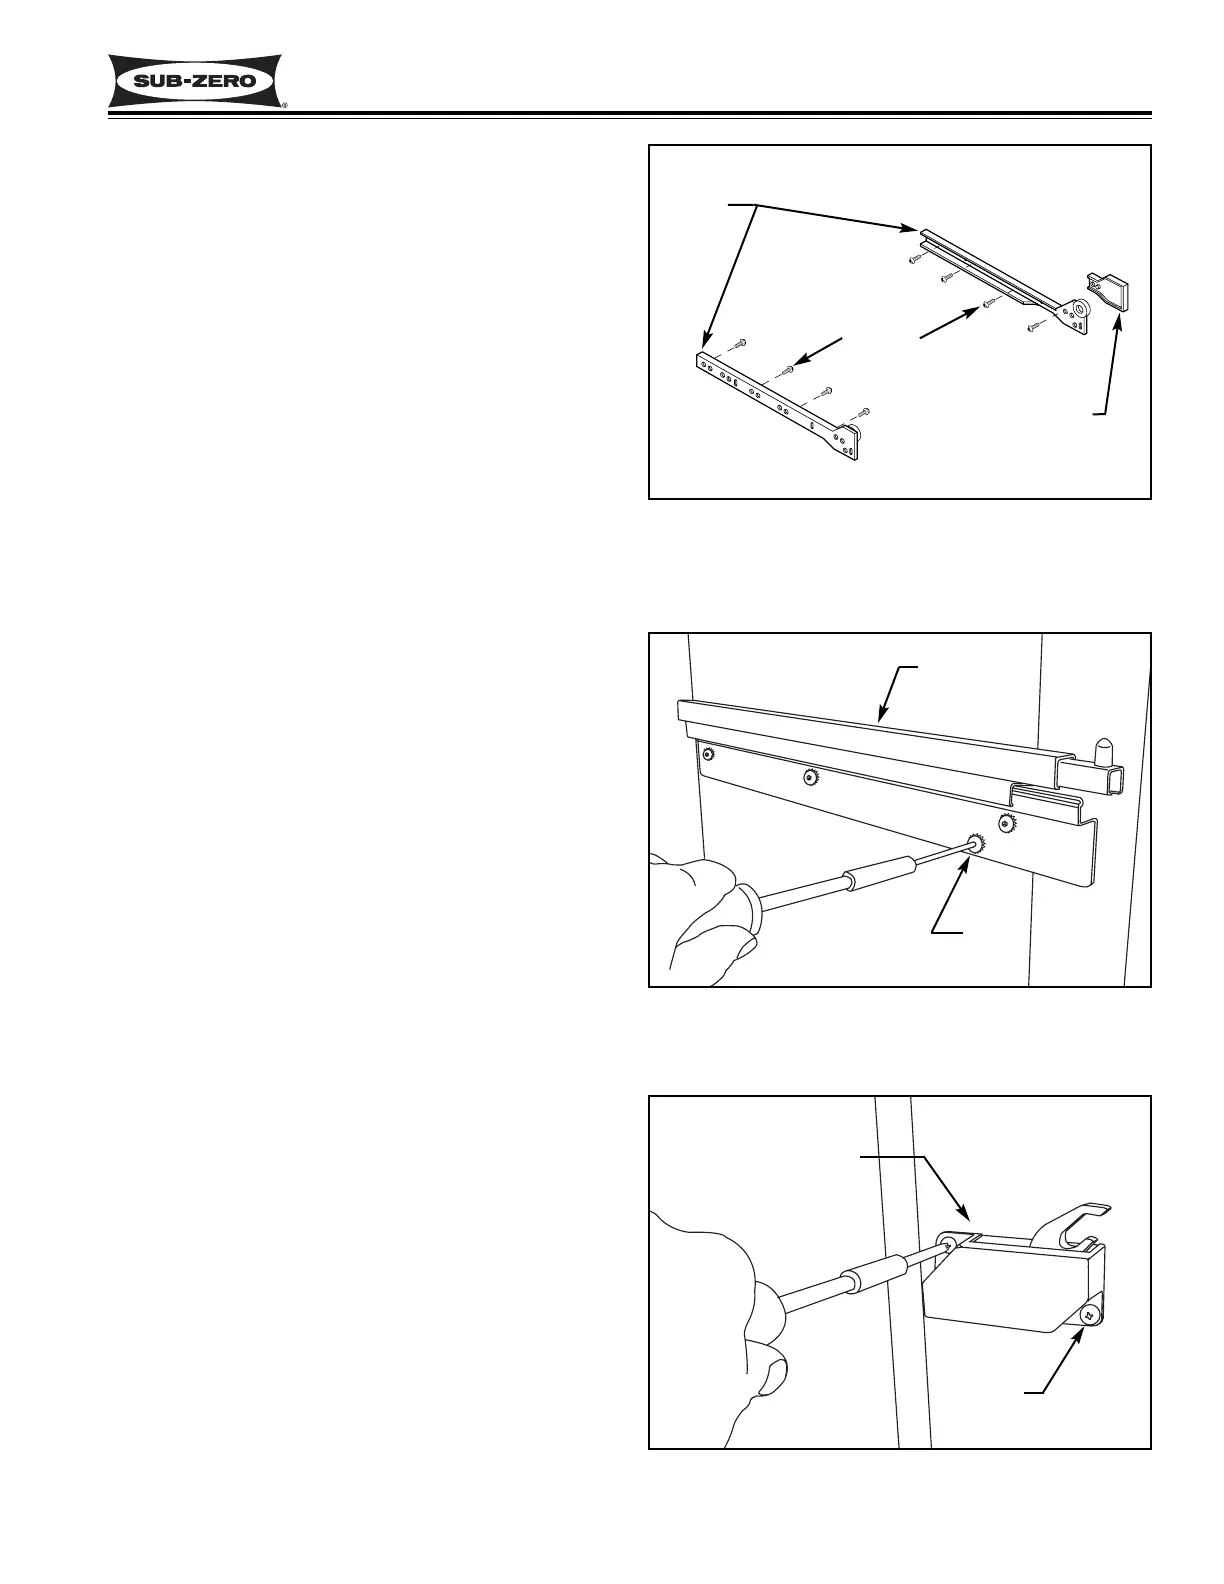
Figure 6-38. Wine Compartment Cabinet
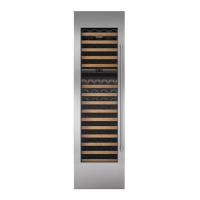
Slide & Slide Spacer
Figure 6-39. Model 427R Drawer Slide
Refrigerator Section Drawer Slide Assembly
Removal (Model 427R ONLY)
The drawer slide assemblies in the refrigerator section
of the 427R are attached to the side walls with Allen-
head screws passing through the drawer slide bracket,
and into blind threaded inserts.
To remove a refrigerator section drawer slide assembly,
remove the drawer first.
NOTE: The top drawer has a control cable that must
be disconnected before drawer removal. To remove the
top drawer assembly, pull top drawer forward 6" to 10",
lift it up off of the pins at front and push the slides in.
Carefully place the drawer assembly face down directly
in front of unit. Then, disconnect the display cable at
interior left rear of the unit by turning the collar counter-
clockwise and unplugging the pins from the socket.
(See Figure 6-32)
To remove the bottom drawer assembly, open the draw-
er and lift the front of the drawer up off of the pins at the
end of the drawer slides. Then, pull the drawer assem-
bly forward and out.
Now, extract the drawer slide mounting screws with a
5/32" Allen-head wrench, and pull the drawer slide
assembly out. (See Figure 6-39)
Drawer Closer Removal (Model 427R ONLY)
The drawer closer assemblies are attached to the right
side of the refrigerator compartment with two screws.
To remove a drawer closer assembly, remove the draw-
er first.
NOTE: The top drawer has a control cable that must
be disconnected before drawer removal. To remove the
top drawer assembly, pull top drawer forward 6" to 10",
lift it up off of the pins at front and push the slides in.
Carefully place the drawer assembly face down directly
in front of unit. Then, disconnect the display cable at
interior left rear of the unit by turning the collar counter-
clockwise and unplugging the pins from the socket.
(See Figure 6-32)
To remove the bottom drawer assembly, open the draw-
er and lift the front of the drawer up off of the pins at the
end of the drawer slides. Then, pull the drawer assem-
bly forward and out.
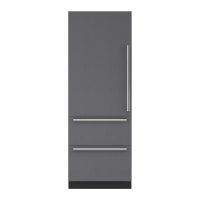
Now, extract the two screws that secure the drawer
closer to the wall, and pull the drawer closer assembly
out. (See Figure 6-40)
Slide
Screws
Slide Spacer
Figure 6-40. Model 427R Drawer Closer
Drawer Slide
Bolt
Drawer Closer
Screw