400 Series
400 Series
Component Access and Removal
6-29
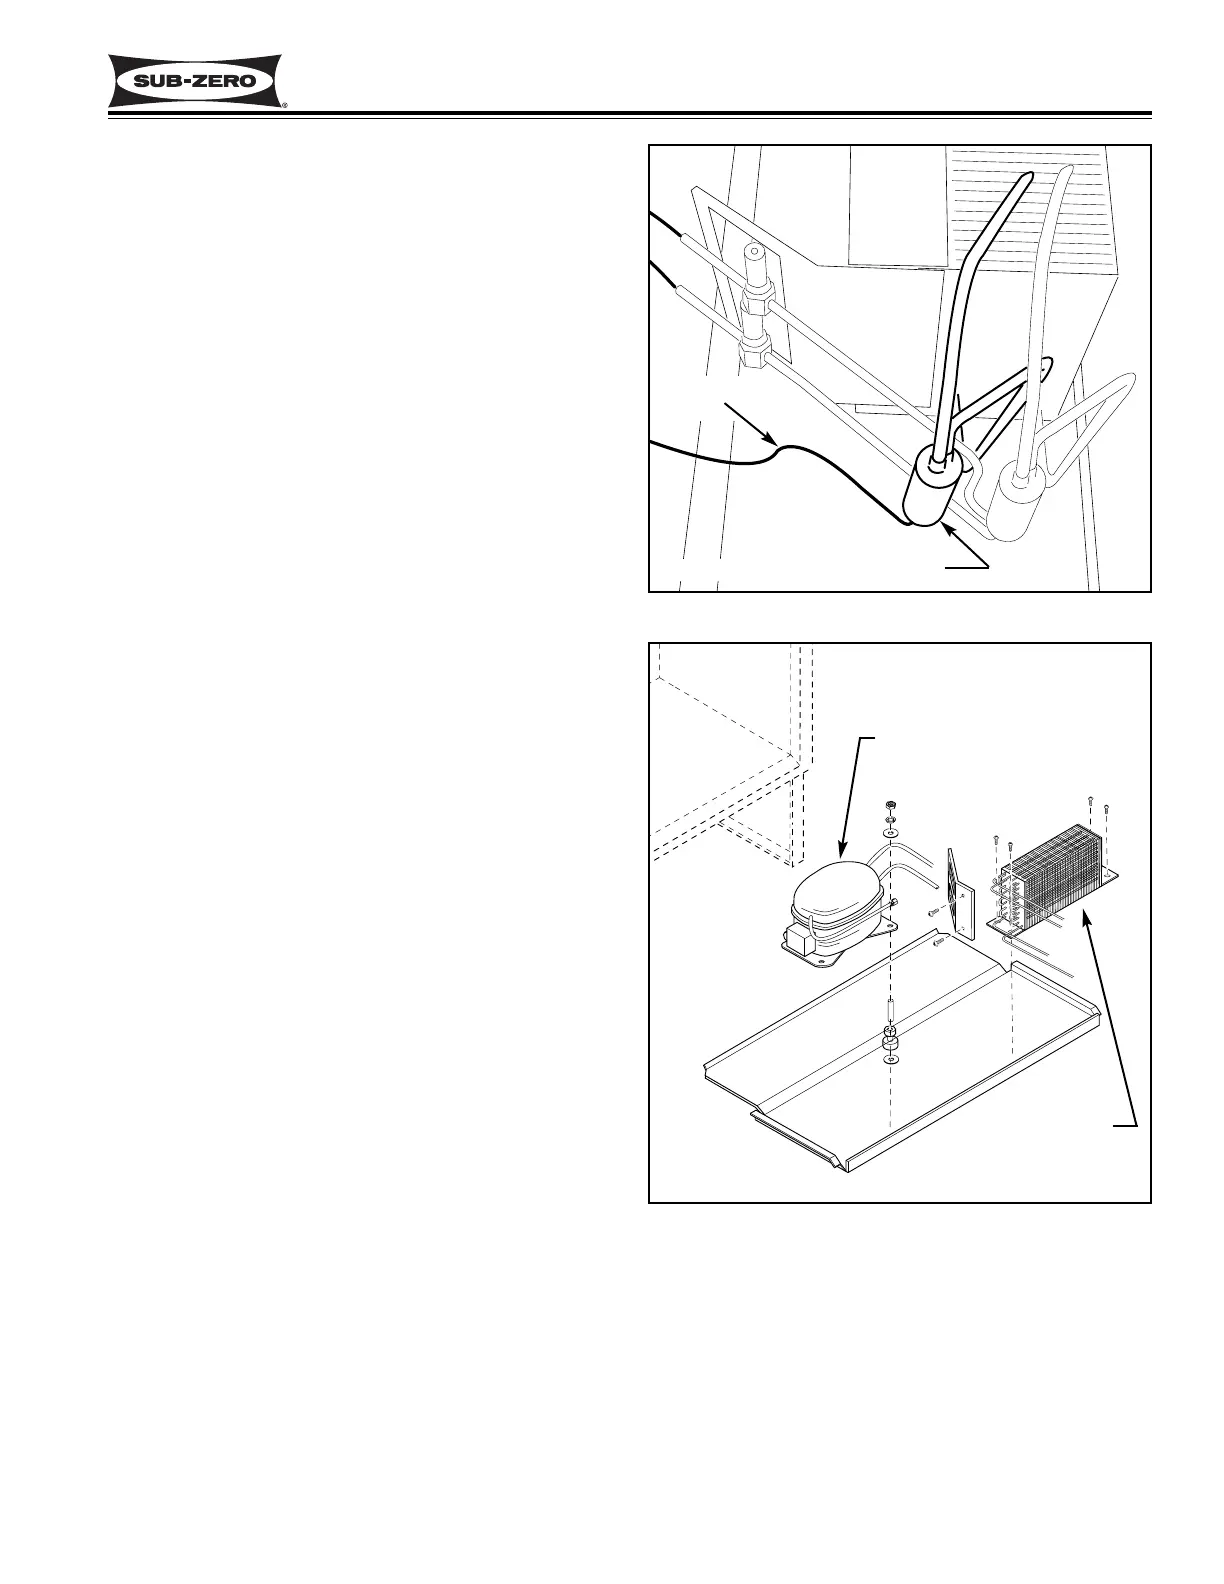
Figure 6-62. 427R Refrigerator Filter-Drier
Figure 6-63. Compressor(s) & Condenser
Refrigerator Section Filter-Drier Access and
Removal (Model 427R ONLY)
The refrigerator section filter-drier is located to the left
of the condenser on the unit tray. (See Figure 6-62)
NOTE: See HOT COMPRESSOR & TUBING CAU-
TION at beginning of this section.
After evacuating the sealed system, you will need to
slide the unit tray out. (See Figure 6-34)
NOTE: Move tray slowly and observe the sealed sys-
tem tubing. Care must be taken to not kink any of the
tubing.
Now, cut the capillary tubes approximately 1" from the
filter-drier, and cut the drier inlet tube approximately 1"
from the filter-drier. (See Figure 6-62)
Compressor Access and Removal
(Models 427 & 427R)
The compressor(s) are attached to the unit tray with
bolts. On the model 427R, the front compressor is the
wine storage compressor and the back compressor is
the refrigerator section compressor. (See Figure 6-63)
NOTE: See HOT COMPRESSOR & TUBING CAU-
TION at beginning of this section.
After evacuating the refrigerant from the sealed system,
you will need to slide the unit tray out. (See Figure 6-
34)
NOTE: Move tray slowly and observe the sealed sys-
tem tubing. Care must be taken to not kink any of the
tubing.
Now, cut the suction port and discharge port approxi-
mately 1" from the compressor. Disconnect the com-
pressor electricals. Extract the four bolts from the com-
pressor base and lift the compressor up and out.
Condenser Access and Removal
(Models 427 & 427R)
To condenser is located at the front right of the unit tray,
and is held in place with screws passing up from under
the unit tray into the condenser brackets. The 427R
has a dual condenser with the front of the condenser
being part of the wine storage sealed system and the
back of the condenser being part of the refrigerator
sealed system. (See Figure 6-63)
NOTE: See HOT COMPRESSOR & TUBING CAU-
TION and SHARP FINS CAUTION at beginning of this
section.
After evacuating the refrigerant from the sealed system,
you will need to slide the unit tray out slightly. (See
Figure 6-34)
Refrigerator Section Filter-Drier
Capillary
Tube
NOTE: Move tray slowly and observe the sealed sys-
tem tubing. Care must be taken to not kink any of the
tubing.
Now, remove the condenser mounting screws. Cut the
inlet tube(s) and outlet tube(s) approximately 2" from
the condenser and lift the condenser up and out. (See
Figure 6-63)
Compressor
Condenser