400 Series
400 Series
Component Access and Removal
6-3
MODEL 424
MODEL 424 EXTERIOR COSMETIC AND MECHANICAL COMPONENT REMOVAL:
An attempt has been made to arrange these instructions in such a way as to simulate which components would
need to be removed first in order to gain access to other components. When following a component removal proce-
dure, it may be necessary to reference another removal procedure towards the front of this section.
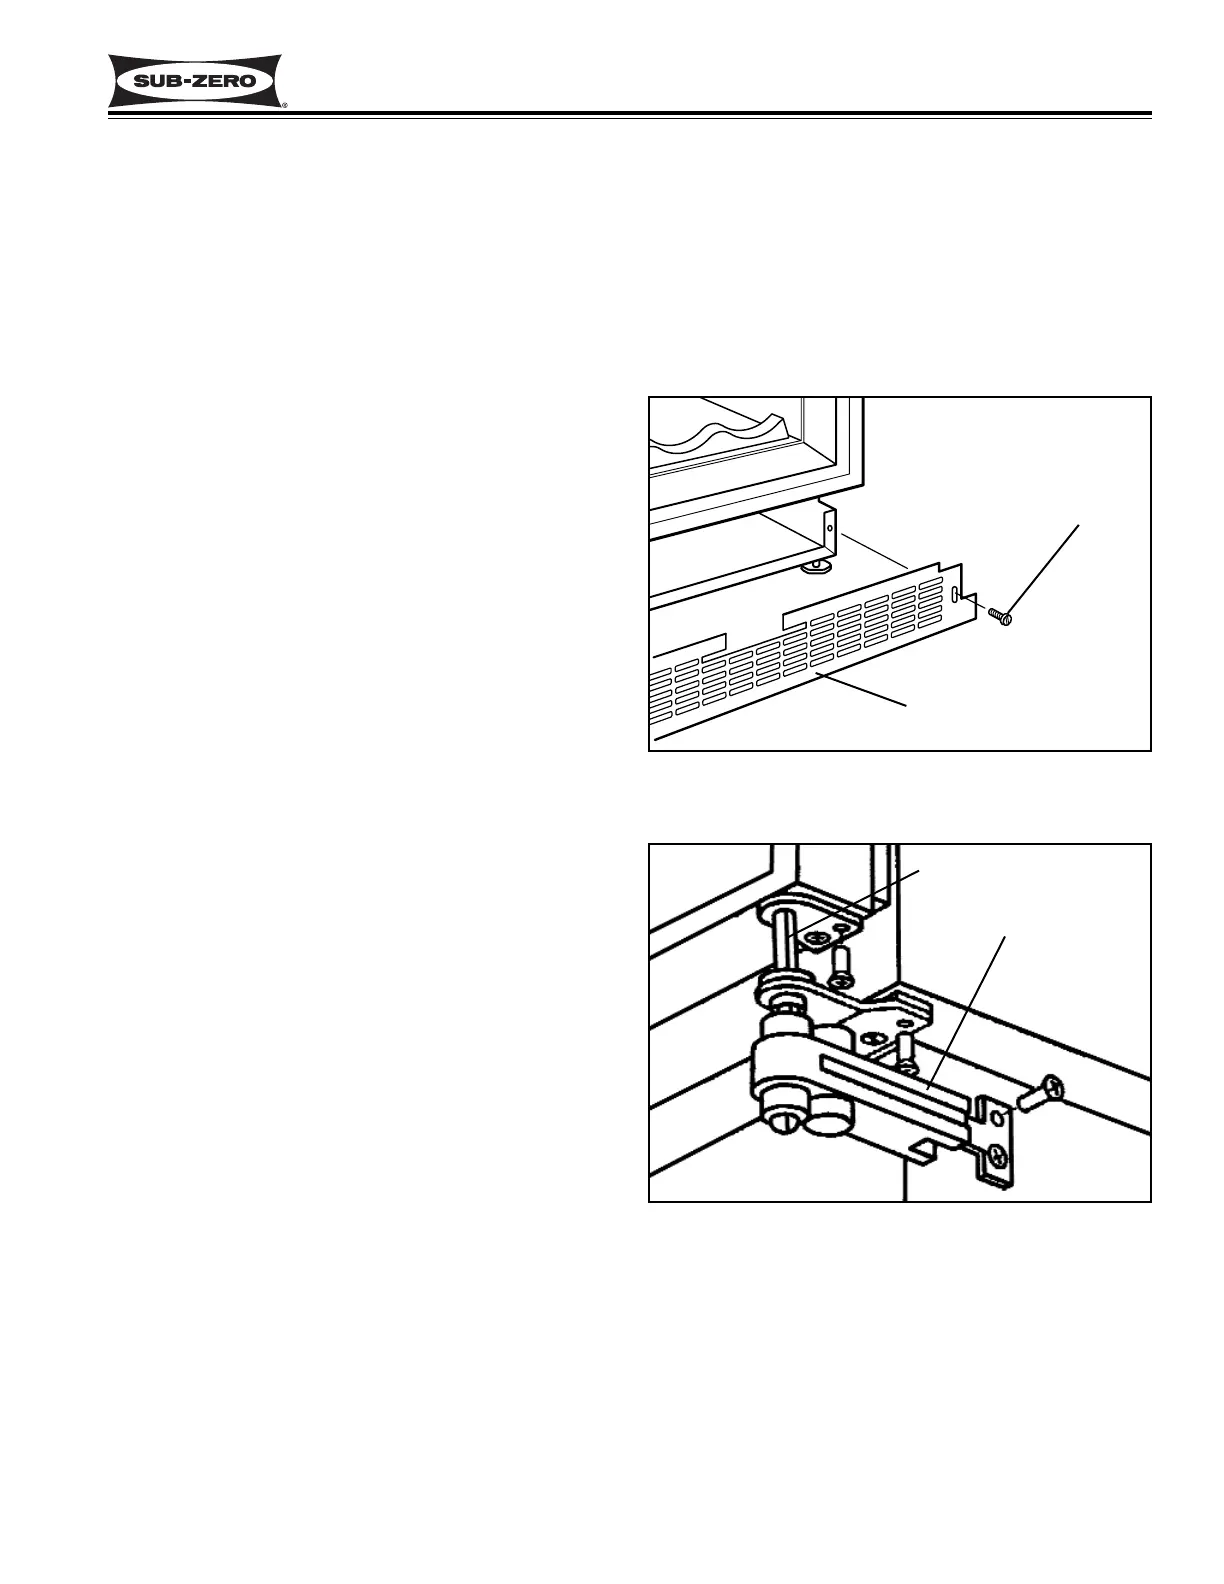
Figure 6-1. Kickplate Removal
Kickplate
Kickplate
Mounting
Screw
(1 of 2)
Figure 6-2. Door Closer Removal
Door Closer
Hinge Pin
Kickplate Removal (Model 424)
To remove the kickplate, extract the mounting screws
located at each end of the kickplate and pull the kick-
plate forward. (See Figure 6-1)
Door Closer Removal (Model 424)
NOTE: See DOOR CLOSER CAUTION at beginning of
this section.
To remove the door closer you will need to pull the unit
approximately 6" out of the rough-in opening. (See TIP-
PING WARNING at beginning of this section)
NOTE: If removing a model 424 from its installation, an
anti-tip bracket and a countertop bracket may have
been used to make a solid installation. (See Figures 2-2
in section 2) If the brackets were not used, shims may
have been wedged along the sides and top.
After pulling the unit from its installation, extract the two
mounting screws securing the door closer to the side of
unit base. Then, slide the door closer down off of the
bottom door hinge pin. (See Figure 6-2)
NOTE: It may be necessary to lean the unit back
slightly to create enough clearance between the hinge
pin and the floor.
NOTE: When reinstalling a door closer on a model 424
keep in mind that there are slots in the cam of the door
closer that must line-up with the ribs on the hinge pin.
Also, the cams may be in "full-closed position" or "full -
open position." It is easiest to install a door closer onto
the hinge pin with the door closed and the cams in the
"full-open position." Then, after the closer is on the
hinge pin, rotate the closer to the closed position and
install the screws.