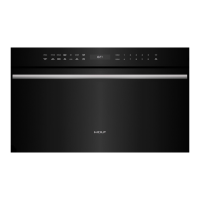
Microwave Drop-down Door Series
Microwave Drop-down Door Series
Component Removal
3-2
#826151 - Revision A - March, 2016
COMPONENT REMOVAL
This section explains how to remove components from a Wolf Drop-down Door Microwave. Depending on which
component you are going to remove, you may have to remove other components first. Refer to the appropriate sec-
tion in this manual that explains how to remove those various components. When reassembling, reverse the steps
that were used to remove the components. Before removing any component perform the 3E Checks listed below,
and perform the 4R Checks after completing the repair.
3E Checks
In the following component removal procedures perform the steps below before any component removal.
Disconnect from the power supply.1
Wedge the door open.2
Discharge the high voltage capacitor.3
4R Checks
In the following component removal procedures perform the steps below after completing any repair.
Reconnect all leads removed from components during the repair.1
Replace the outer case.2
Reconnect the power supply.3
Check for microwave energy by placing a cup of cold water in the microwave and heating on high for two4
minutes. Confirm the water is hot.
Microwave Measurement
After adjustment or replacement of the door latch switches, monitor switch, or the door is completed individually or
collectively, a microwave leakage test must be performed. The survey instrument and the result must meet the
requirements of the performance standard for microwave ovens. See section 1, page 4 (1-4) for instructions on how
to perform the test.
• TO AVOID ELECTRIC SHOCK, POWER TO THE UNIT MUST BE DISCONNECTED WHENEVER SERVICING
AND/OR ACCESSING COMPONENTS.
• KEEP IN MIND THAT UNIT SURFACES AND COMPONENTS GET HOT DURING USE OF THE APPLIANCE.
• PULLING A UNIT FROM ITS INSTALLATION SHOULD ONLY BE PERFORMED BY AN CERTIFIED SERVICE
TECHNICIAN OR INSTALLER.
• When working on the microwave and components, be careful when handling sheet metal parts. They may
have sharp edges.
Tools Needed
6-Lobe Torx type drive size T-10, T-15, T-20, and T-25•
6-Lobe Torx type drive size T-20 - Security Bit, and T-25 - Security Bit•
Needle nose pliers•
AM-3 (1 mm) and AM-5 (2 mm) Allen wrench•

 Loading...