Microwave Drop-down Door Series
Microwave Drop-down Door Series
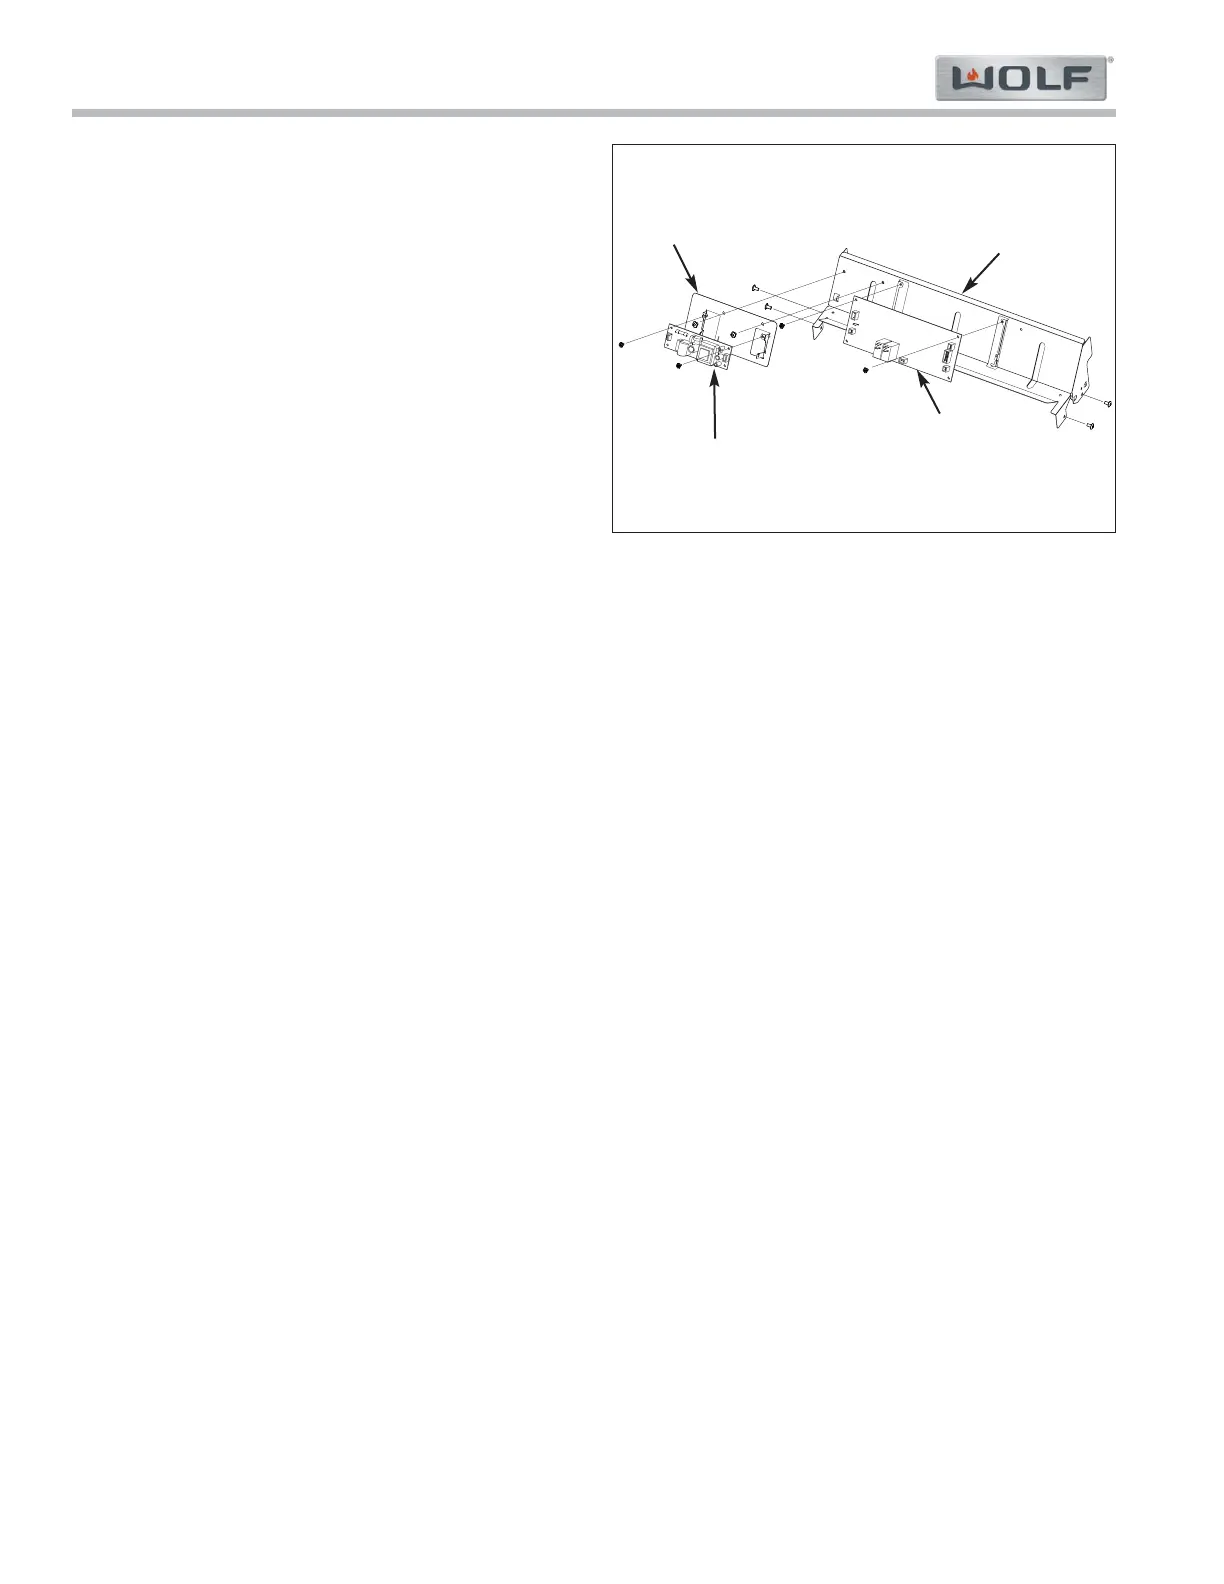
Component Removal
3-8
#826151 - Revision A - March, 2016
Control Board
To remove the control board, first remove the outer
wrapper, then (See Figure 3-15):
1. Use a T-10 Torx drive to extract the screws from the
control board.
2. Slide the control board up and disengage from the
lower tabs.
3. Disconnect the CN-F connector from the unit dis-
play.
4. Disconnect the CN301 connector from the power
module.
5. Disconnect the wire harness from the control board.
Power Module
To remove the power module, first remove the outer
wrapper, then (See Figure 3-15):
1. Use a T-10 Torx drive to extract the screws from the
power board.
2. Slide the power module up and disengage from the
lower tabs.
3. Disconnect the wire harnesses from the power
module.
Bracket
To remove the bracket, first remove the power module,
then (See Figure 3-15):
1. Use a T-10 Torx drive to extract the screws from the
bracket.
2. Remove the bracket.
Unit Control Support
To remove the unit control support, first remove the
control board and power module, then (See Figure 3-
15):
1. Use a T-20 Security Torx drive to extract the
screws from the unit control support.
2. Rotate the unit control support so that the under-
neath is exposed.
3. Use a needle nose plier to compress the tip of the
wire retainers and push then out of the unit control
support.
4. Maneuver the unit control support around the wire
harnesses and remove the unit control support.
Figure 3-15. Control Board and Power Module
Control Board
Power Module
Bracket
Unit Control
Support