Component Removal
Microwave Drop-down Door Series
Microwave Drop-down Door Series
3-9
#826151 - Revision A - March, 2016
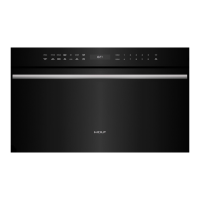
High Voltage (HV) Rectifier
To remove the HV rectifier, first remove the outer wrap-
per, then (See Figure 3-16):
1. Use a T-20 Torx drive to extract the screw from the
HV rectifier ground lead.
2. Disconnect the HV rectifier terminals from the HV
capacitor.
3. Remove the HV rectifier.
High Voltage (HV) Capacitor
To remove the HV capacitor, first remove the HV rectifi-
er, then (See Figure 3-16):
1. Use a T-20 Torx drive to extract the screw from the
HV capacitor band.
2. Remove the HV capacitor.
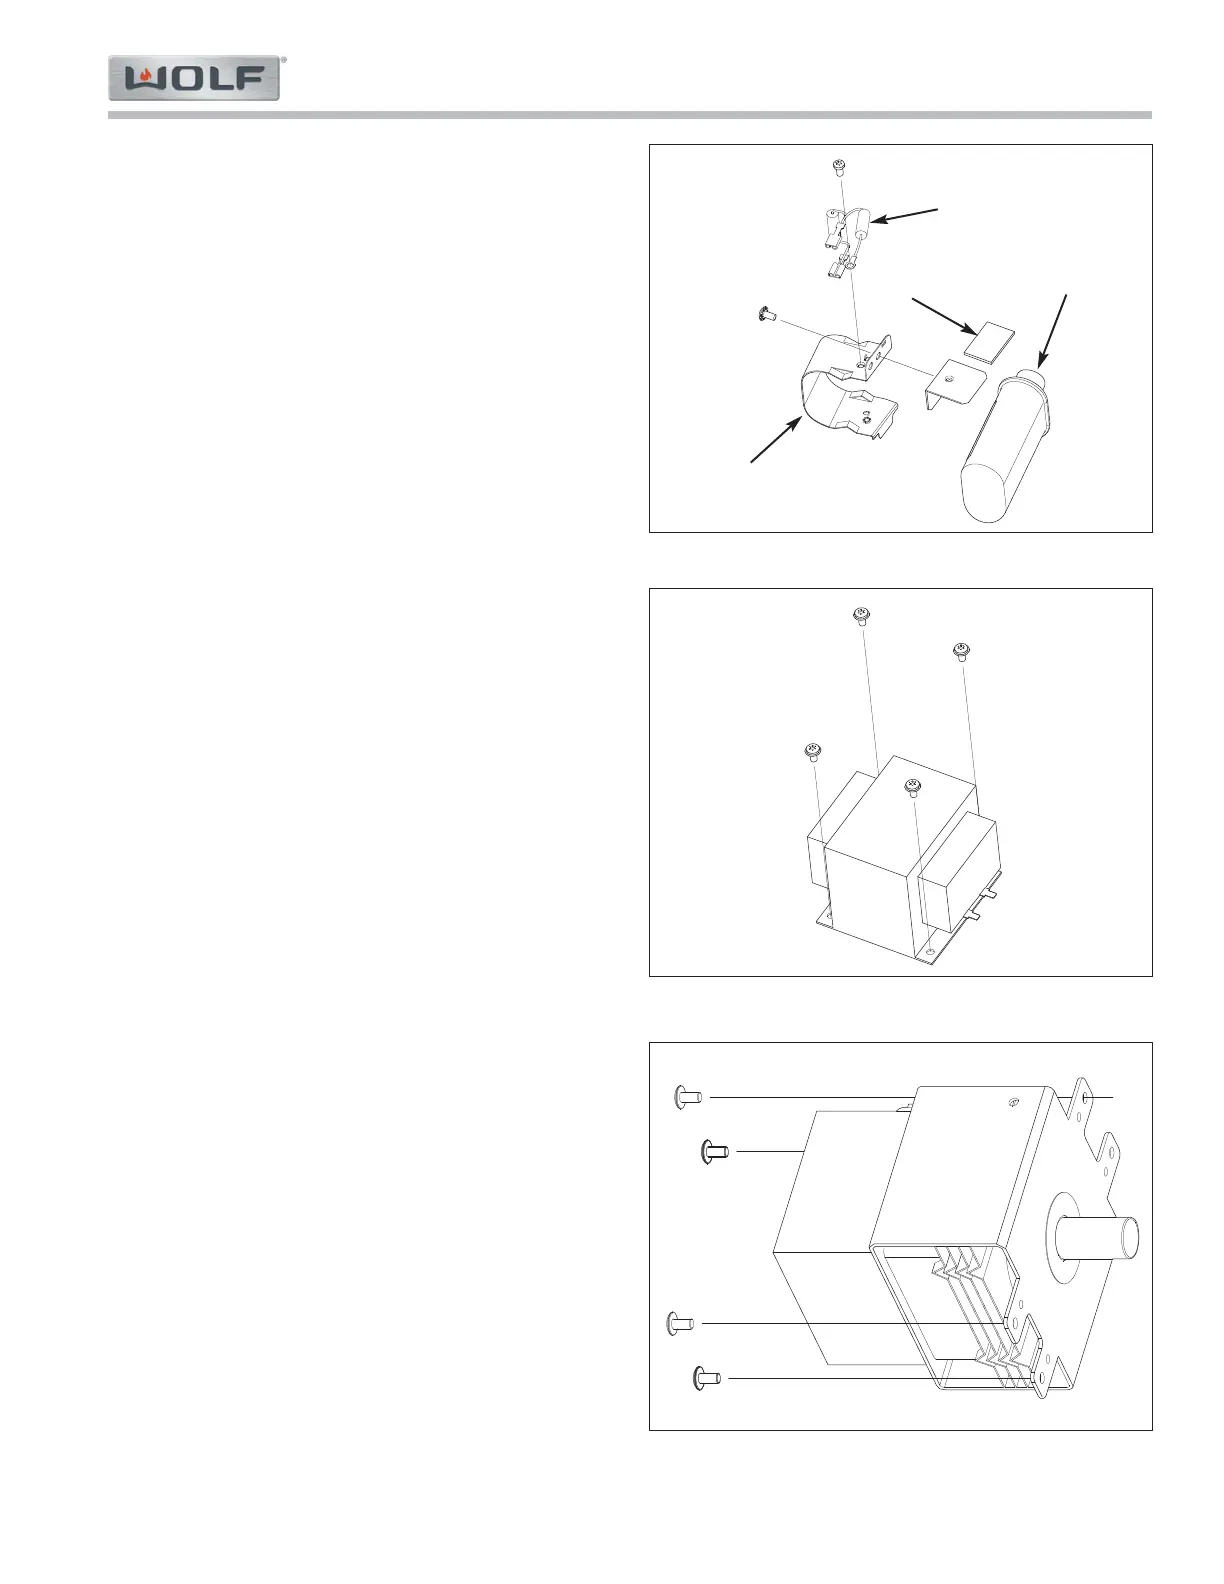
High Voltage (HV) Transformer
To remove the HV transformer, first remove the outer
wrapper, then (See Figure 3-17):
1. Disconnect the HV transformer primary side wires
from the terminals.
2. Disconnect the HV transformer secondary wires
from the HV capacitor.
3. Disconnect the HV transformer secondary wires
from the magnetron.
4. Use a T-25 Torx drive to extract the screws from the
HV transformer.
5. Remove the HV transformer.
Magnetron
To remove the magnetron, first remove the outer wrap-
per, then (See Figure 3-18):
1. Disconnect the wires from the terminals.
2. Use a T-20 Torx drive to extract the screw from the
magnetron thermal cut-out (TCO) bracket. Move
the magnetron TCO bracket, and magnetron TCO
with wires connected away from the magnetron.
3. Use a T-20 Security Torx drive to extract the screws
from the magnetron.
4. Remove the magnetron.
Figure 3-16. HV Rectifier and Capacitor
Figure 3-17. HV Transformer
Figure 3-18. Magnetron
HV Rectifier
Capacitor Band
HV Capacitor
Cushion