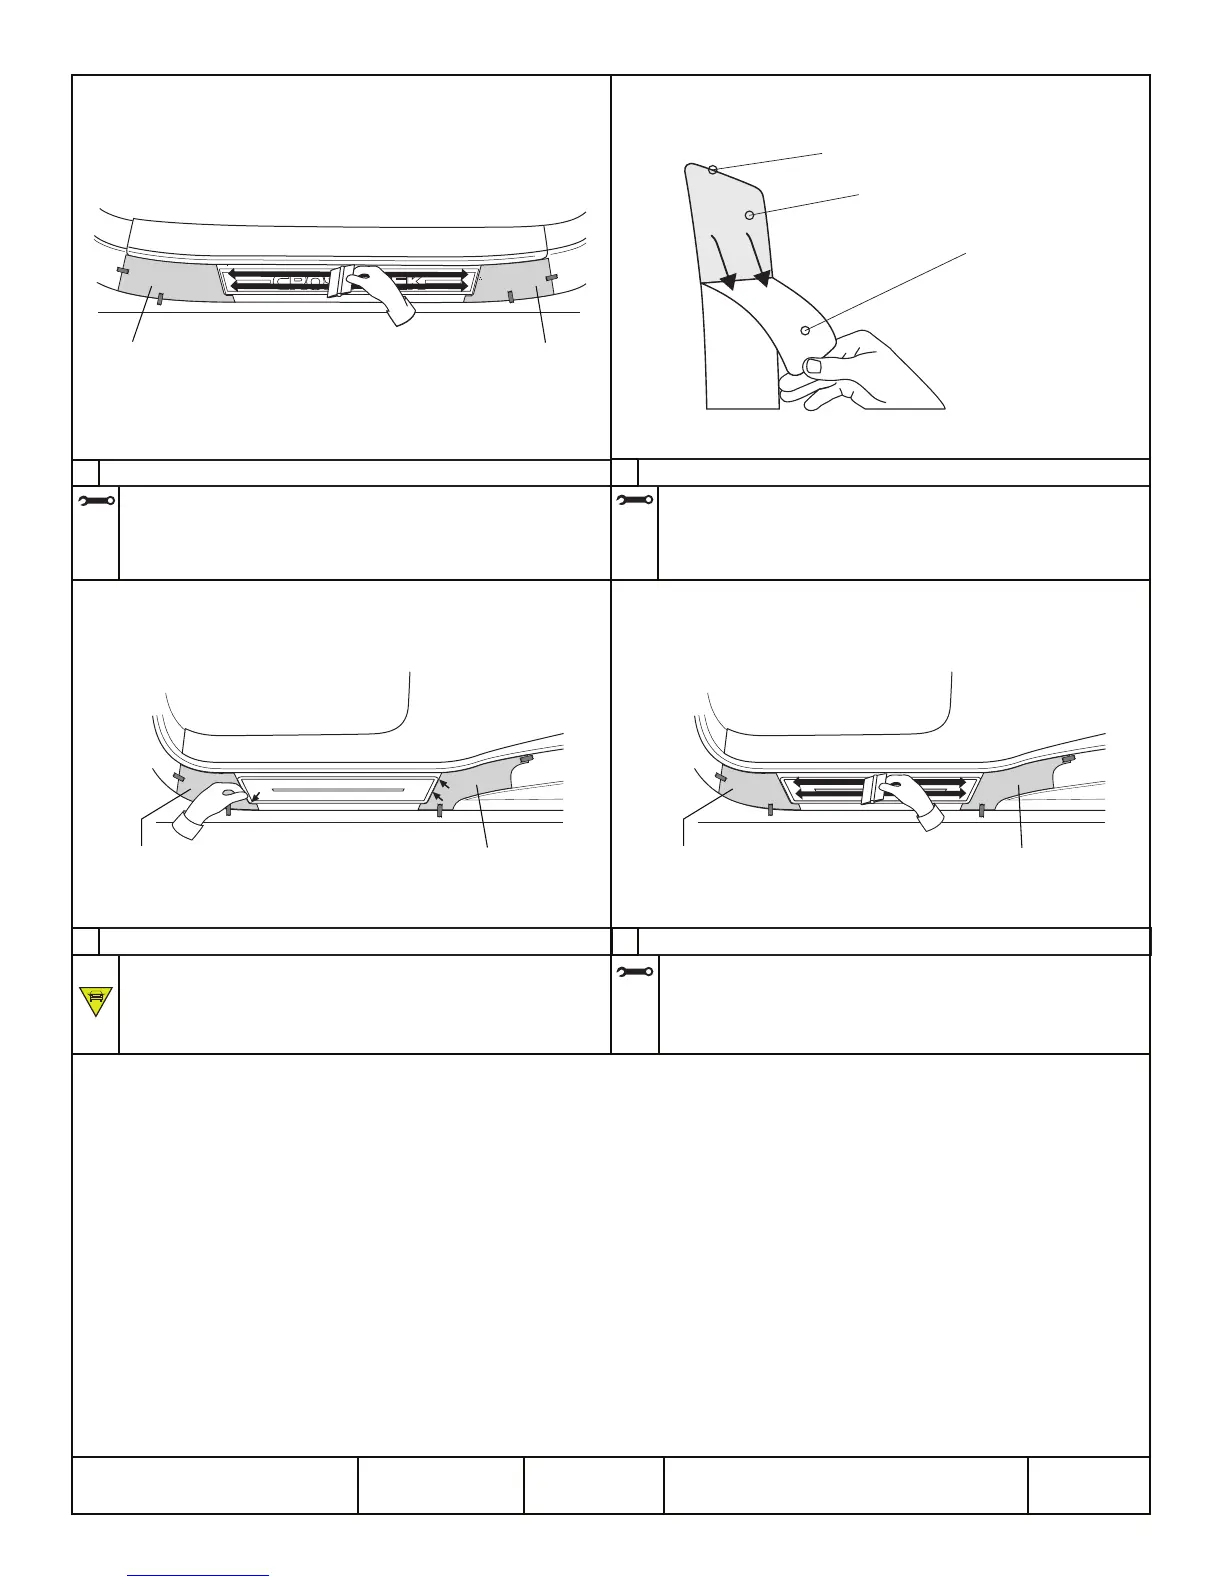
Moving to the Left Rear Sill Plate, remove liner from Sill Plate. After
removal of part liner, to prevent contamination, limit touching
adhesive side of Sill Plate by handling on the edges.
02/10/17
SUBARU OF AMERICA
PAGEDATEISSUE
00
5
6
Adhere To Surface
Start by aligning the edge of Sill Plate with the template as shown.
Make sure the top edge of the Sill Plate is aligned with the plastic
panel and lay into position.
NOTE: If mislocated, lift straight up and reposition into correct location.
7
Starting in the center, squeegee the top surface of the Sill Plate
onto the surface of sill area as shown, using firm, overlapping
squeegee strokes. Carefully remove template and save for use
on the right side of vehicle.
Starting in the center, squeegee the top surface of the Sill Plate
onto the surface of sill area as shown, using firm, overlapping
squeegee strokes. Carefully remove template and save for use
on the right side of vehicle.
Sill Plate Alignment
Adhere To Surface
8
Separate Liner
DESCRIPTION
Side Sill Plate
*
(Repeat Steps 1-8 for right side of vehicle.)
3/10
RR Sill Plate Front Template
RR Sill Plate Rear Template
Left Rear Door Sill
Plastic Panel
Liner
Sill Plate
Adhesive side of Sill Plate
FRT Sill Plate Rear Template
FRT Sill Plate Front Template
Left Front Door Sill
Plastic Panel
RR Sill Plate Front Template
RR Sill Plate Rear Template
Left Rear Door Sill
Plastic Panel