Figure 1
INTRODUCTION
1. YourDrop-inCooktophasbeencertiedbyCSAfortheU.S.A.andCanada
forusewithLP/Propanegasonly.
2. Yourcooktopisoneofthefollowingmodels:SDN2orSDN3.
3. Modelnumberletterdesignation:
S - Suburban
D - Drop-in
N-Newdesign
#-Numberofburners
4. The completemodel, serial number and stock number are located on the
CSAlabellocatedunderthetop.Thisinformationwillbeneededwhenservicing
applianceororderingparts.Recordtheinformationbelowandretainforfuture
reference. Replacement parts can be ordered through your local dealer or
Suburban Service Center. To obtain information on locating a local service
agency,callSuburbanManufacturingCompany,CustomerServiceDepartment,
(423)775-2131.
ModelNo.______________________ StockNo.______________________
SerialNo.______________________ DateofPurchase________________
5. ThecooktopisdesignedcertiedforusewithLP/Propanegasonly.Do not
attempt to convert to natural gas.
6. Gassupplypressureforcheckingoftheregulatorsettingshallbeatleast
1”W.C.abovethesuggestedmanifoldpressure.
MinimumGasSupplyPressure-11”W.C.
MaximumGasSupplyPressure-14“W.C.
INSTALLATION
WARNING! Installation of this appliance must be made in accordance
with the written instructions provided in this manual. No agent,
representative or employee of Suburban or other person has the
authority to change, modify or waive any provision of the instructions
contained in this manual.
1. IntheU.S.A.,theinstallationmustconformwithstateorothercodesorinthe
absenceofsuchcodes,refertothelatesteditionof:
a. StandardforRecreationalVehiclesNFPA1192.
b.NationalFuelGasCodeANSIZ223.1/NFPA54
InCanada,theinstallationmustbeinaccordancewith:
a. StandardCAN/CSA240.4.2-08,InstallationRequirementsfor
PropaneAppliancesandEquipmentinRecreationalVehicles.
b.Anyapplicablelocalcodesandregulations
2. Minimumclearancesfromcombustiblewallsaboveandbelowcounter:
Models
BelowCounter CenterofBurnerHead(s)toadjacentvertical
combustiblematerialabovethecookingsurface
burners.
Sides,Rearand
Bottom
RightSidewall LeftSidewall Backwall
SDN2 0” 57/8” 57/8” 8”
SDN3 0” 55/8” 6” 8”
3.Cut-outdimensionsillustratedinFigure2areasfollows:
Model
Dimensions
A B C* D* E
SDN2 163/8 115/8 23/16 3/4”min. 18”
SDN3 1815/16 161/8 21/16 23/8”min. 21”
*Minimumacceptablespacingbetweenadjacentmodelsis3inches.
WARNING: Installation of cook top cannot be such that the user is
required to reach over any of the burners to reach the knobs.
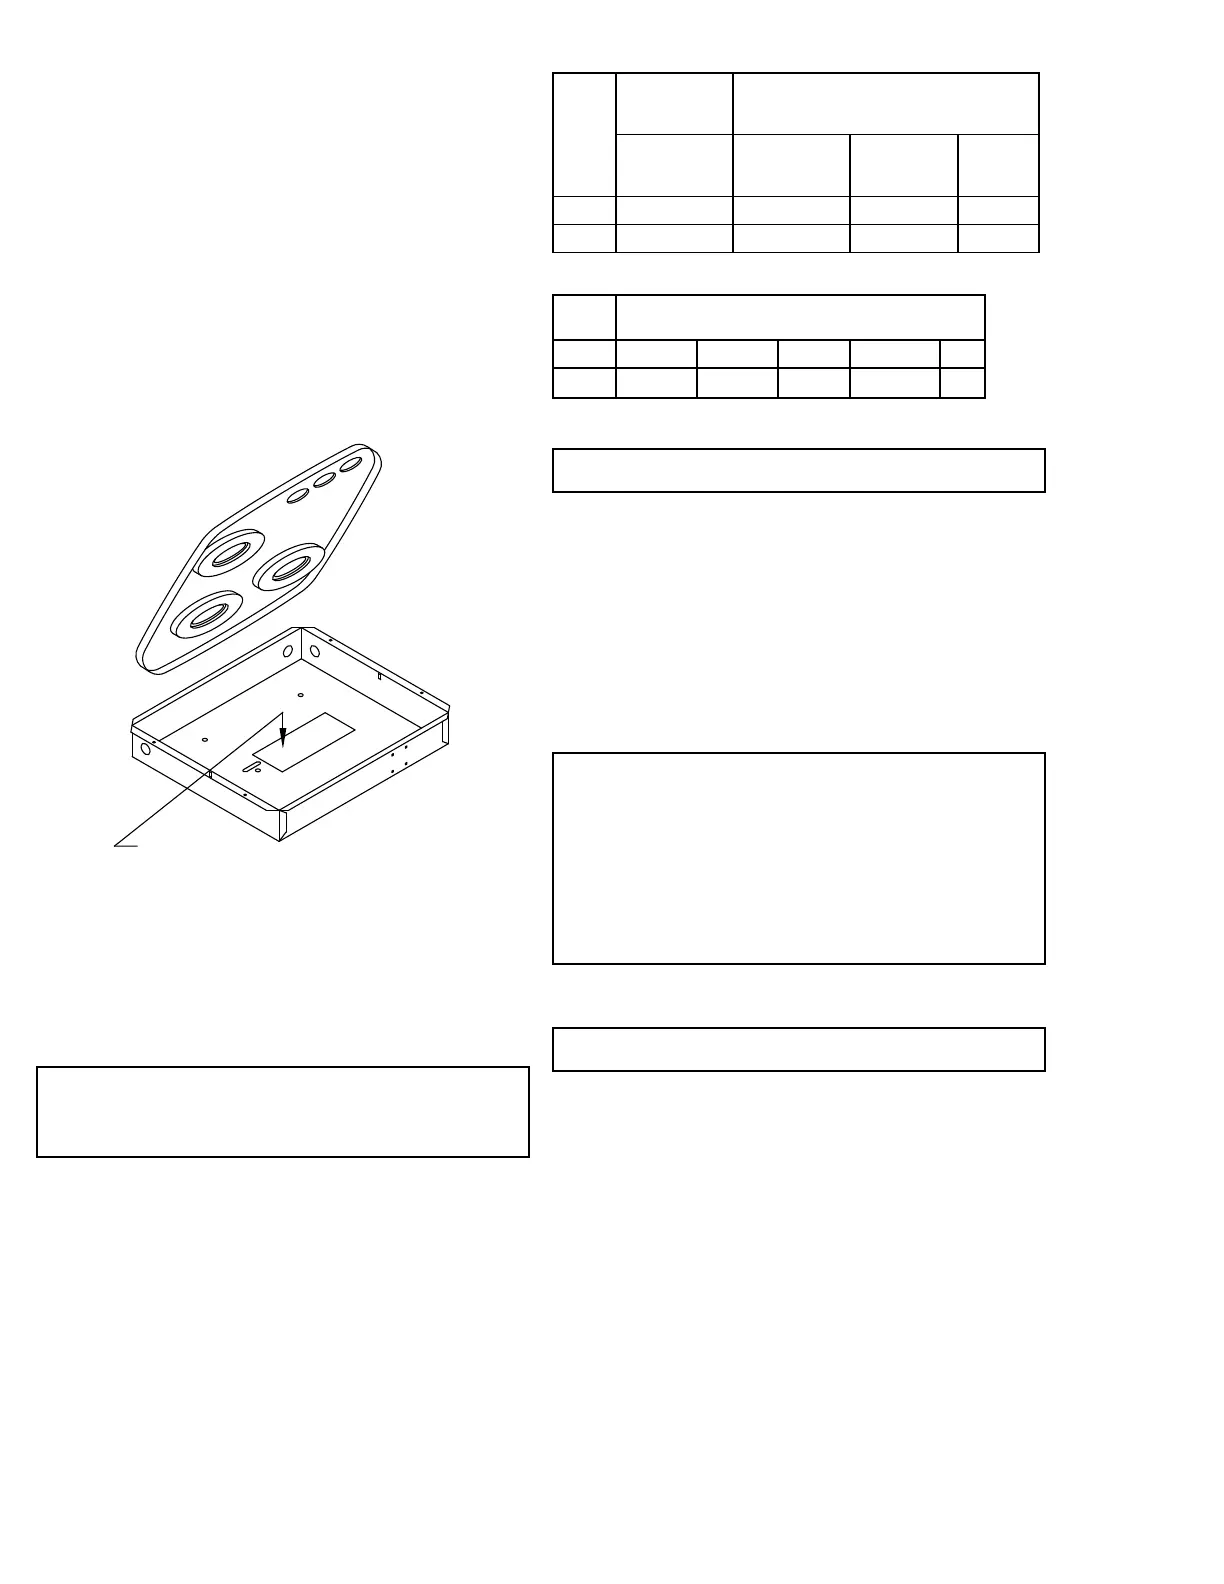
4.Beforeplacingdrop-incooktopintocabinet,determinewhichoneofthethree
knockoutopeningsintheburnerbox(leftside,rightsideorrear)willbeusedfor
routingofthegassupplytubingtothepressureregulator.Aftermakingselection,
knockoutthe1inchplug.Placedrop-incooktopintothepreparedopeningand
securetocabinetwithfour(4)woodscrews.(Notprovided)
5. Routegaslinethroughopeninginburnerboxandconnectthegaslinetothe
3/8”are ttinginsidethe burnerbox.Place nylonbushingover gaslineand
insertbushingintoopeninginburnerbox.
CAUTION: Gas supply tubing within the connes of the appliance
connection shall be rigid or semi-regid metallic tubing.
6. Besureallopeningsinthecabinetryaroundthegaslinearesealedattimeof
installation.
CAUTION: It is imperative that the cabinet in which the cook top is placed
be separated from other appliances so that the combustion air supply to
the top burners can not be affected in any way by any forced-air heating
appliance or its return air system or by any other source of positive or
negative air pressure. A negative air pressure created by another forced
air appliance may draw the ame down around the top burners and into
the cook top resulting in damage to the burners and cook top, as well
as possible personal injury and/or damage to vehicle. A positive draft
could cause the burner ame to lift-off the burner and go out resulting in
an uncontrolled escape of gas. Whenever the gas fumes reach an open
ame or another ignition source, an explosion and/or re will occur
resulting in property damage, personal injury and/or loss of life.
7. Be sure burner knobs are in “off” position. Turn on gas supply. Check all
connectionsforleaks.
WARNING: Never check for leaks with an open ame. Apply a soap and
water solution to all joints to see if bubbles are formed.
NOTE: The appliance must be disconnected from the gas supply piping
systemduringany pressure testing of that system attestpressureinexcess
of1/2PSIG.
8. Removethetopandthegrate(s)fromtheirpacking-Installthegrate(s)onthe
top.
9. Position the top over the burners and secure in place with two (2) thumb
screwsandtwo(2)nylonwashersprovided.
10. Your Suburban Drop-in Cook top is now ready for operation. Before
operating,readthesafetyinformationandoperatinginstructionscontainedin
thismanual.
11. If installation of this product is in a portable counter top, the following
additionalguidelinesmustbefollowed:
a. Portable counter top is provided b installer and must be able to
supportaminimumweightof20lbs.
b.OEMmust provide a label placed on the counter topthatclearly
statesthemaximumweightthatcanbeaddedtotheportablecounter
topafterinstallation.(Thisshouldtakeintoaccounttheweight ofthe
cookingunit-20lbs).
FOR EXAMPLE: Mounting bracket used is rated for 100 lbs. OEM
shouldweighfabricatedcountertop.Subtractweightofcountertop(i.e.
2
 Loading...