INSTALLATION, START-UP & MAINTENANCE MANUAL
MODEL NO.: SD-220 TO SD-600- DDS OPTION
REV 0 – May 24,,.2001
14
SECTION 3
3.2.2 Dryer operating sequence (No control or alarm option)
The
S
S
u
u
l
l
l
l
a
a
i
i
r
r
®
®
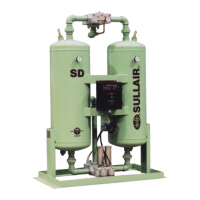
SD-220 / SD-600 heatless air dryers use a PLC as its standard
controller. In the event of a power failure, the inlet valves will remain in their
positions and the exhaust valves will close. The dryer system will repressurize.
Energizing control panel: Power is turned ON – electrical circuit energized.
When power is applied or restored to the control panel, the dryer will remain in a
standby state for one (1) minute period, allowing the dryer system to repressurize.
STEP 1 SELECT LEFT CHAMBER DRYING.
- De-energize solenoid EV-1R and EV-2L.
- Energize solenoid EV-1L and EV-2R.
- Inlet valve positioned for left chamber drying.
- Exhaust valve opened for right chamber regeneration.
- When regeneration time is complete, go to STEP 2
STEP 2 RIGHT CHAMBER REPRESSURIZATION.
- De-energize solenoid EV-1L and EV-2R.
- Inlet valves remain in open position.
- Right chamber exhaust valve closes.
- The repressurization timer starts a countdown of 45 sec.
- When repressurization time is complete, go to STEP 3
STEP 3 SELECT RIGHT CHAMBER DRYING.
- Energize solenoid EV-1R and EV-2L.
- Inlet valve positioned for right chamber drying.
- Exhaust valve opened for left chamber regeneration.
- When regeneration time is complete, go to STEP 4
STEP 4 LEFT CHAMBER REPRESSURIZATION
- De-energize solenoid EV-1R and EV-2L
- Inlet valves remain in open position.
- Left chamber exhaust valve closes.
- The repressurization timer starts a countdown of 45 sec.
- When repressurization time is complete, go to STEP 1
The dryer has completed one (1) full cycle and will repeat steps 1 through 4 until
power is removed from the control panel.
 Loading...