10
3B: Elevation Headpiece with Forward Drop and Toggle
2014 Presge
Elevaon/Forward/Toggle Headpiece
Your new headpiece only requires a few easy steps to put the headpiece back on aer arrival.
Please follow along below and call if you have any quesons.
Step 1, is idenfy the four 1 1/2 inch long 1/4 lag screws that you will use to aach the headpiece
to the table frame. Also nd the hairpin that will go in the exion/extension t-bar. Set aside.
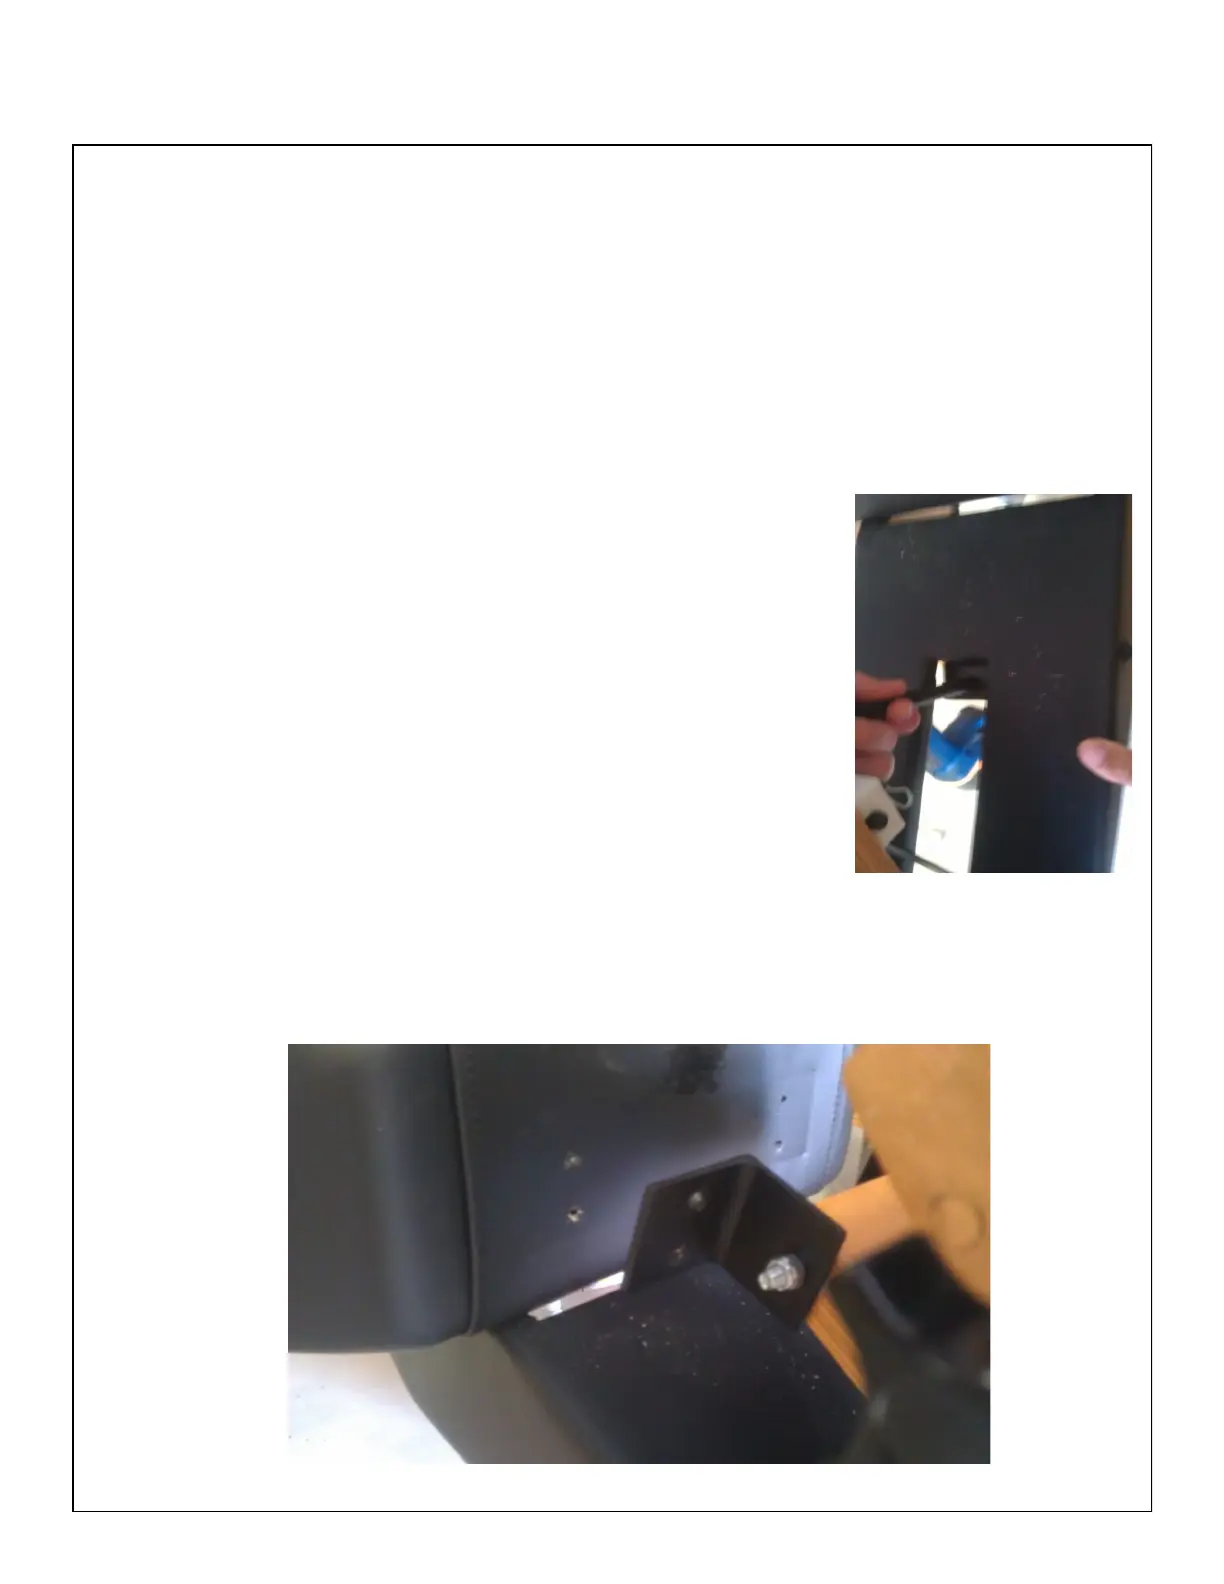
Step 2, take the t-bar on the boom of the headpiece and using one
hand, rotate the exion/extension handle on the side of the forward
triangle forward. This will reveal the hole in the t-bar jam.
Now take the t-bar and put it through the hole in the jam and then
let pressure o of the handle. Having a second person help is oen
makes it easy. See the picture to the right.
Step 3, let the back of the headpiece down no so that the brackets line up
with the holes in the front of the table. Using the lag screws provided aach
the brackets to the table. Do NOT ghten beyond snug at this point
Step 4, with a helper if available, lower the headpiece to neutral and stand
back to see of the headpiece is nice and level. If it is, then nish ghtening the lag screws, if not, gently
adjust the brackets ll the headpiece is level. Then ghten the lag screws.
Step 5, put the hairpin in the hole located at the boom of the T-bar you rst inserted.
 Loading...