11
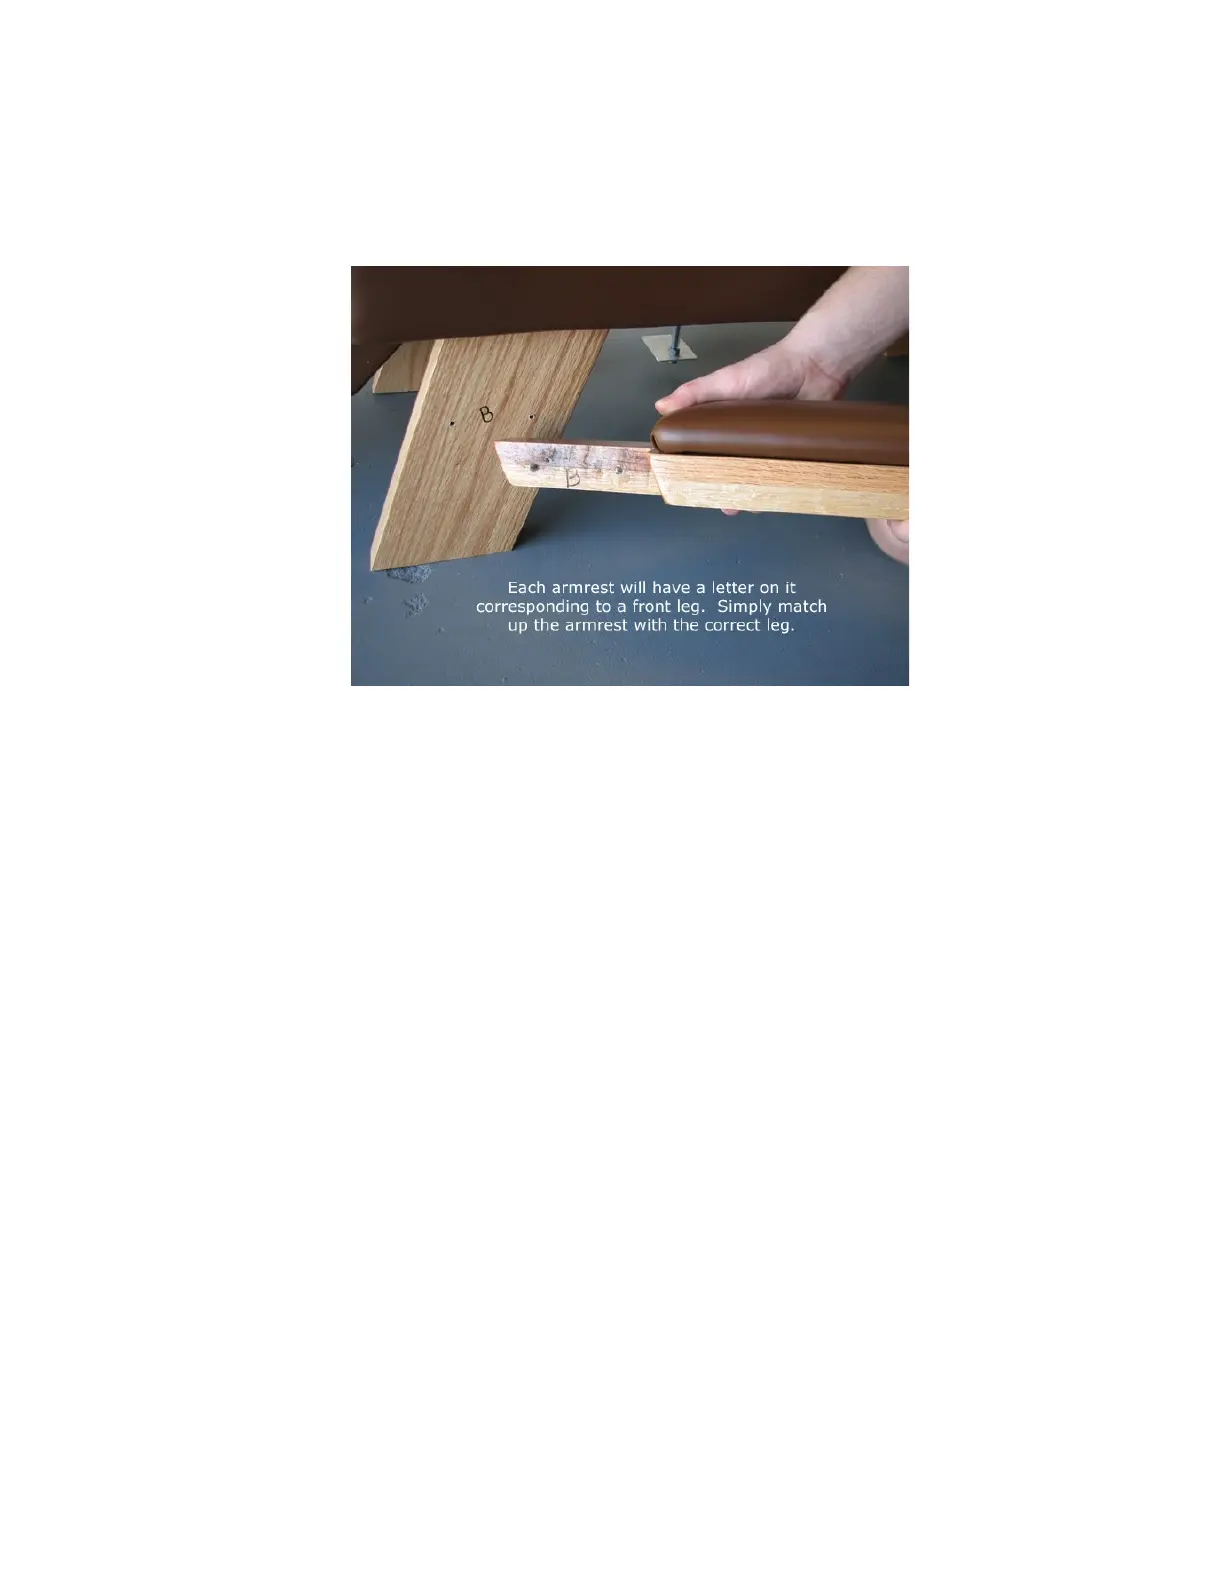
Step 4: Attaching the Armrests
Attaching the armrests on our tables is very simple. Just match up the armrest with the correct leg
and attach using two 3 1/2" bolts w/ flat washer on outside, fender washer on inside and a 1/2 inch
nylon lock nut . A 1/2" socket wrench is required for this step with adjustable or 1/2 inch wrench.
****PLEASE NOTE*****
Your table was leveled at the factory and the arm rests installed. In the event that you had to adjust
the level of your table due to your floor, then it may be necessary to level the arm rests as well after
installation.
To do this, simply loosen the arm rest and tap up and down on it until it is parallel with the floor.
Then re-tighten the bolts. In extreme cases it might be necessary to re-drill the arm rests pilot holes.
If you feel this to be the case, please contact support at 863-202-0330 before proceeding.
Your new table for 2021 uses hex bolts to attach the arm rests rather than lag screws.
Find in your main hardware bag a smaller bag labeled arm rests.
Inside find four 5/16 Hex bolts, a flat washer, a fender washer and a nylon lock nut.
Put the flat washer on the bolt and insert it into the front hole of the arm rest and through the front leg. Thenk
add a fender washer and then the nut. Loosely tighten the nut.
Put the second bolt into the second hole of the arm rest, put on the fender washer and then they nylon lock
nut.
Tighten both lock nuts till snug but where you can still move the arm rest around a little bit.
Repeat this process on the other side of the table.
Now from the front of the table look at your arm rests and get them equal from side to side.
Then tighten the four arm rest bolts completely.
 Loading...