The Safety Drain Hose
For EXCEL NE units, the safety drain hose must be connected. The safety drain is to remove excess
liquid that is not evaporated from the evaporation chamber.
Connecting The Safety Drain Hose
*The safety drain is gravity fed, and so, must slope downward at all points. Do not merge sinks, bathtub, or any
other drains to the safety drain.
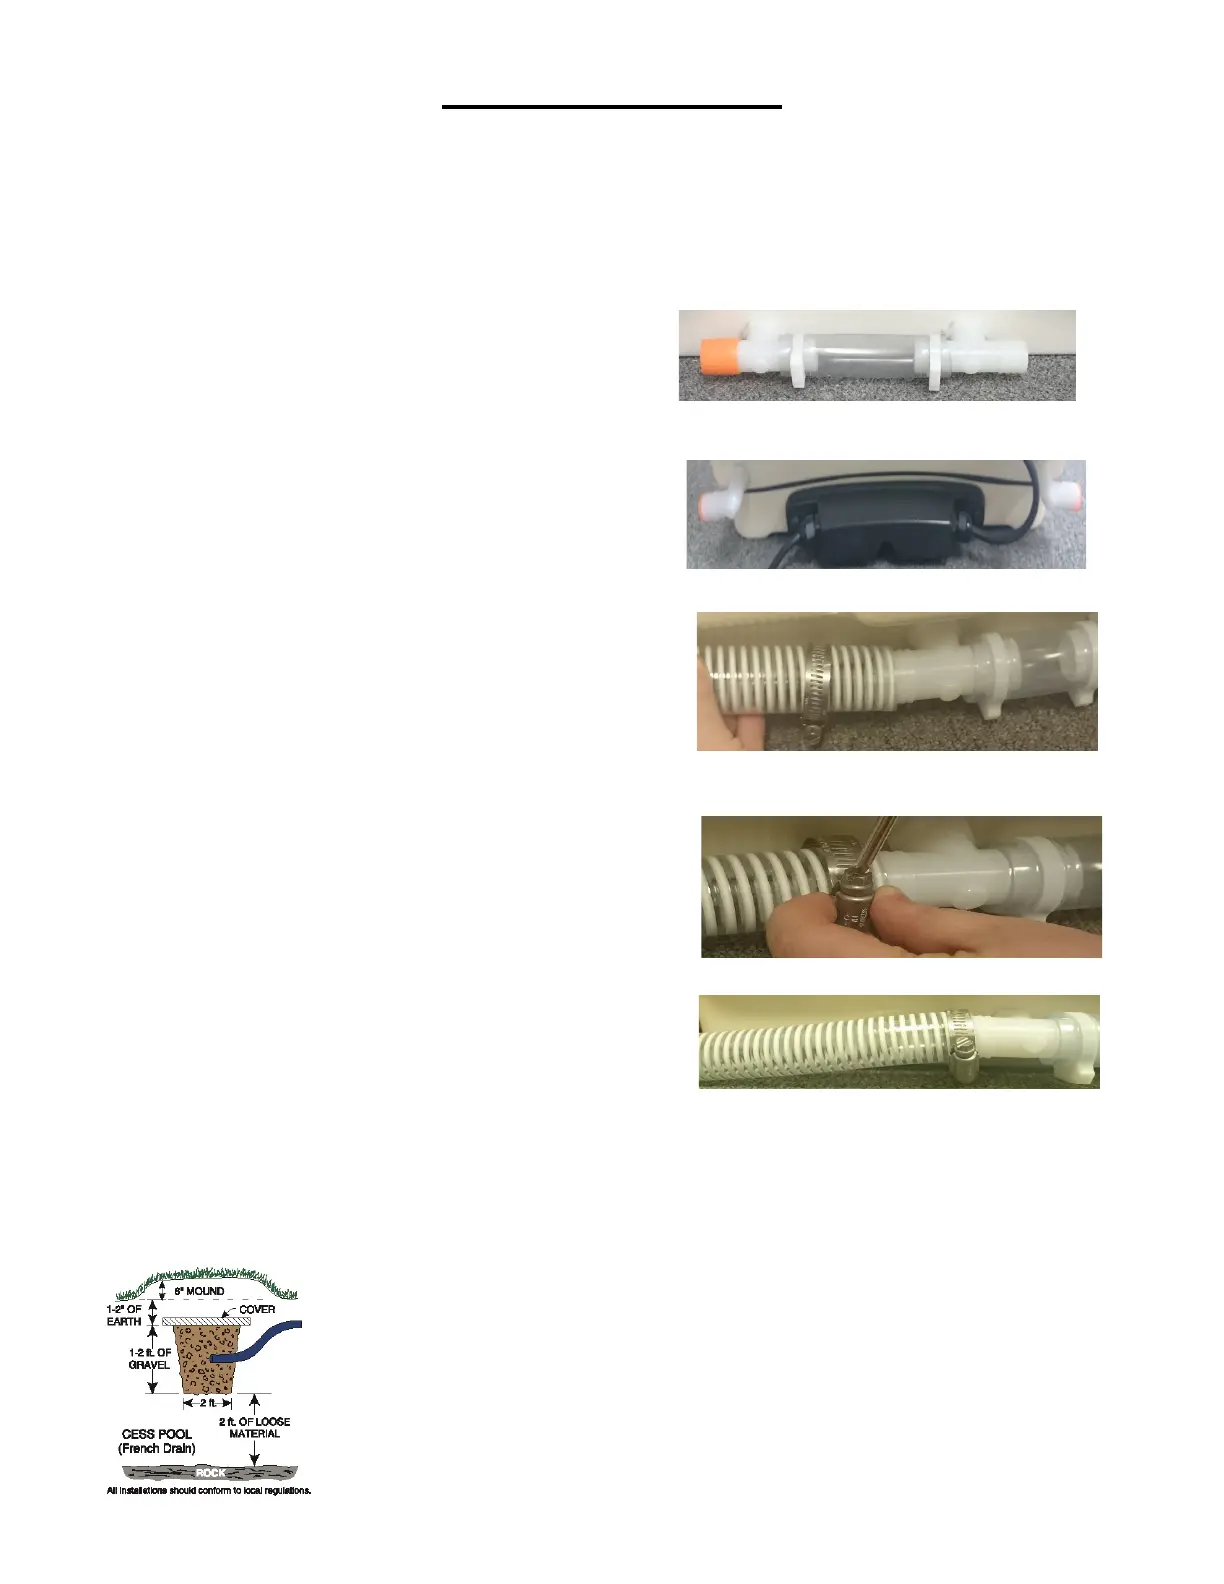
1) EXCEL NE: The safety drain assembly (Fig. 1), has a cap
on one end, and the other end will be uncapped to facilitate
the connection of the drain hose (Included with NE unit).
The cap can be removed, and placed on either side of the
safety drain assembly as applicable, for convenience of installation. Fig 1.
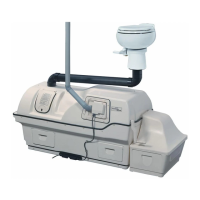
EXCEL OR COMPACT: The safety drain assembly (Fig 2)
is supplied plugged on both sides. These toilets are
designed to evaporate all liquids when used according to
their rated capacity. As a precautionary measure, Sun-Mar
recommends that the safety drains on all toilets be
connected . The drain hose is not supplied with these toilets. Fig. 2.
If connection is required, a good quality hose of appropriate
length and 1” SS hose clamp should be obtained from a
local building center or DIY store. The inside diameter of
the drain hose for the EXCEL is 1” and for the COMPACT is
¾”.
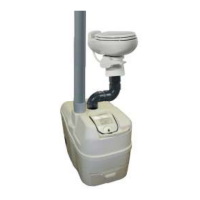
2) Remove one drain cap, or place the cap on end of the safety Fig. 3
drain assembly that will NOT have the drain hose connected
(NE).
3) Place the 1” SS hose clamp over the end of the hose that will
be connected to the safety drain assembly. Carefully push
the drain hose over the barbed end of the drain assembly
where the cap has been removed (Fig 3) so that the drain
hose will overlap the drain assembly by 1”. Tip: heating the Fig 4.
hose where it will be connected to the safety drain will help
facilitate the connection.
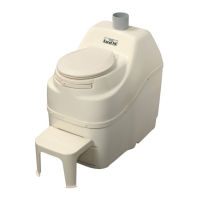
4) Move the 1” SS hose clamp on to the section of the hose
that is covering the end of the drain assembly. Use a flat
head screwdriver to tighten the 1” SS hose clamp (Fig 4), until Fig 5
the drain hose is firmly affixed to the safety drain assembly.
5) The safety drain assembly is gravity fed, ensure that the drain hose is
lower than the drain assembly at all points (Fig 5). This may
necessitate clamping the drain to the floor in some installations.
Effluent Handling
The following are possible options to take care of the liquid:
- Feed into a lined pit filled with gravel and sand. Such a
recycling bed also ensures a closed loop system.
- Feed into a small cesspit or “French drain”.
- Plumb into an existing septic or holding tank line.
Installation should be in accordance with applicable local regulations.
9