The provided document is an owner's manual for Sun-Mar Self-Contained Composting Toilets, including the Excel, Excel NE, and Compact models.
Function Description
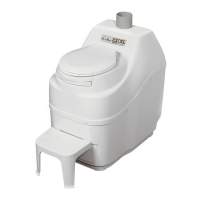
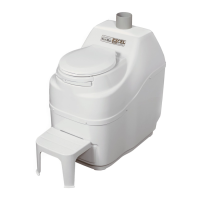
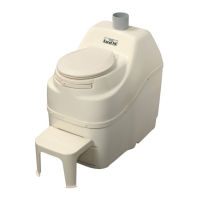
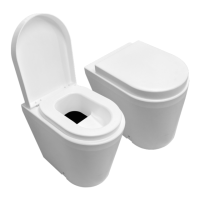
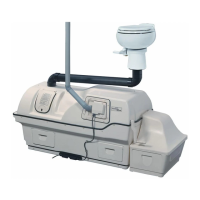
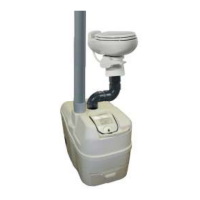
Sun-Mar Self-Contained Composting Toilets are designed to convert human waste into compost through a natural decomposition process. The key to their operation lies in a three-chamber design: a patented Bio-drum™, a compost finishing drawer, and an evaporation chamber. This design allows for independent environments within the toilet to optimize composting efficiency. Electric models incorporate a thermostatically controlled heater and fan assembly to aid in liquid evaporation, making them suitable for continuous electrical supply. Non-electric versions operate without a fan or heater, ideal for locations without continuous power.
The patented Bio-drum™ is central to the composting process, providing the necessary mass for good compost and facilitating aeration through simple rotation. Excess liquid drains through a screen at the bottom of the drum into the evaporation chamber. Compost mixing is achieved by rotating a handle clockwise. To remove finished compost, the drum lock button is pulled out, and the handle is rotated counter-clockwise.
The compost finishing drawer, located beneath the Bio-drum™, isolates compost for approximately four weeks, allowing it to complete the composting process without mixing with new waste. The evaporation chamber, situated at the base of the unit below the finishing drawer, collects and evaporates any excess liquid.
Composting relies on optimal conditions for oxygen, temperature, moisture content, and the carbon/nitrogen ratio. Aerobic bacteria, which thrive in oxygen-rich environments, are crucial for breaking down waste. The Bio-drum™ should be turned three times per week (six complete turns) to aerate the compost. Optimal temperatures for decomposition range from 70-90° F (20-30° C). Below 55° F (13° C), decomposition slows or stops, requiring additional heat for continuous or frequent use. For intermittent use in cold seasons, the toilet can act as a holding tank until temperatures rise. Moisture is also essential, with compost needing to be damp, not saturated, to support bacterial activity. A balanced carbon/nitrogen ratio is maintained by adding carbon-rich materials like Sun-Mar Compost Sure Green and nitrogen-rich human waste.
Important Technical Specifications
Rated Capacity:
- Residential & Continuous Use:
- Excel: 3 Adults or a family
- Excel NE: 2 Adults or families of 3
- Compact: 1 Adult
- Weekend & Vacation Use:
- Excel: 6 Adults or families of 8
- Excel NE: 5 Adults or families of 7
- Compact: 3 Adults or families of 4
Electrical Specifications (for electric models):
- Compact (115V): Maximum Amps: 2.0 A, Fan Power: 35 Req, Heater Power: 200 W, Average Power: 125 W
- Compact (240V): Maximum Amps: 1.0 A, Fan Power: 35 Req, Heater Power: 200 W, Average Power: 125 W
- Excel (115V): Maximum Amps: 2.4 A, Fan Power: 35 Req, Heater Power: 260 W, Average Power: 125 W
- Excel (230V): Maximum Amps: 1.25 A, Fan Power: 35 Req, Heater Power: 265 W, Average Power: 125 W
- 230V models include an over current protection device on the heating element circuit.
- A ground fault interrupter (GFI) circuit is recommended.
- Surge protectors are recommended in areas with power fluctuations.
Vent Pipe Installation:
- Electric toilets: No more than four 45° bends, no horizontal or downward slopes. Vent pipe should terminate 24-30 inches above the highest peak of the roof. All exposed vent pipe in unheated spaces should be insulated.
- Non-Electric toilets (Excel NE): No more than two 45° bends, no horizontal or downward slopes. Vent pipe should terminate 24-30 inches above the highest peak of the roof. An optional 12V fan is available for purchase if needed due to competing appliances or climatic conditions.
- Vent pipe must be installed separately from all other household vents to ensure odorless operation.
- Silicone caulking is used to seal the connection between the vent and the toilet; PVC cement for other vent connections.
- A 4" diffuser is included for Excel and Compact models, and a 6" diffuser for Excel NE, to encourage updraft.
Safety Drain:
- Excel and Compact: Designed to evaporate all liquids, but safety drains are recommended as a precautionary measure.
- Excel NE: Safety drain must be connected due to overflow liquid, even with limited usage.
- The safety drain is gravity-fed and must slope downward at all points. It should not merge with other drains.
- Drain hose internal diameter: 1" for Excel, 3/4" for Compact.
- Effluent can be fed into a lined pit with gravel and sand (recycling bed), a small cesspit/French drain, or an existing septic/holding tank line, conforming to local regulations.
Dimensions (Rough-in):
- Detailed rough-in diagrams are provided for Excel, Excel NE, and Compact models, showing measurements for height, width, depth, vent, and drain locations.
- At least 15" of clear space in front of the toilet is required to remove the finishing drawer.
Usage Features
Initial Start-Up:
- Spray Compost Quick: Remove the finishing drawer and spray the inner floor (evaporation chamber) and Bio-drum™ to prevent organic material hardening.
- Prepare Compost Sure Green: Mix 1/2 bag (Excel/Excel NE) or 1/3 bag (Compact) of Compost Sure Green with 2 quarts of warm water and 1/2 Microbe Mix packet. Let it absorb water for about an hour.
- Add Mixture to Bio-drum™: Scoop the mixture into the Bio-drum™ through the hole under the toilet seat and rotate the drum to mix. Ensure the drum opening remains under the toilet seat.
- Electric Toilets Only: Plug in the toilet. The fan should run continuously. Check for warmth in the evaporation chamber after ten minutes to ensure the heater is working.
- It takes approximately 6 weeks for microbial cultures to establish and achieve good compost. During this time, the compost will hold moisture and darken uniformly.
- Regular toilet paper is acceptable as a carbon source.
Daily Use:
- Add at least one cup of Compost Sure Green per person per day, even for urination only.
- Ensure the Bio-drum™ opening is centered under the toilet seat to receive waste.
Every Second Day:
- Spray 3-4 sprays of Compost Quick on the compost surface to speed up decomposition.
- Turn the handle clockwise for 6 complete revolutions (42 turns) to mix and aerate the compost.
Every Two Weeks:
- Add one scoop (tablespoon) of Microbe Mix to "recharge" the compost and maintain a healthy microbe colony.
Seasonal Usage and Winter Use:
- Spring Start-Up (Seasonal Users): Extract compost from the Bio-drum™ until most is removed, leaving 4-6" as a "starter base." Rake loose material from the evaporation chamber. Add warm water and two scoops of Microbe Mix to the remaining compost and rotate the drum.
- No Winter Use: Add a few cups of water to the Bio-drum™ to prevent drying. Unplug electric toilets. Place something over the diffuser of non-electric toilets to prevent animals.
- Occasional Winter Use: For 3-4 weekends, composting activity will slow below 55° F (13° C). Toilets act as holding tanks. Remove enough compost before cold weather to make room, as the compost will freeze, and the drum should not be turned.
- Heavy or Residential Winter Use: Units should be kept in a heated area. Insulate electric vent pipes and consider heat tape for exposed sections to prevent ice blockages. Install and insulate the safety drain above the frost line. Maintain temperatures above 55° F (13° C) to sustain composting activity.
Maintenance Features
Ongoing Toilet Maintenance:
- Every Three Months: Rake the evaporation chamber. Remove the finishing drawer and rake solid debris from the inner floor, especially the back corners, and dispose of it.
- Twice Per Year: Clean the drum screen. Spray with Compost Quick, let sit for 15 minutes, then scrub vigorously with a wire brush. Use a screwdriver or nail if needed to clear holes.
- Periodic Maintenance: Remove compost from the Bio-drum™ when it is half full (level with the middle of the drum hub at the front).
Removing Compost from the Patented Bio-drum™:
- Pull the drum lock button: Located above the finishing drawer, pull it out approximately 1/2" and hold. Do NOT push it in.
- Turn the handle counter-clockwise: While holding the button, turn the handle counter-clockwise for three revolutions. Release the button and continue turning until the handle stops. This opens the drum door, allowing compost to fall into the finishing drawer.
- Level the compost in the drawer: Open the finishing drawer and use a rake to level the compost, preventing soiling of the Bio-drum™.
- Allow compost to rest: Leave the compost in the finishing drawer for a minimum of 3-4 weeks (or longer) to complete composting, isolated from new waste.
- Compost should never be more than half full to avoid stress on hinges and moving parts, and to ensure compost can exit the drum.
Troubleshooting:
- Compost Too Wet: Ensure Compost Sure Green is used. If the drum screen is clogged, spray with Compost Quick and scrub with a wire brush.
- Waste Not Breaking Down / Lumps: Add Sun-Mar Microbe Mix. Increase room temperature if below 55° F (13° C). Add 1/2 to 1 gallon of warm water if compost is too dry.
- Drum Too Full: Remove compost until the drum is half full or less. Rotate thoroughly and add compost accelerant.
- Strong Odor: Follow "Ongoing Toilet Maintenance" and use Compost Sure Green. Avoid adding kitchen/garden waste.
- Flies Present: Do not add kitchen/garden waste or topsoil. Keep compost moist. Apply pesticides like pyrethrin if needed, or clean the toilet thoroughly with soap and water.
- Urine Odor in Washroom: Re-install vent pipe to avoid horizontal/downward slopes. If the fan has failed, replace it. If competing appliances cause downdraft, install a 12V fan (Excel NE) or set the electric fan gate to '0'.
- Occasional Urine Odor Outside: Extend vent pipe above the highest peak of the roof. Add lime to the evaporation chamber. Consider Sun-Mar filter box for ammonia.
- Fan Noisy: Clean fan blades. If bearings are worn, replace the fan. A fan speed control can reduce noise.
- Fan Not Working: Vacuum dust from fan blades. Check power source (breakers, fuses). If problem persists, replace the fan.
- Liquid Build-Up in Evaporation Chamber: Install safety drain. Rake evaporation chamber regularly. Fill chamber with hot water and Compost Quick enzyme liquid overnight to clear mineral salts.
- Liquid Overflow: Check drain line for kinks, blockages, or upward bends. Remove and flush blockages. Rake solid materials away from the safety drain. Use premium 1" ID (Excel/Excel NE) or 3/4" ID (Compact) hose.
- Heating System Not Working / Lack of Evaporation: Connect safety drain. Ensure toilet is level. Test for warmth in the evaporation chamber. If no warmth, thermostat or heating element may have failed; replace as needed. If warmth is present but evaporation is lacking, refer to "Liquid Build Up In Evaporation Chamber" solutions.
- Blown Fuse (230V toilets ONLY): Check and replace fuse in the electric box. A surge protector is recommended.
- Drum Will Not Turn: If the set screw securing the handle to the shaft is broken, drill it out and replace, or order a handle replacement kit. If the steel roll-pin securing the gear wheel to the shaft is broken, order a small gear kit.
- Drum Door Not Opening/Closing Properly: If the drum is too full, remove compost. If hinges are stuck, spray with Compost Quick and scrub with a brush.
General Cautions:
- Do NOT stand on the toilet.
- Electric toilets must be protected from rain, flooding, and melting snow.
- Do NOT power wash electric toilets.
- Do NOT use metal tools for cleaning.
- Do NOT add chemicals, plastics, glass, metals, diapers, feminine hygiene products, cleaning fluids, cigarettes, kitchen or garden waste, baby wipes, or feminine paper to the compost. Only add waste and Compost Sure bulking material.