Assembly Instrucons
Before you begin installaon of the solar heater, turn o
the lter pump and close o all water connecons.
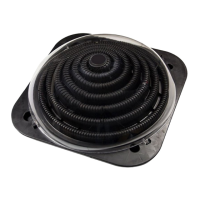
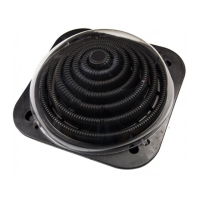
Sun2Solar® Deluxe Dome
Above Ground Pool Heater
• Aach the feet to the underside of the solar
collector (Fig. 2,3)
• Fit the 2 connecon adapters to the underside of
the solar heater (Fig 4,5,6)
• Connect the hoses between the lter unit, the
solar collector and the pool
• Assembly with a 1 ¼” hose connector. This is
pushed directly over the connecon adapter and
fastened with the hose clamp (Fig 7)
• Assembly with a 1 ½” hose connector (Fig 8,9,10)
First push the rubber reducer ng 1 ¼ - 1 ½”
over the connecon adapter. Then push the 1 ½”
hose over the reducon ng and fasten with a
hose clamp
• Intex® special adapter: This is needed on large
Intex® pools which have swimming pool hoses
with gate valves (Fig 11, 12)
Sun2Solar® Deluxe Dome
In-Ground Pool Heater
Connecon between solar collector and pool
For pools with a 1 ¼” or 1 ½” swimming pool hose follow
the instrucons below:
• Aach the hose to the return connector on the
underside of the solar heater
• Use a hose clip to connect the hose to the return
connector (Fig 13)
A) Pool Return Hose
B) Reducon Fing (if required)
C) Hose Clip
D) Return Connector
For large Intex® pools (which have swimming pool hoses
with gate valves) follow the instrucons below (Fig 14)
• Connect the Intex® special adapter and the O Ring
with the return connector. Make sure the O Ring
is in the Intex® special adapter
• Screw on the pool hose with the Intex® special
adapter. Makes sure that the seal between the
hose and the Intex® special adapter is correctly
inserted.
A) Intex® Special Hose
B) Intex® Special Adapter
C) O Ring
D) Return Connector
E) Flat Seal
Correct Posioning of the Solar Heater
Aach both legs to the underside of the device and adjust
posion to maximize exposure to the sun. Make sure the
surface is stable and level
The device should be assembled as show (Fig 15)
A) Swimming pool hose to the pool
B) Swimming pool hose from the lter / pump
C) Return connector
D) Connector ow
Make sure that all hose connecons are waterght and
the hose is not kinked or have any sharp corners. If the
hoses are not waterght, check whether the O Rings are
correctly posioned and all connecons are screwed
together rmly. Do not over-ghten the hose clamps.
Connecng Several Solar Heaters
If you would like to increase the heang power, you can
connect several collectors together. For this you will need
an addional swimming pool hose 1 ¼” – 1 ½”.
We recommend connecng a maximum of 4 collectors,
depending on the power of your lter unit.
We recommend use of a Sun2Solar® bypass kit (Fig 16)
(Item# 902518A)
Not only does this help opmal control of heat output,
it also helps targeted control of the water ow rate,
depending on the power of the lter unit.
Inial Use
Once the solar heater is assembled and the hoses are con-
nected to the lter pump and the pool. Open the water
supply and ensure that water is owing through the hose.
Then turn on the lter system. Air bubbles will rise from
the inlet nozzle in the pool. This happens as the air is
expelled from the solar heater. If this connues for more
then 2-3 minutes, check the ghtness of the connecons
in your system.
Please Note: Cover your pool overnight to avoid loss of
heat.