Assembly
2
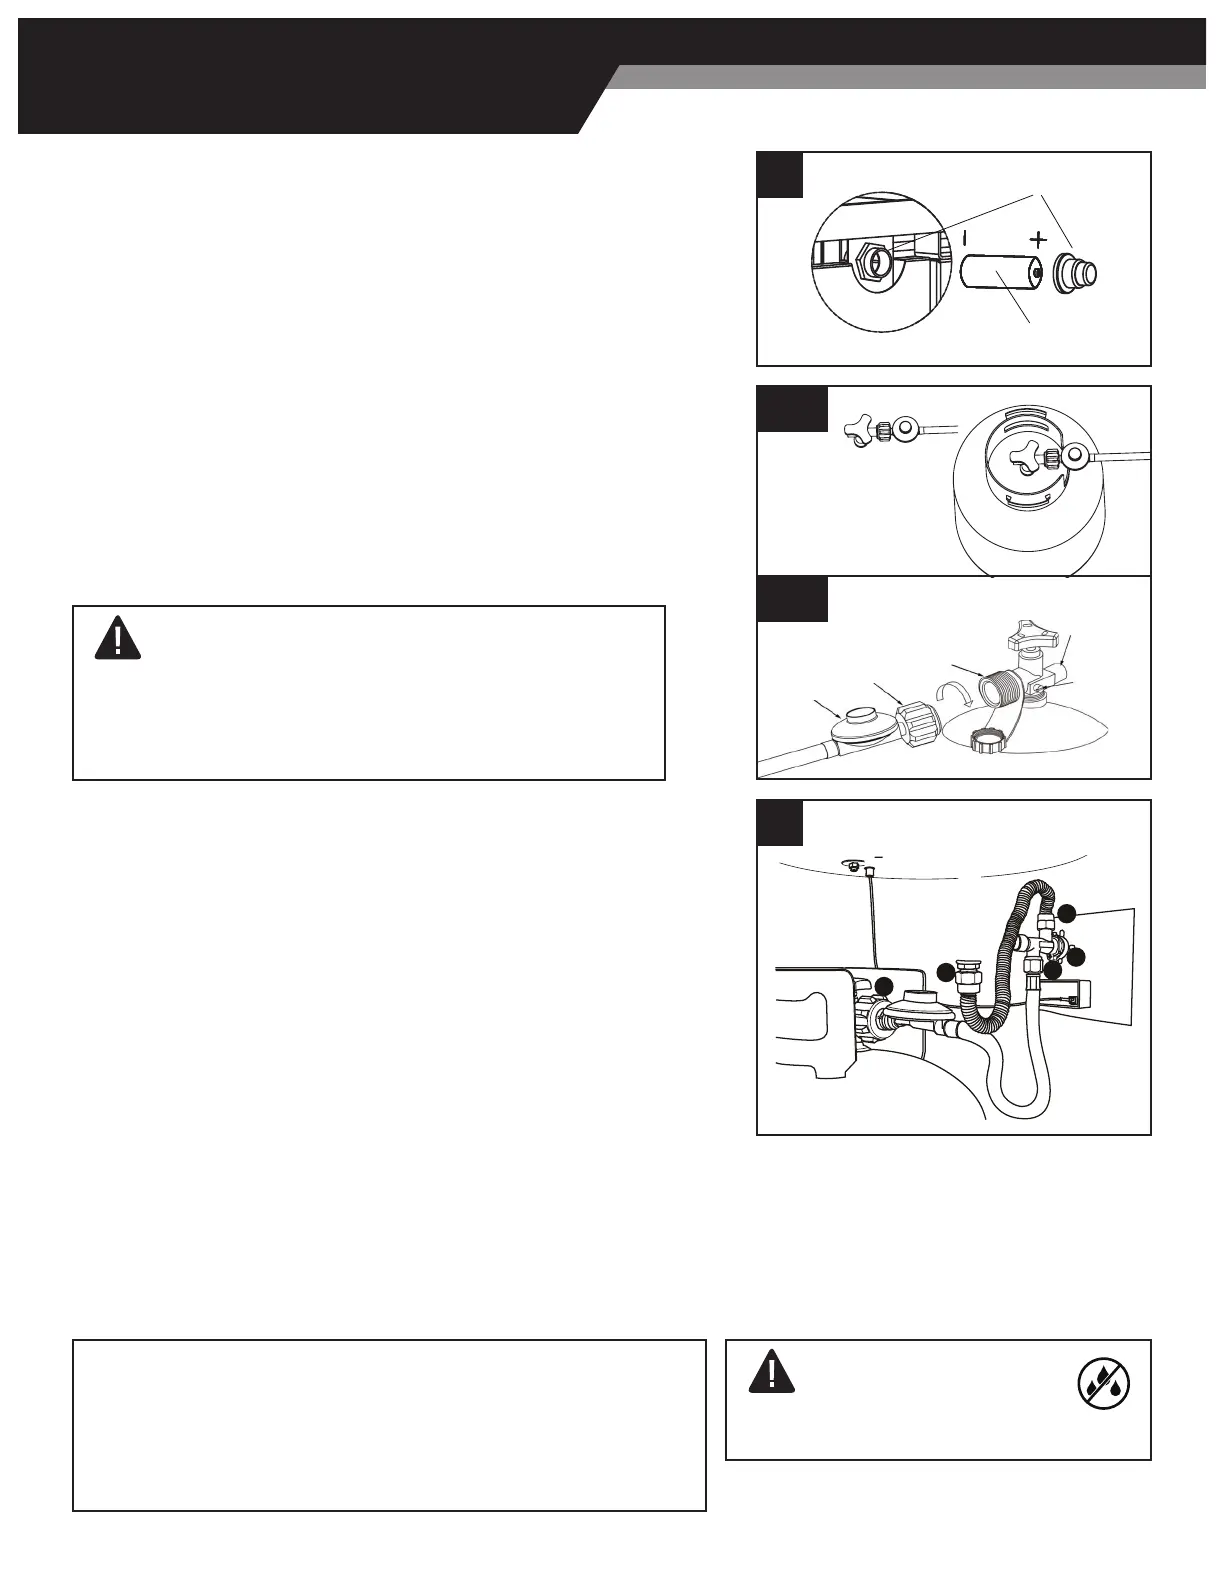
A
B
3 A
3 B
4
1
2
3
4
5
BLACK COUPLING NUT
turn clockwise to connect
REGULATOR
CYLINDER
VALVE
PRESSURE
RELIEF
VALVE
turn clockwise
to reseal
BLEED-OFF
VALVE
3. Connect Gas Tank
(I) Connect hose and regulator to cylinder. See Figure A.
(II) Turn the cylinder valve clockwise to close the gas supply on the gas
cylinder. Screw the regulator coupling clockwise by hand only. Make sure
it is fastened. See Figure B.
4. Perform Leak Test
(I) Make 2-3 oz. of leak test solution (one part liquid dishwashing
detergent and three parts water).
(II) Apply several drops of solution where hose attaches to regulator.
(III) Apply several drops of solution where regulator connects to cylinder.
(IV) Make sure all re pit and light valves are OFF.
(V) Turn cylinder valve ON.
If bubbles appear at any connection, there is a leak.
(I) Turn cylinder valve OFF.
(II) If leak is at hose/regulator connection: tighten connection and perform
another leak test. If bubbles continue appearing, the hose should be
returned to the place of purchase.
(III) If leak is at regulator/cylinder valve connection: disconnect,
reconnect, and perform another leak test. If you continue to see bubbles
after several attempts, cylinder valve is defective and should be returned
to cylinder place of purchase.
If NO bubbles appear at any connection, the connections are secure.
NOTE: Whenever gas connections are loosened or removed, you must
perform a complete leak test.
2. Install Battery to Electronic Igniter
(I) Remove the rubber cap on the electronic igniter (A) by unscrewing
and slide battery (B) into the battery slot. Make sure the positive side of
the battery faces outwards. Screw the electronic igniter cap (A) over the
battery tightly.
• Do not store a spare LP-gas cylinder under or near this appliance.
• Never ll the cylinder beyond 80 percent full.
• Place the dust cap on the cylinder valve outlet whenever the
cylinder is not in use. Only install the type of dust cap on the
cylinder valve that is provided with the cylinder valve. Other type
of caps or plugs may result in leakage of propane.
WARNING
Perform all tests outdoors.
Extinguish all open ames.
NEVER leak test when smoking.
Do not use the re pit until all connections have been leak
tested and do not leak.
CAUTION
Do not operate this re table if
Firebowl Pan and Flame Glass are wet!
1-877-387-3639 | Page 7