-
7
-
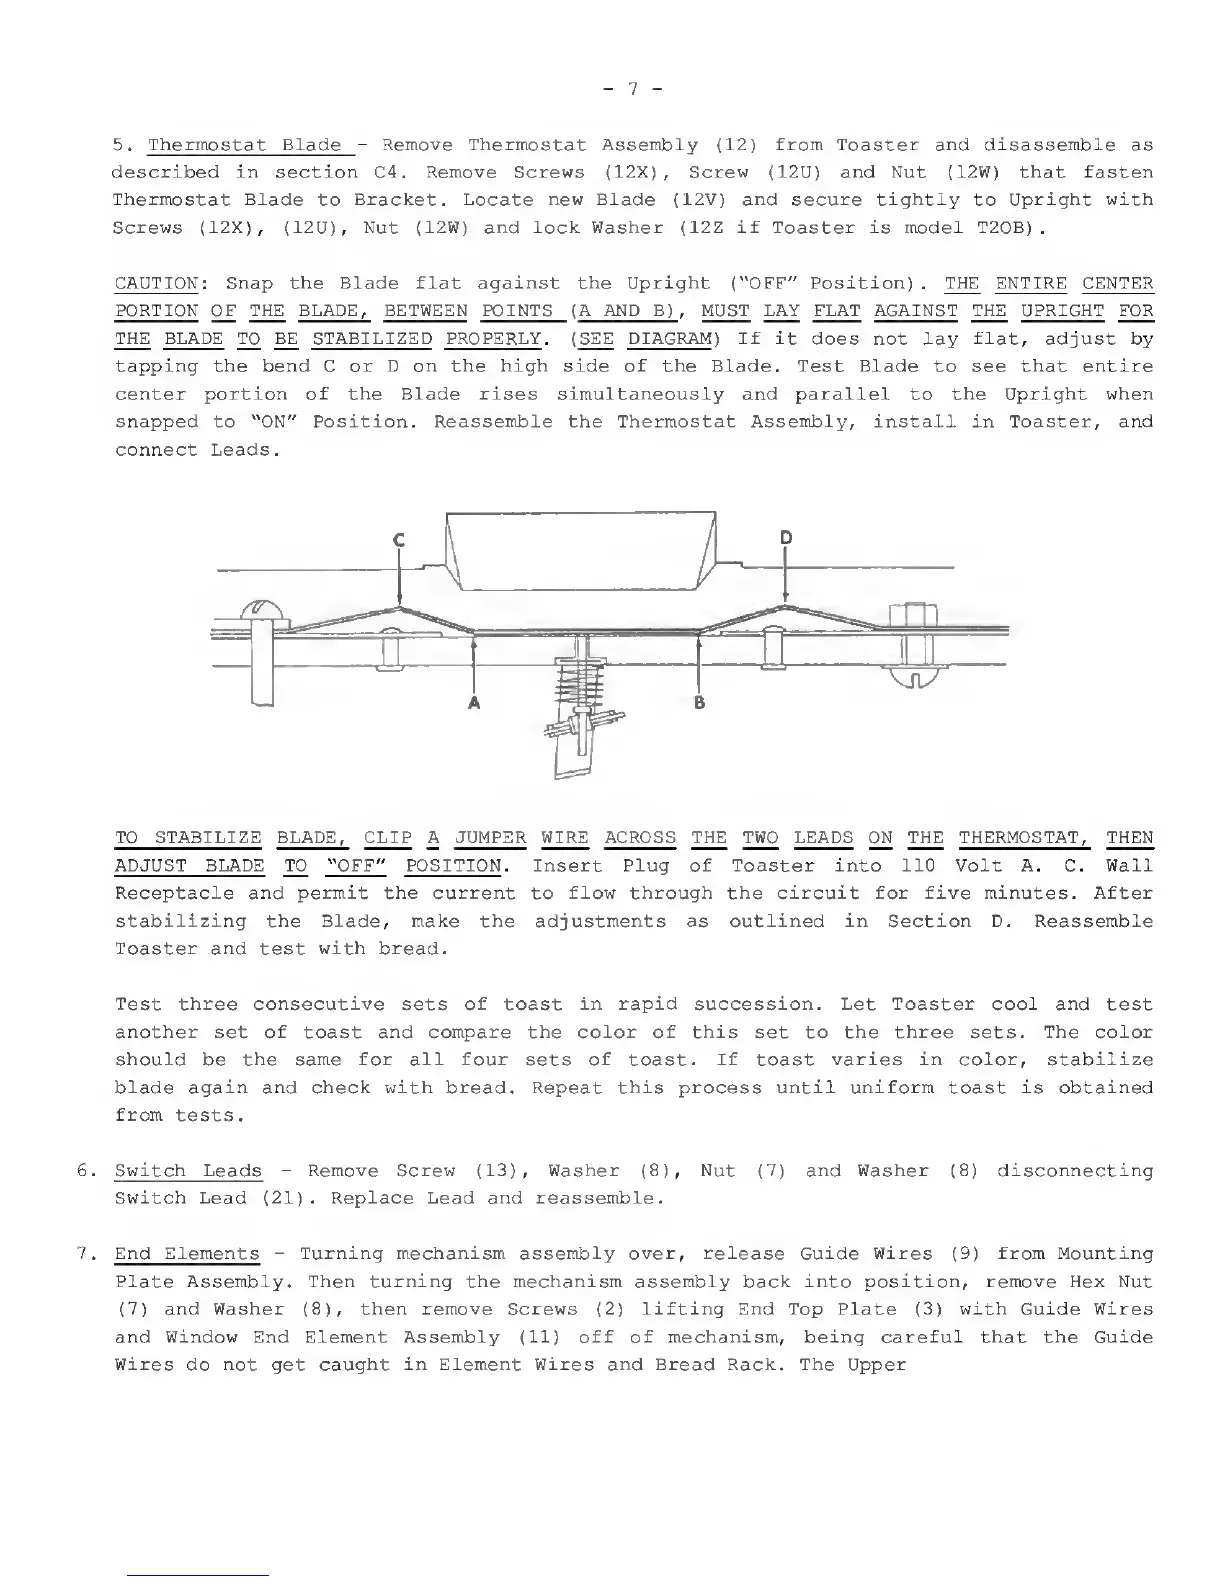
5. Thermostat Blade
-
Remove Thermostat Assembly
(12)
from Toaster and disassemble as
described in section
C4.
Remove Screws (12X) , Screw (12U) and Nut (12W) that fasten
Thermostat Blade to Bracket. Locate new Blade (12V) and secure tightly to Upright with
Screws (12X), (12U), Nut (12W) and lock Washer (12Z if Toaster is model T20B)
.
CAUTION : Snap the Blade flat against the Upright ("OFF" Position) . THE ENTIRE CENTER
PORTION OF THE BLADE, BETWEEN POINTS
(
A AND B)
,
MUST LAY FLAT AGAINST THE UPRIGHT FOR
THE BLADE TO BE STABILIZED PROPERLY .
(
SEE DIAGRAM
)
If it does not lay flat, adjust by
tapping the bend C or D on the high side of the Blade. Test Blade to see that entire
center portion of the Blade rises simultaneously and parallel
to
the Upright when
snapped to "ON" Position. Reassemble the Thermostat Assembly, install in Toaster, and
connect Leads
.
TO STABILIZE BLADE, CLIP A JUMPER WIRE ACROSS THE TWO LEADS ON THE THERMOSTAT, THEN
ADJUST BLADE TO "OFF" POSITION
.
Insert Plug of Toaster into 110 Volt A.
C.
Wall
Receptacle and permit the
current to
flow through the circuit for five minutes. After
stabilizing
the
Blade,
make the adjustments
as outlined
in Section D. Reassemble
Toaster and
test
with
bread.
Test three
consecutive
sets
of
toast
in rapid
succession.
Let Toaster cool and
test
another
set
of
toast
and compare the color of this
set to
the three
sets.
The
color
should
be
the same for all four
sets
of
toast.
If
toast
varies in color,
stabilize
blade again and check with
bread. Repeat this process until uniform toast
is obtained
from
tests.
6.
Switch
Leads
-
Remove Screw
(13),
Washer
(8),
Nut
(7)
and
Washer
(8)
disconnecting
Switch Lead
(21).
Replace Lead and reassemble.
7.
End Elements
-
Turning mechanism assembly
over,
release Guide Wires
(9)
from Mounting
Plate Assembly. Then turning the mechanism assembly back into position, remove Hex Nut
(7)
and Washer
(8),
then
remove Screws
(2)
lifting End Top Plate
(3)
with
Guide Wires
and Window End Element Assembly
(11)
off of mechanism, being careful that the Guide
Wires do not get caught in Element Wires and Bread Rack. The Upper