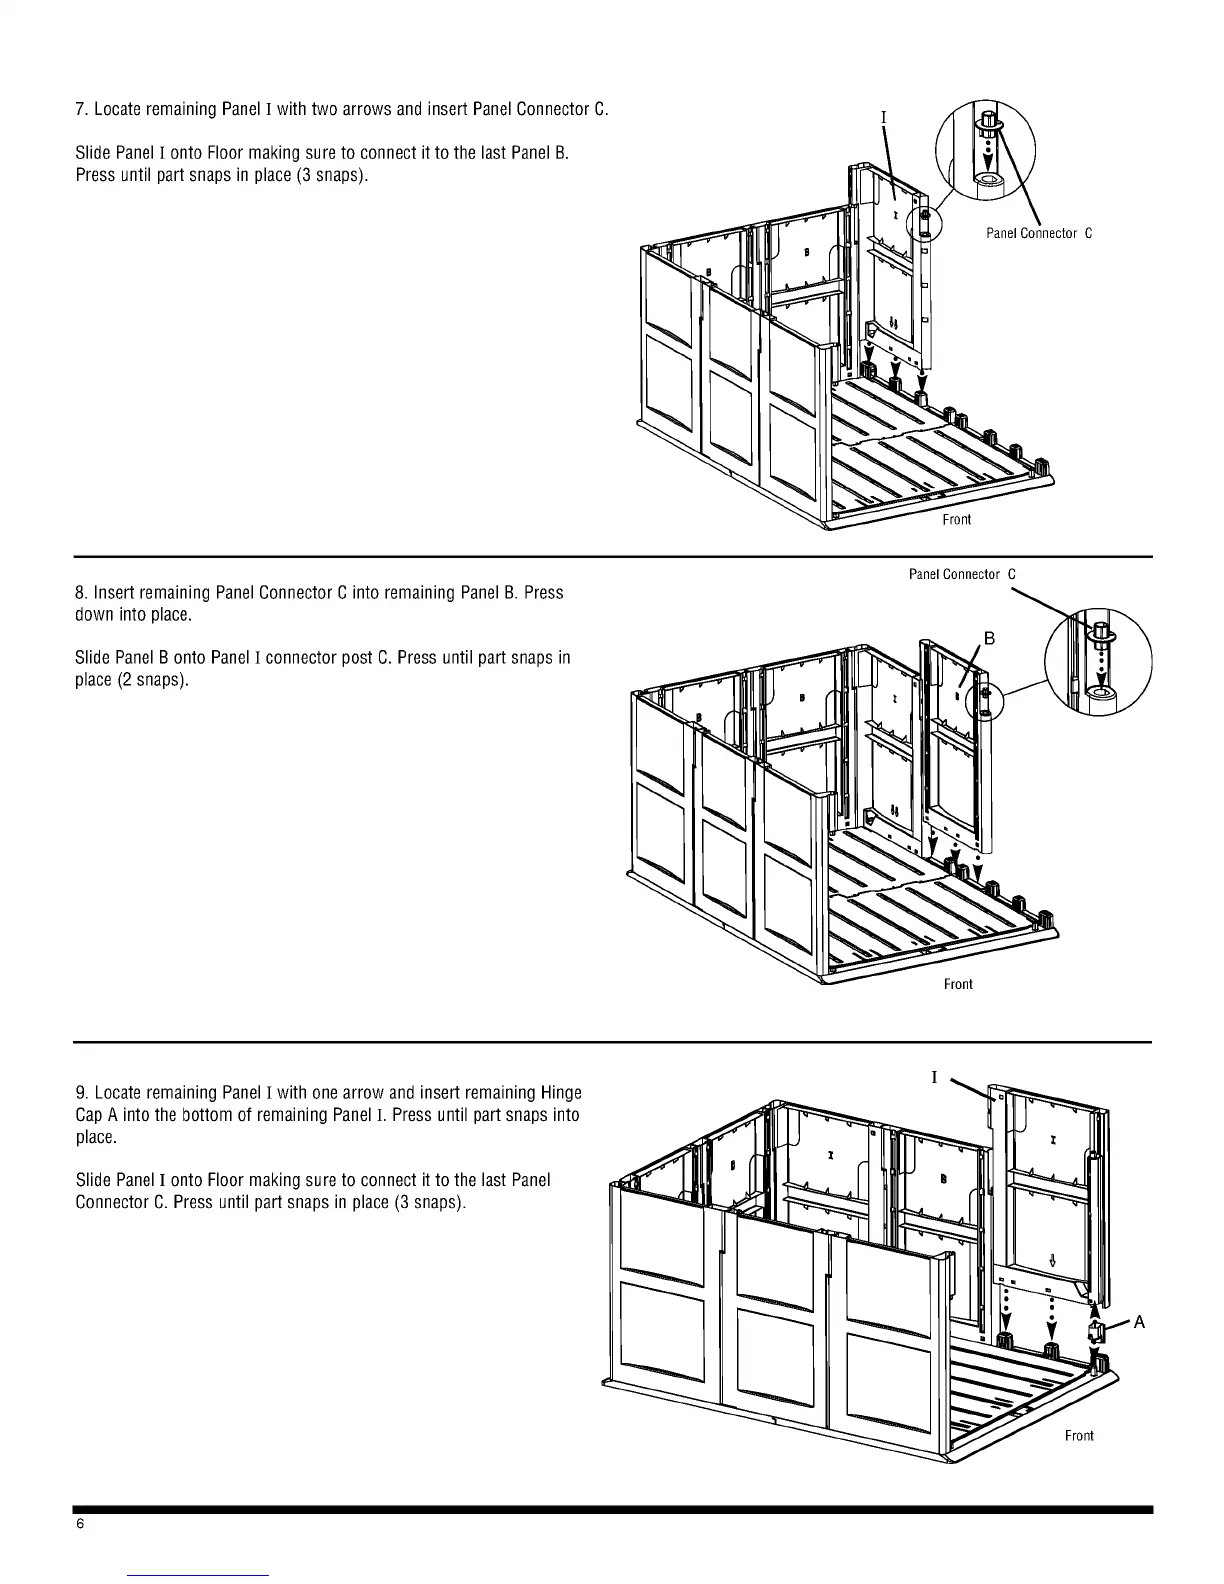
7. Locate remaining Panel I with two arrows and insert Panel Connector C.
Slide Panel I onto Floor making sure to connect it to the last Panel B.
Press until part snaps in place (3 snaps).
8. Insert remaining Panel Connector C into remaining Panel B. Press
down into place.
Slide Panel B onto Panel I connector post C. Press until part snaps in
place (2 snaps).
Panel Connector C
C
9. Locate remaining Panel I with one arrow and insert remaining Hinge
Cap A into the bottom of remaining Panel I. Press until part snaps into
place.
Slide Panel I onto Floor making sure to connect it to the last Panel
Connector C. Press until part snaps in place (3 snaps).
6
A
I