SunFounder GalaxyRVR Kit for Arduino, Release 1.0
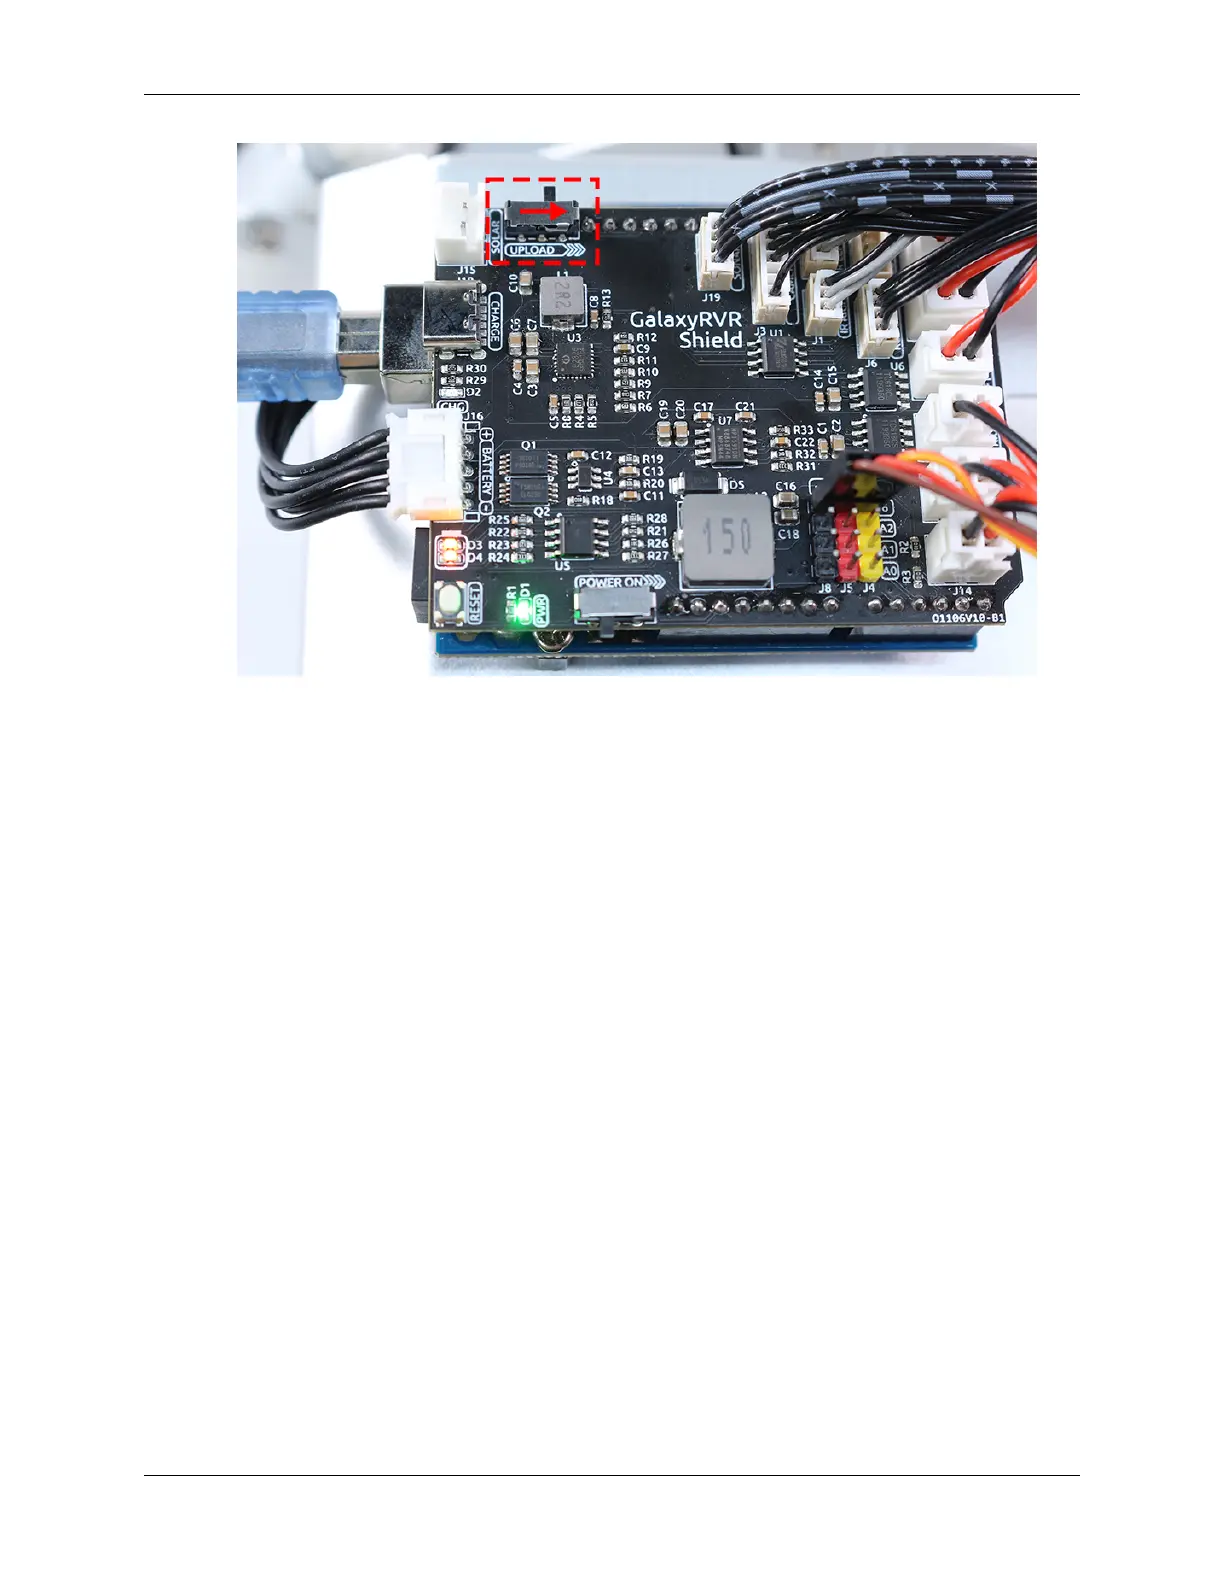
• Once the code has been successfully uploaded, switch to the left to initiate the ESP32 CAM.
• Connect to the GalaxyRVR Network.
• Connect and run the controller.
Though these steps might seem tedious, they are crucial for the process. After repeating them a few times, you’ll
become more familiar and comfortable with the procedure.
Now that we’ve finished this lesson, let’s reflect on what we’ve learned through some questions:
• In the process of creating a new controller, you’ve encountered many different types of blocks. Have you con-
sidered what their individual functions might be?
• Is it possible to use other widgets to control the tilt mechanism?
• Or even directly control the Mars Rover’s movements?
Let’s anticipate our exploration of these questions in the next lesson!
3.12 Lesson 12: Driving the Rover with the App
In our last adventure, we mastered the art of using the SunFounder Controller to not only explore the world through the
rover’s eyes but also to adjust its gaze by controlling the tilt mechanism. It was like giving our Mars rover a sense of
sight!
Now, imagine if you could steer this Martian explorer as well, directing its path at your whim. In this lesson, that’s
exactly what we’re going to do! We’re going to take our understanding of the SunFounder Controller to the next level
and learn to maneuver our rover, giving us the thrilling experience of being a Mars rover driver!
With our vivid and lively STEAM course, children will not just learn; they’ll experience the excitement and wonder of
space exploration! Strap in and get ready for an exciting journey!
94 Chapter 3. Course Mode