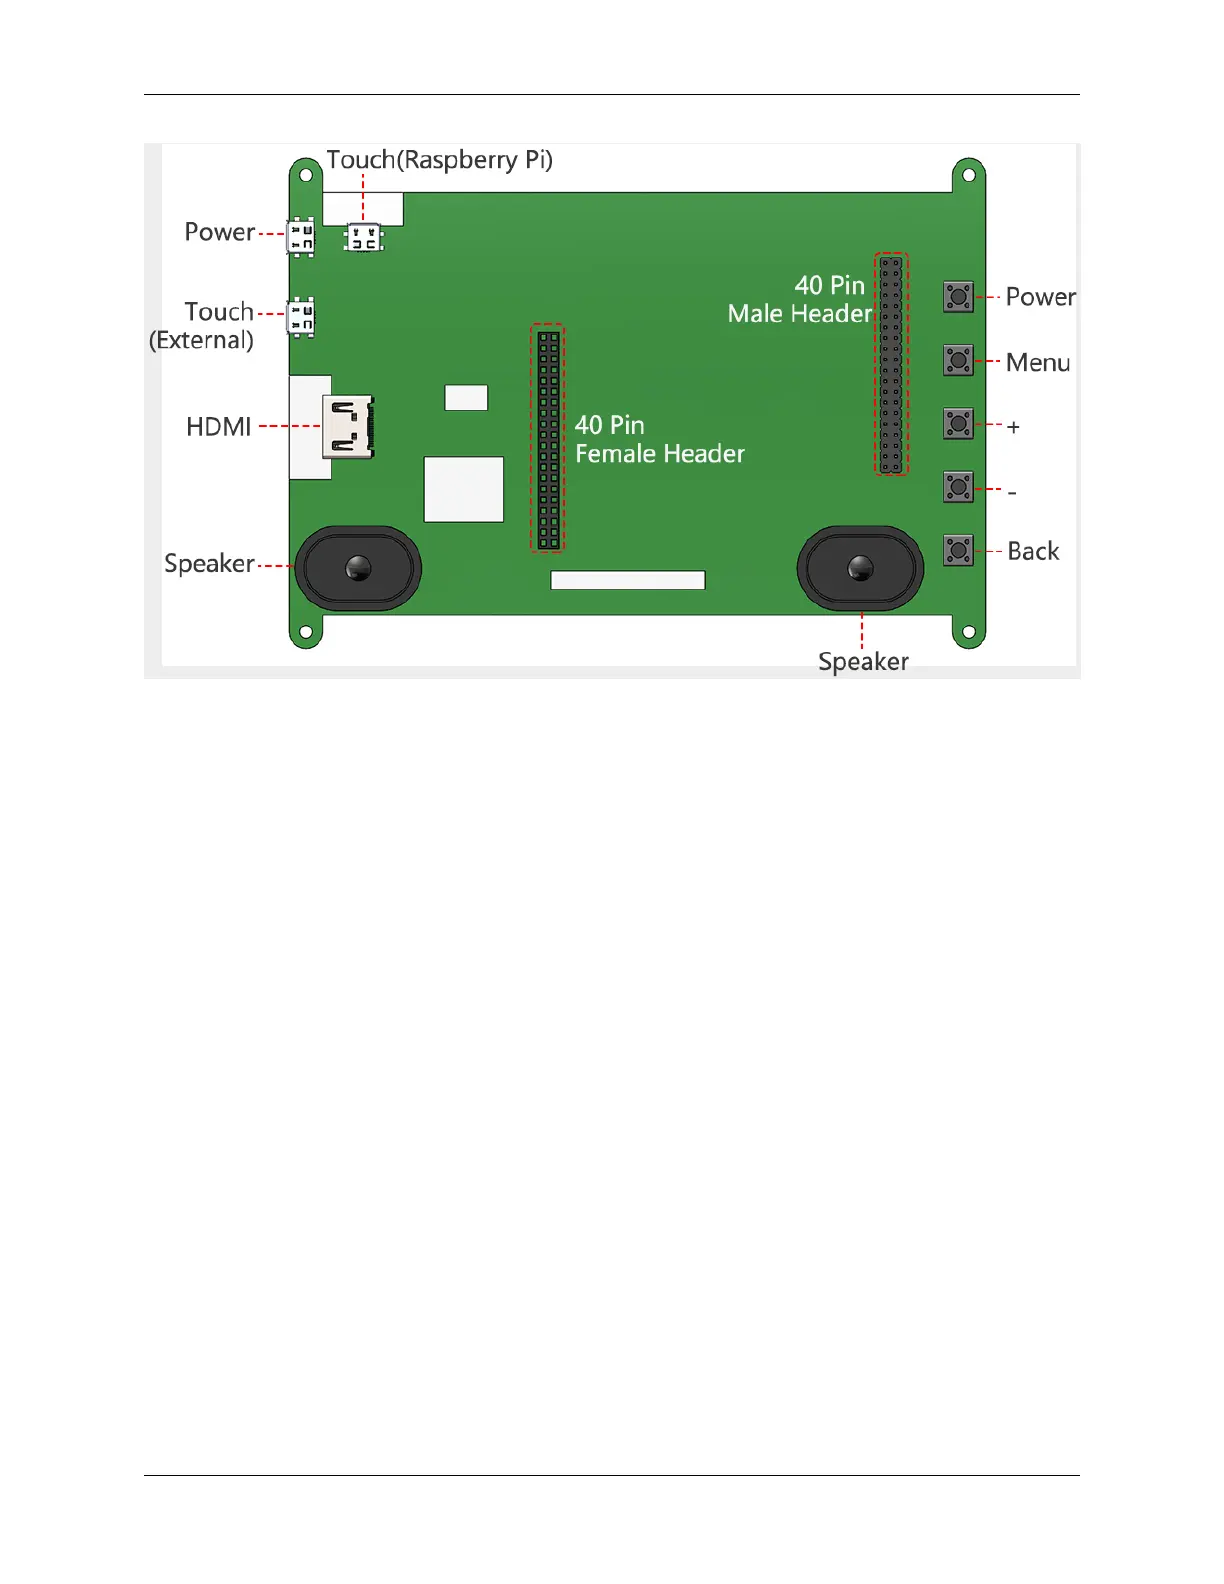
TS7-Pro 7-inch Touch Screen
• Power Used to provide power to this screen when you use it as an extended screen.
• Touch(External) When you use this screen as an external screen, you can connect this screen to your device
with a micro USB cable. If the screen does not have enough power, you can connect a separate Micro USB
cable to the Power port.
• HDMI HDMI connector
• Speaker This screen has 2 speakers for playing sound, music, etc.
• Touch(Raspberry Pi) When you drive this display with Raspberry Pi, you need to connect this port to your
Raspberry Pi with the USB Bridge to get the touch function.
• 40 Pin Female Header You can plug in your Raspberry Pi here.
• 40 Pin Male Header This is the 40 pin header from the Raspberry Pi, you can use it to do some projects or use
a 40pin ribbon cable expand it to the breadboard.
• Buttons These 5 buttons can be used to turn on/off the screen, adjust the volume and brightness, they are used
in combination, see the table below for details.
The first row refers to Working, Sleep, Menu, Volume Adjust and Brightness Ajust, 5 states; the first
column refers to the 5 buttons. If in Working state, press the Power button can enter Sleep state; press the
Menu button can enter Menu; press the “+” button to increase the volume; press the “-” button to decrease
the volume; press the Back button can enter Brightness Ajust interface.
4 Chapter 1. HARDWARE INTRODUCTION