10
Chain Lubricant
mCAUTION! Failure to lubricate the chain will cause
damage to the chain and bar. Use a good quality bar and chain
oil designed specically for use with chain saws. Bar and chain
oil can be purchased at your local hardware store or online at
sunjoe.com.
NOTE: It is normal for oil to seep from the saw when not in
use. To prevent seepage, empty the oil tank after each use.
When storing the unit for a long period of time (3 months or
longer), be sure the chain is lightly lubricated. This will prevent
rust on the chain and the bar sprocket.
mWARNING! Do not use the chain saw with any type of
accessory or attachment. Such usage might be hazardous.
Operation
Starting the Machine
Before starting the chain saw, remove the oil tank cap and add
bar and chain oil to the top of the oil level window (Fig. 11).
One minute of use will consume approximately 0.2 oz (6 ml)
of oil. Rell when the oil level drops to 1/4 of a tank.
NOTE: Your electric chain saw is equipped with an automatic
oil pump for bar and chain oiling. You must add bar and chain
oil in order for your chain saw to work.
1. Connect the electric chain saw to a working 120 V outlet
using a heavy-duty outdoor extension power cord, such
as the Snow Joe
®
+ Sun Joe
®
SJTW-A 14-gauge 50-foot
extension cord with lighted end (Model PJEXT50-B).
Visit sunjoe.com to order online or call 1-866-SNOWJOE
(1-866-766-9563) to order by phone.
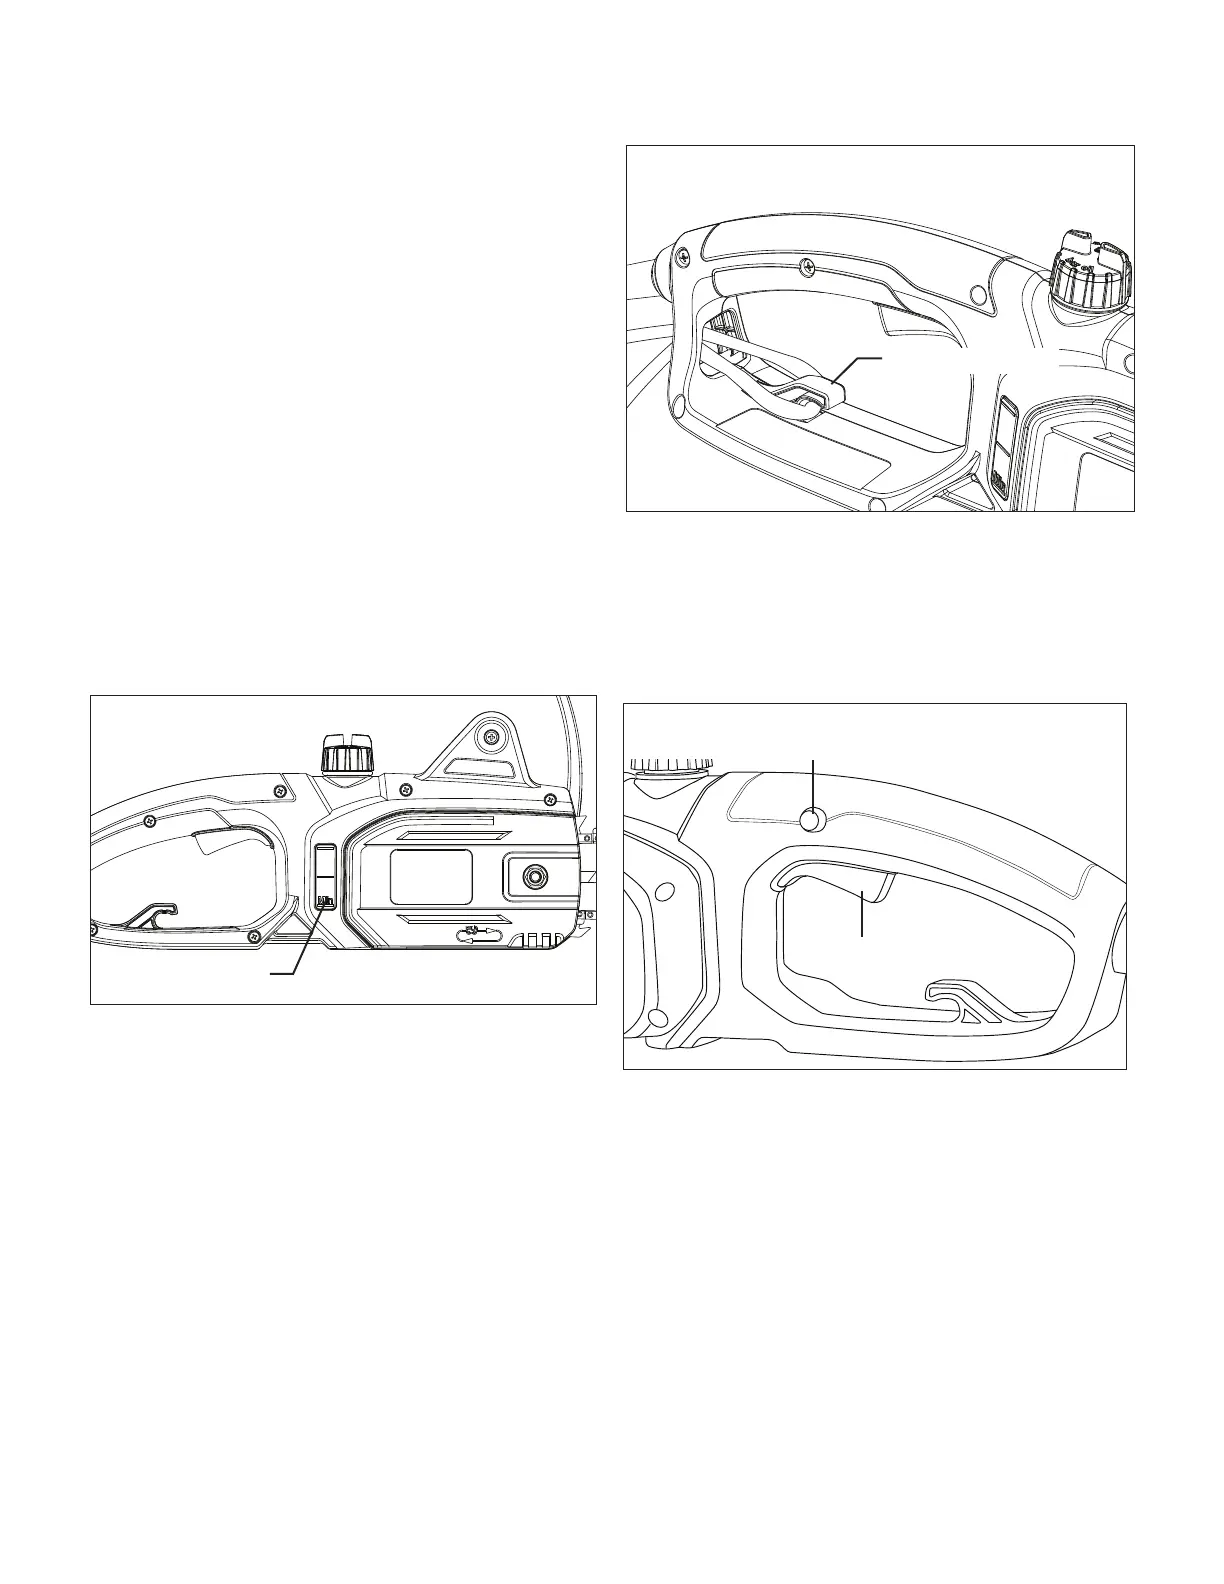
2.
Make a loop in the power cord and push it up through the
hole in the handle and around the cord restraint hook
(Fig. 12), then connect the extension cord to the appliance
cord.
3. Make sure the guide bar is not touching the ground or
any other object.
4. Hold the chain saw rmly with both hands.
5. To turn the tool ON, push and hold the safety lock button
with your thumb, then squeeze the trigger with your
ngers. Once the tool is running, release the safety lock
button (Fig. 13).
6. To turn the tool OFF, release the trigger switch (Fig. 13).
NOTE: Do not press the trigger switch until you are ready to
make a cut.
Operating Tips
m
WARNING! For your safety and that of others:
1. Do not use the machine without reading the instructions
carefully. Become acquainted with the controls and
the proper use of the machine. Learn how to stop the
machine quickly.
2. Keep in mind that the operator or user is responsible for
accidents or hazards occurring to other people or their
property.
3. Always wear suitable clothing when using the machine.
Wear anti-vibration gloves and other personal protective
equipment.
Fig. 11
Oil level window
Fig. 12
Cord restraint hook
Fig. 13
Safety lock button
Trigger switch

 Loading...