10
We value your experience using Sunny Health and Fitness products. For assistance with
parts or troubleshooting, please contact us at support@sunnyhealthfitness.com or 1-877-
90SUNNY (877-907-8669)
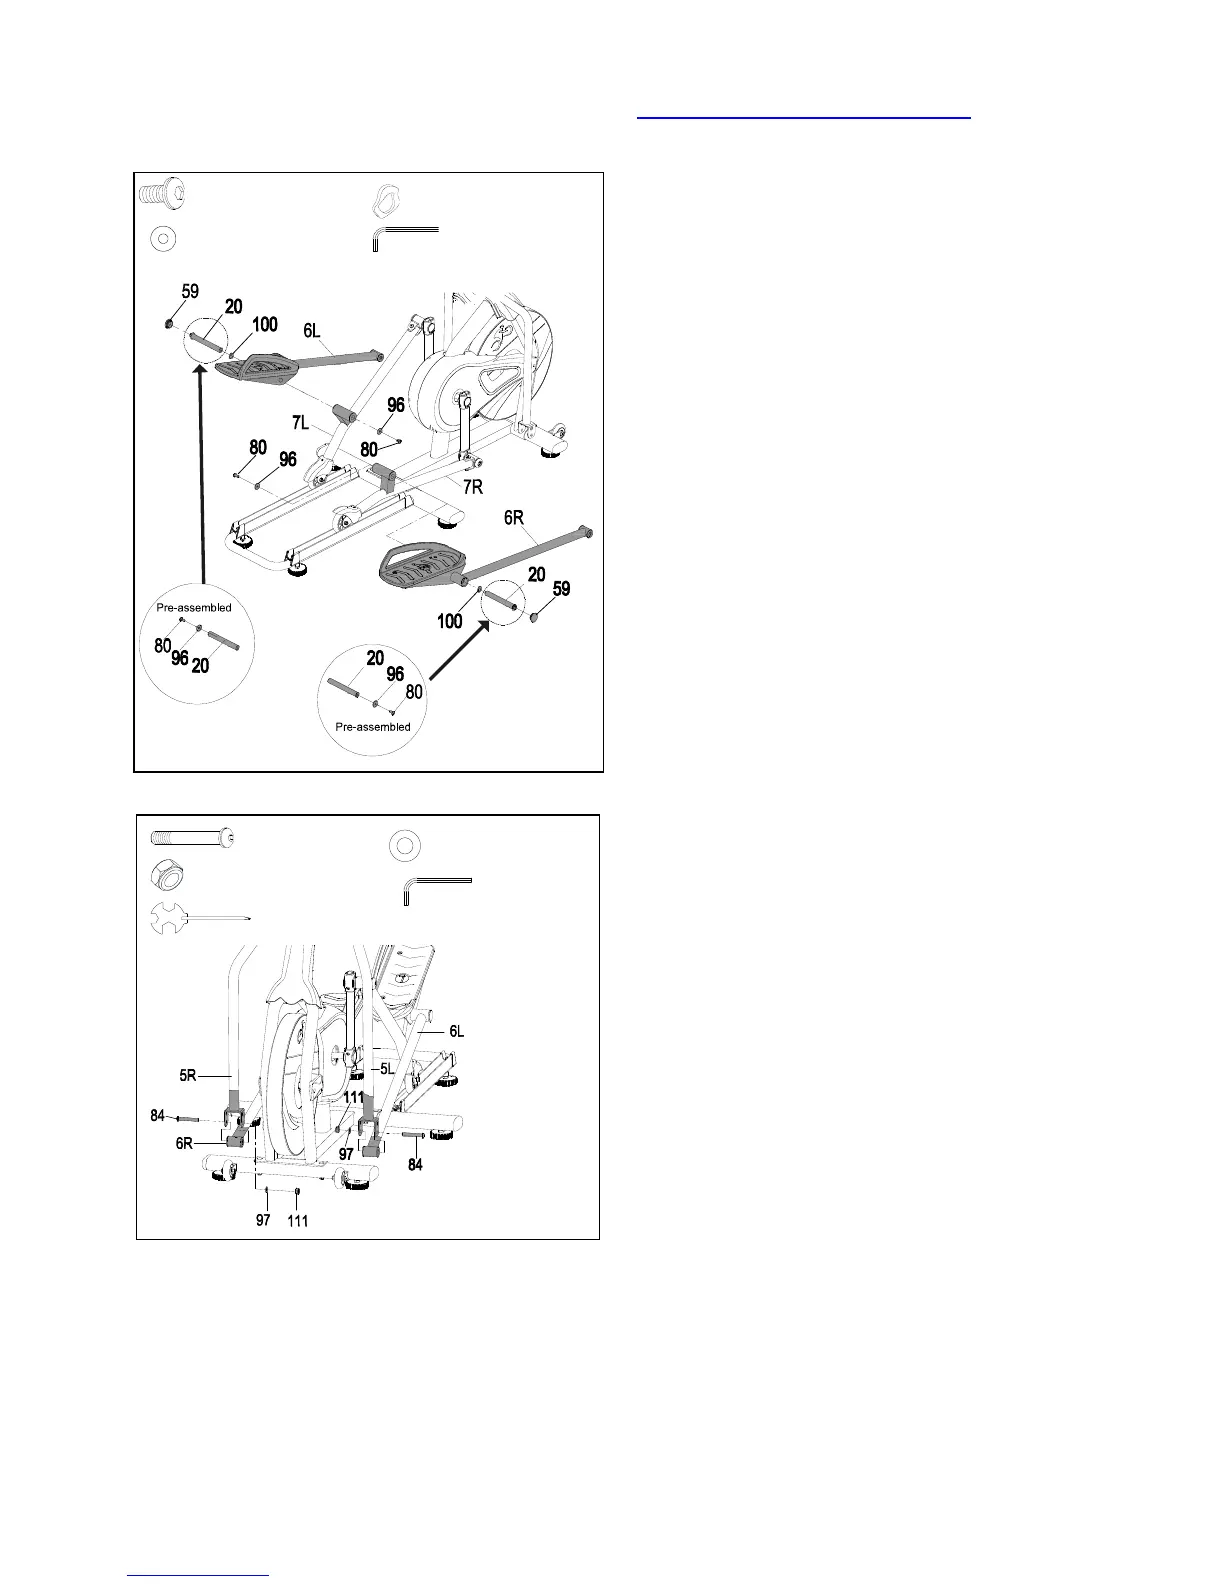
STEP 9:
Note: Please lubricate the Pedal Tube Axles
(No. 20) with Grease before assembly.
Remove 2 End Caps (No. 59) from Left &
Right Pedal Tubes (No. 6L & No. 6R).
Remember to put it back once the assembly is
completed.
Connect the Left Pedal Tube (No. 6L) to the
Left Wheel Tube (No. 7L) with Pedal Tube
Axle (No. 20), 1 Hex Socket Bolt (No. 80), 1
Washer (No. 96), and 1 Wave Washer (No.
100) using 2 Allen Wrenches (No. A).
Please repeat this assembly step to the right
side.
Note: Please do not fully tighten the Hex
Socket Bolts (No. 80).
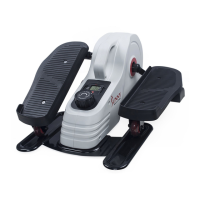
STEP 10:
Connect the Left Pedal Tube (No. 6L) to Left
Lower Swing Bar (No. 5L) with 1 Hex
Socket Bolt (No. 84), 1 Washer (No. 97),
and 1 Nylon Nut (No. 111) using Allen
Wrench (No. A) and Spanner (No. B).
Please repeat this assembly step to the right
side.
Note: Please tighten up all the Screws and
Bolts of the above assembly steps now.