9
We value your experience using Sunny Health and Fitness products. For assistance with
parts or troubleshooting, please contact us at support@sunnyhealthfitness.com or 1-877-
90SUNNY (877-907-8669)
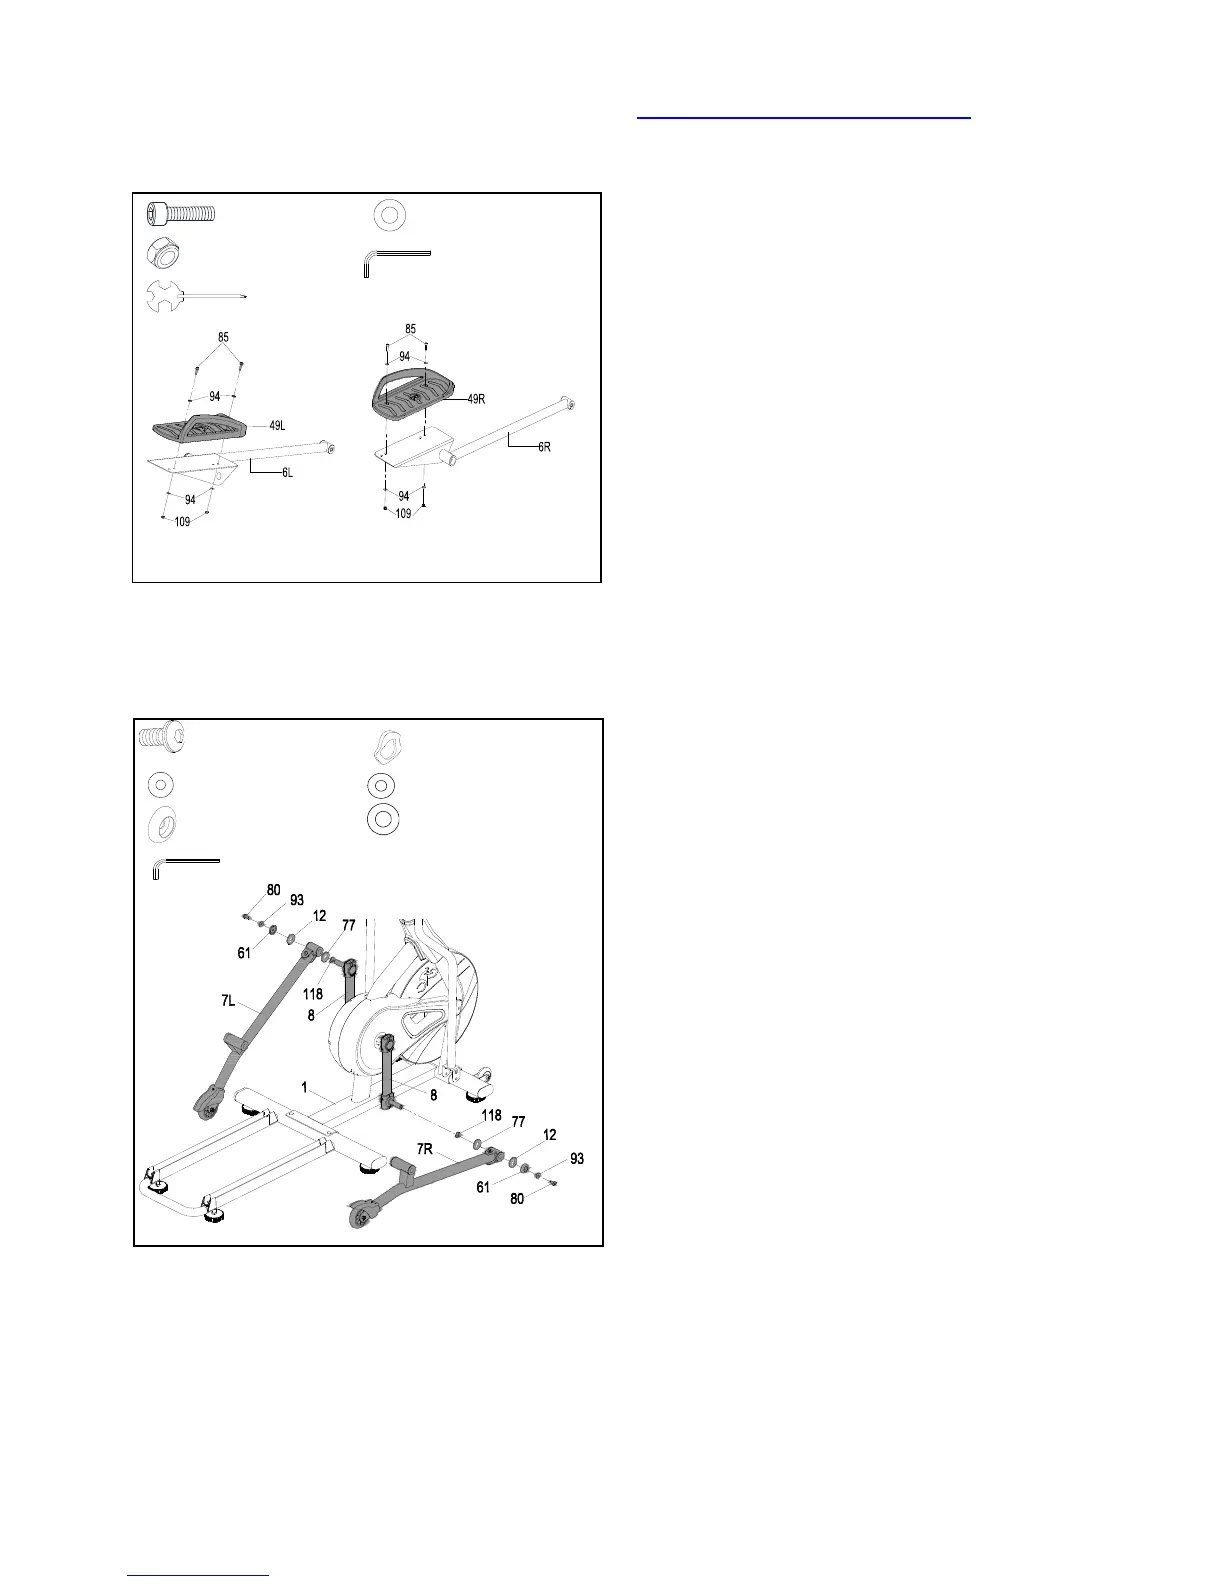
STEP 7:
Note: There are 4 holes on each of the Left &
Right Pedal Tubes (No. 6L & No. 6R). You
can adjust the training position forward or
backward.
Place the Left Pedal (No. 49L) onto Left
Pedal Tube (No. 6L) using 2 Cup Head
Bolts (No. 85), 4 Washers (No. 94), and 2
Nylon Nuts (No. 109). Tighten and secure
with Allen Wrench (No. A) and Spanner (No.
B).
Please repeat this assembly step to the right
side.
Note: Please put both pedals in the same
position during assembly.
Repeat this assembly step to the Right side.
STEP 8:
Note: Please lubricate the axles of Crank
Tubes (No. 8) with Grease before assembly.
Attach the Left Wheel Tube (No. 7L) onto the
Crank Tube (No. 8) on the left side of the
Main Frame (No. 1). Use 1 Hex Socket Bolt
(No. 80), 1 Washer (No. 93), 1 Wave Washer
(No. 118), 1 Washer (No. 12), 1 Washer (No.
77), and 1 Axle Side Cover (No. 61) and
attach with Allen Wrench (No. A).
Please repeat this assembly step to the right
side.
Note: Please do not fully tighten the Hex
Socket Bolts (No. 80).
-#118
Φ
16.2*
Φ
25*0.5T 2PCS