8
We value your experience using Sunny Health and Fitness products. For assistance with
parts or troubleshooting, please contact us at support@sunnyhealthfitness.com or 1-877-
90SUNNY (877-907-8669).
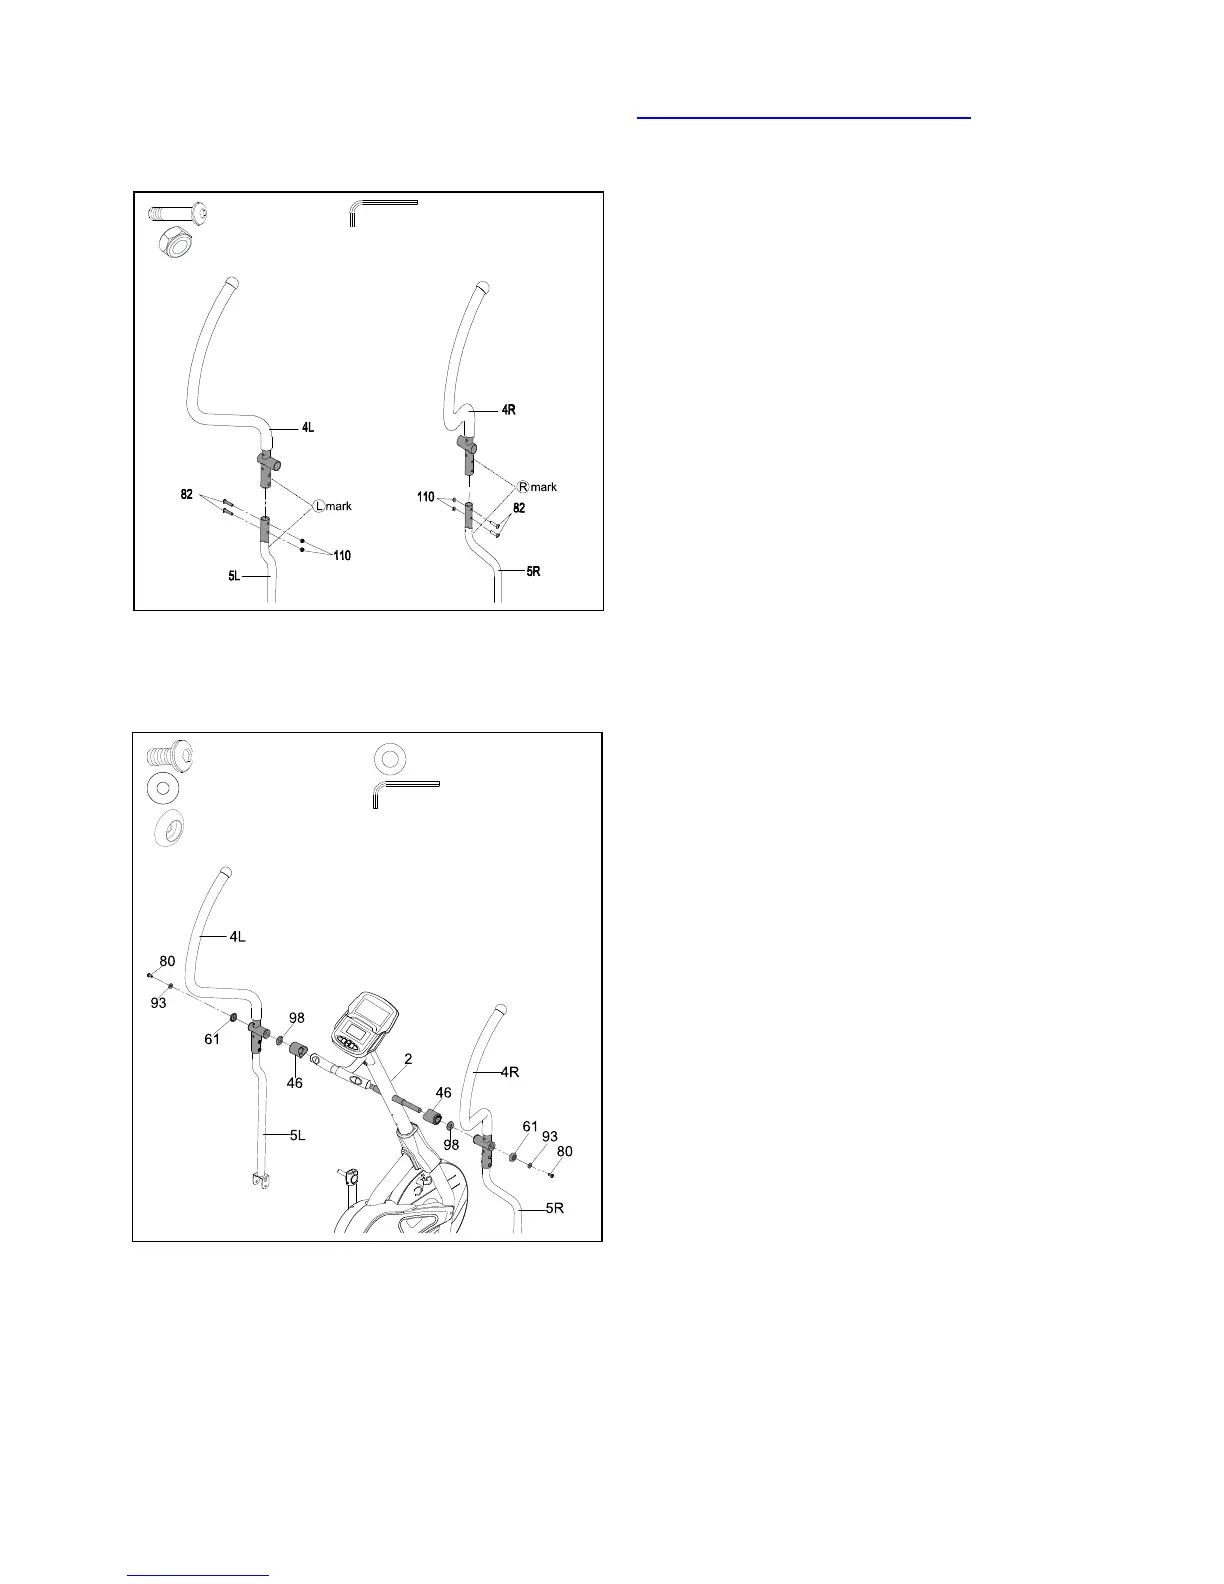
STEP 5:
Attach the Left Upper Swing Bar (No. 4L) to
the Left Lower Swing Bar (No. 5L) marked
L. Use 2 Hex Socket Bolts (No. 82) and 2
Nylon Nuts (No. 110) and attach with Allen
Wrench (No. A).
Note: The R/L mark on Left & Right Upper
Swing Bars (No. 4R & No. 4L) and Left &
Right Lower Swing Bars (No. 5R & No. 5L)
should always be assembled to the front
direction.
Please repeat this assembly step to the Right
side.
Note: Please do not tighten the Hex Socket
Bolts (No. 82).
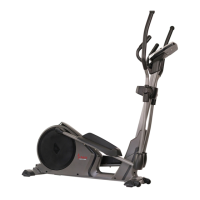
STEP 6:
Note: Please lubricate both sides of the axles
on Upright Tube (No. 2) with Grease before
assembly.
Attach the Left & Right Swing Bars (No.
4L/R & No. 5L/R) to both sides of the Upright
Tube (No. 2) using 2 Swing Axle Covers
(No. 46), 2 Washers (No. 98), 2 Axle Side
Covers (No. 61), 2 Hex Socket Bolts (No.
80), and 2 Washers (No. 93). Tighten and
secure with Spanner (No. A).
Note: Please do not fully tighten Hex Socket
Bolts (No. 80).