7
We value your experience using Sunny Health and Fitness products. For assistance with
parts or troubleshooting, please contact us at support@sunnyhealthfitness.com or 1-877-
90SUNNY (877-907-8669).
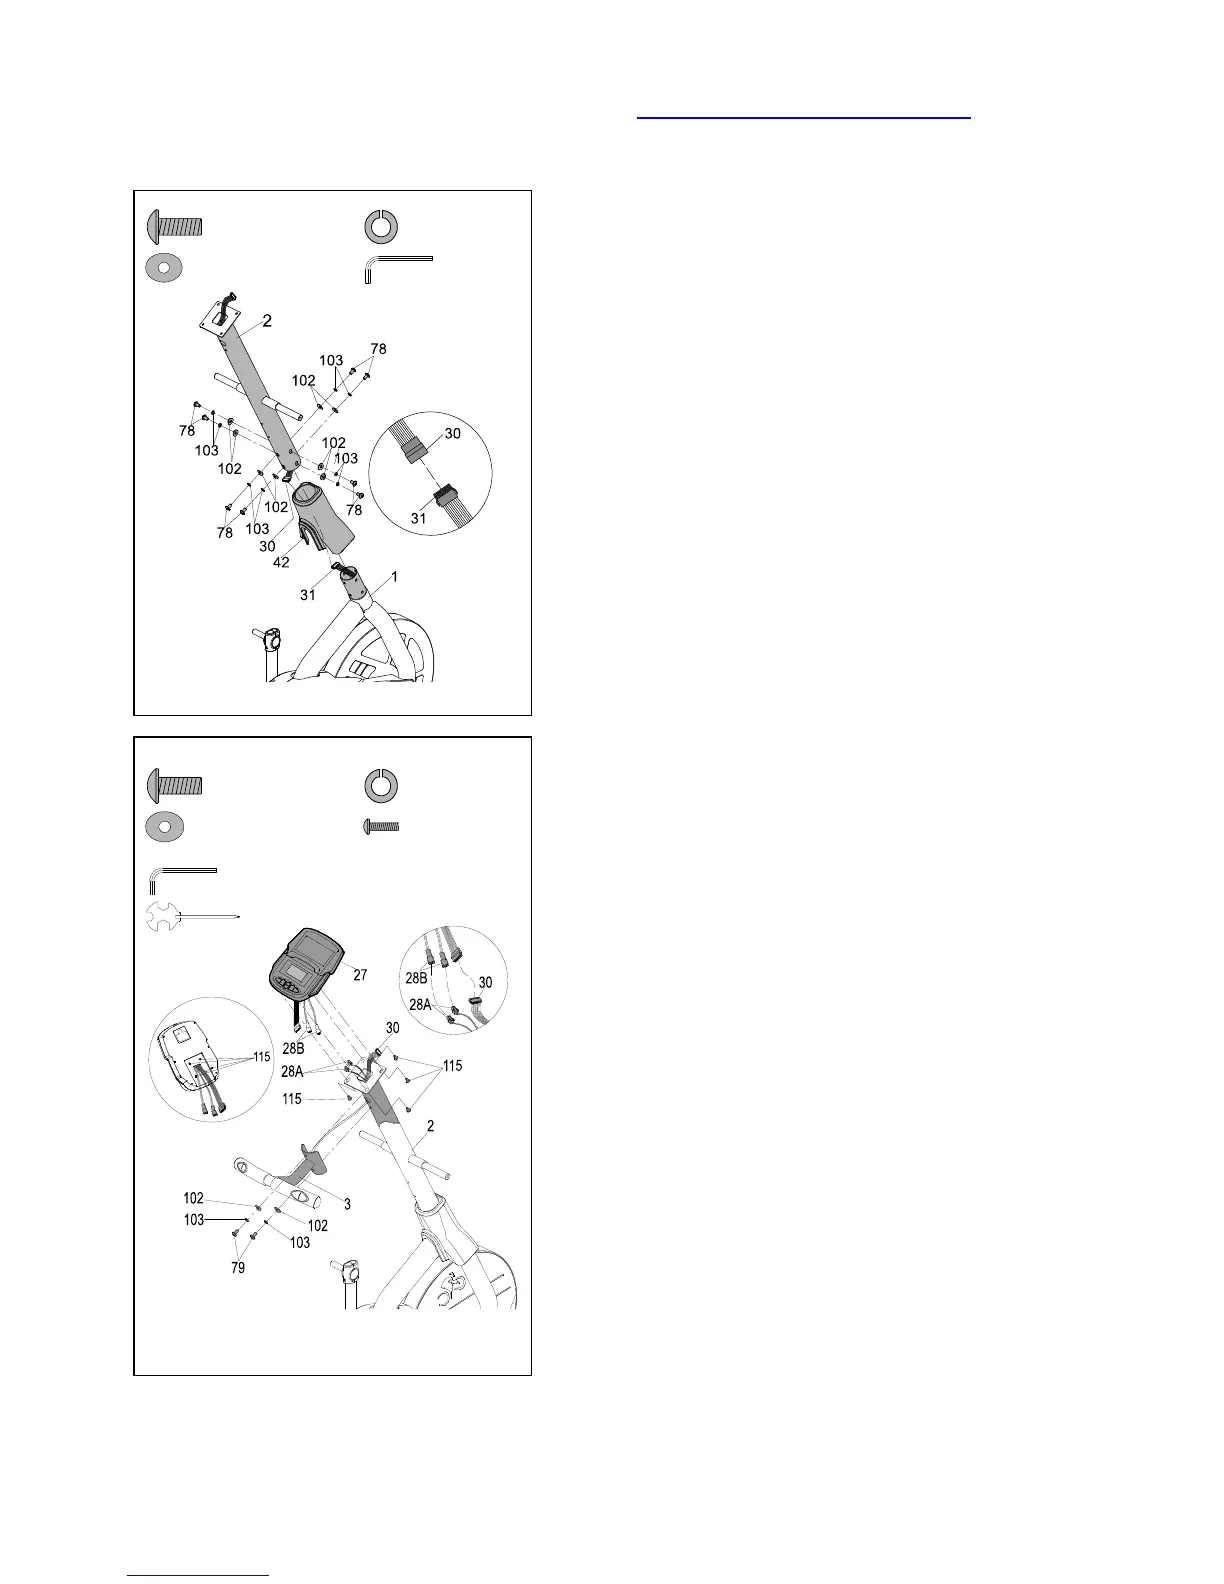
STEP 3:
Remove 8 Hex Socket Bolts (No. 78), 8 Spring
Washers (No. 103), and 8 Curve Washers (No.
102) from the Main Frame (No. 1).
Place the Upright Tube Cover (No. 42) onto the
Upright Tube (No. 2), and then connect the Upper
Cable (No. 30) with the Bottom Cable (No. 31).
Attach the Upright Tube (No. 2) to Main Frame (No.
1) using 8 Hex Socket Bolts (No. 78), 8 Spring
Washers (No. 103), and 8 Curve Washers (No. 102)
that were removed with Allen Wrench (No. A).
Note: Please do not fully tighten the Hex Socket
Bolts (No. 78).
STEP 4:
Remove 2 Hex Socket Bolts (No. 79), 2 Spring
Washers (No. 103), and 2 Curve Washers (No.
102) from the Upright Tube (No. 2).
Insert the Heart Rate Wire (No. 28A) into the side
hole of the Upright Tube (No. 2) and go out through
the top hole of the Upright Tube (No. 2). Attach
Fixed T Handle Bar (No. 3) onto Upright Tube (No.
2) with 2 Hex Socket Bolts (No. 79), 2 Spring
Washers (No. 103), and 2 Curve Washers (No.
102) that were removed. Tighten and secure with
Allen Wrench (No. A).
Remove 4 Screws (No. 115) from the back of the
Console (No. 27).
Connect the wire of Console (No. 27) to the Upper
Cable (No. 30) and connect the Heart Rate Wire
(No. 28A) with Heart Rate Wire (No. 28B), then
inside the extra wires into the Upright Tube (No. 2).
Attach the Console (No. 27) to the Upright Tube
(No. 2) with 4 Screws (No. 115) that were removed.
Tighten and secure with Spanner (No. B).
Note: Do not clip the cables when assembling the
Console (No. 27).