7
1 Add-on kit (part # SQ-ADDON) is required per extra system.
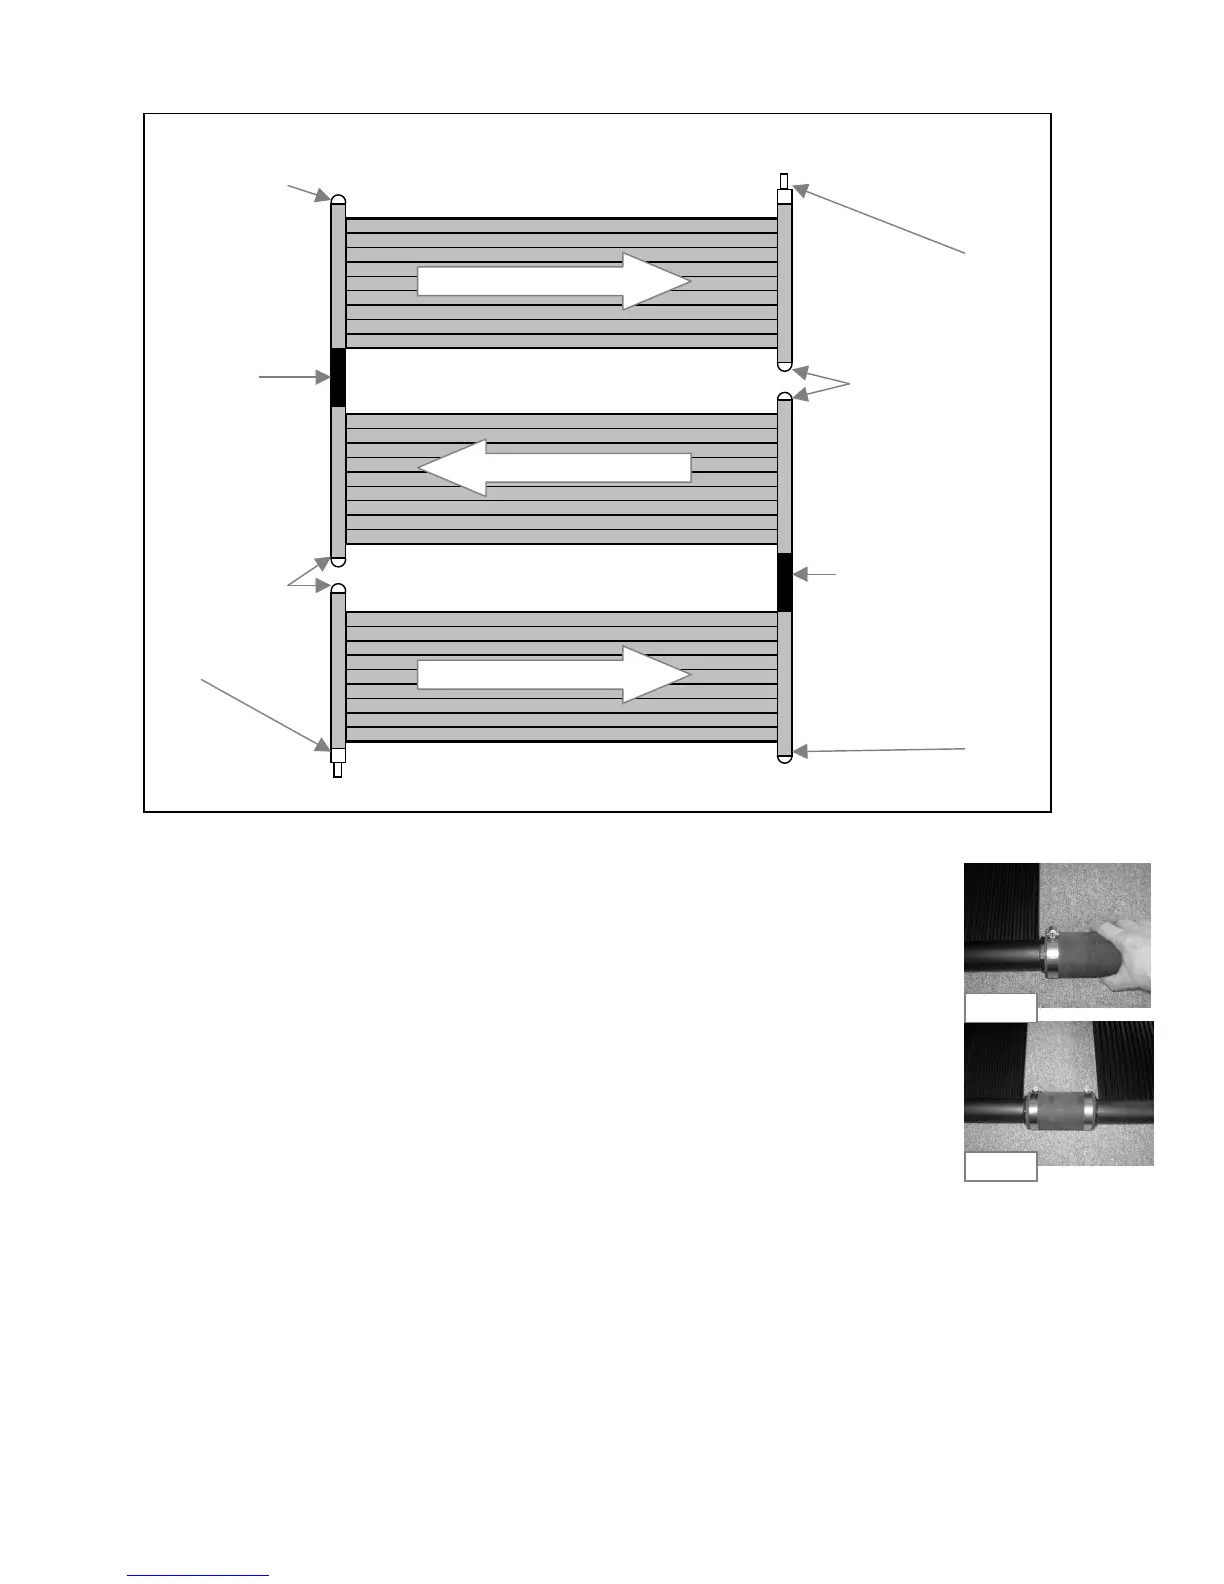
Diagram Step 3c
• Apply Teflon tape to threads of all the caps (SK-FTG-F ) See Fig 3a-1
• Thread all the caps into the panels as per Diagram Step 3c. Do not over tighten.
See Fig 3a-2
• Put "O" rings (SK-FTG-I) on two combination adapters (SK-FTG-D) See Fig 3a-3.
You will only need 2 combination adapters for this type of installation.
• Thread both combination adapters into the panels as per diagram Step 3c. Do not
over tighten. See Fig 3a-4
Note: For an even # of system the inlet and outlet will be on the same side
For and odd # of systems the inlet and outlet will be diagonally opposed
• Push the rubber hose (SK-FTG-J ) from the Add-on kit (SQ-ADDON) over the panel
header as per diagram Step 3c. Slide a metal collar (SK-FTG-L) onto the rubber hose.
Place a metal collar
1
/
4
" from edge and tighten collar with screwdriver. See Fig 3c-1.
Repeat for each system.
• Slide another metal collar onto the rubber hose. Connect the 2 panels together by
pushing the rubber hose over the second panel header. Tighten metal collar to secure
assembly. See Fig 3c-2. Repeat for each system.
Note: A maximum of 6 2ft panels (6 systems) may be plumbed in series
3 d) Installation: multiple systems on rack or roof. (Horizontal only)
Fig 3c-1
Fig 3c-2
7.5"
(Add-on kit)
7.5"
Inlet
Outlet