Select 107 XLS User Guide Page 3 of 7
Setting the Time and Date
Press SET button till the Y:00 icon (year) appears and the letter D flashes. Press the +/- button to set the
year. Press NEXT. N:00 appears (month). Press +/- button to set month. Press NEXT. d:00 appears (Day).
Press +/- button to set day.
Note: The unit will automatically return to run mode if a period of 5 minutes passes without any buttons being
pressed.
CHANGING PROGRAMME TIMES
The built in programme can be easily changed to better suit your needs
If unit is installed as a 7 day programmer, the initial programme displayed will be for Monday. You can go to
any day of the week by pressing DAY button repeatedly. The ON/OFF times can be changed for each day
as above. If you press COPY button, the current programme will be copied into the next day.
If unit is installed as a 5day/2day programmer, the initial programme displayed will be for Monday to Friday.
Pressing DAY button will take you to the programme for Saturday and Sunday. The ON/OFF times can be
changed for each day group as above. If you press COPY button, the current programme will be copied into
the next day group.
If the unit is installed as a 24hr. Programmer, the built in programme will be the same for each day (as for
Monday to Friday overleaf). The COPY function is not required if installed as a 24 hr. programmer.
To return to RUN mode, press SET button until the word RUN appears
Note
It is not possible to copy Sunday to Monday.
For convenience to allow for programmes to go past midnight, the programme day is from 03:00am to
02:50am the next day.
If your programme gets scrambled, or you want to start again, press the reset button using a non-metallic
tool to re-load the default programmes, then press any button to clear the DIP switch configuration code. The
unit should revert to time setting mode ready for programming.
USING ADVANCE
This function is only available when programme is in AUTO or ALLDAY operating modes.
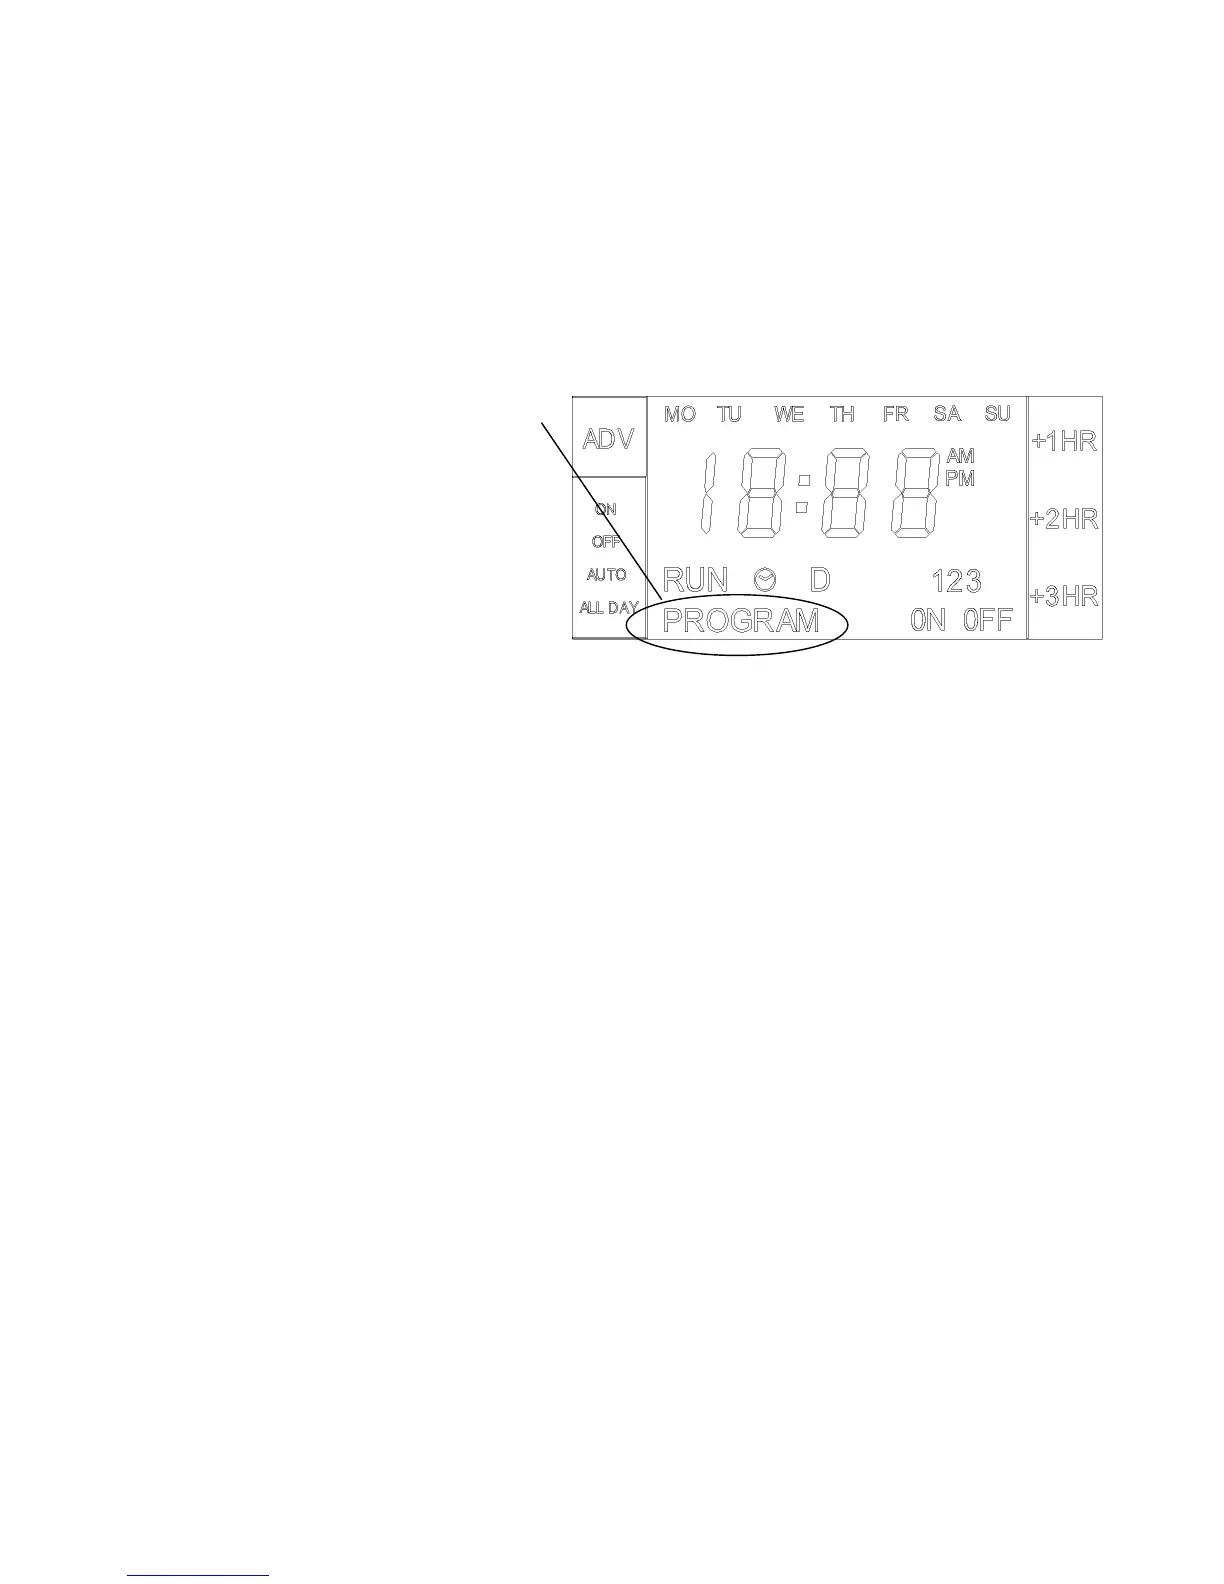
To change the programme, press SET until PROGRAM
icon flashes in the screen and 1 ON appears. This
indicates the time shown on the display is the first ON
time. Change this to the required ON time by pressing
the +/- buttons.
Press NEXT button, display will now show
1 OFF. Change as before.
Use the NEXT and +/- buttons in this way to programme
the second time period.
If the unit is set for three ON/OFF periods, the number 3
will appear. This is set in exactly the same way as the
previous first and second time period.
 Loading...