8
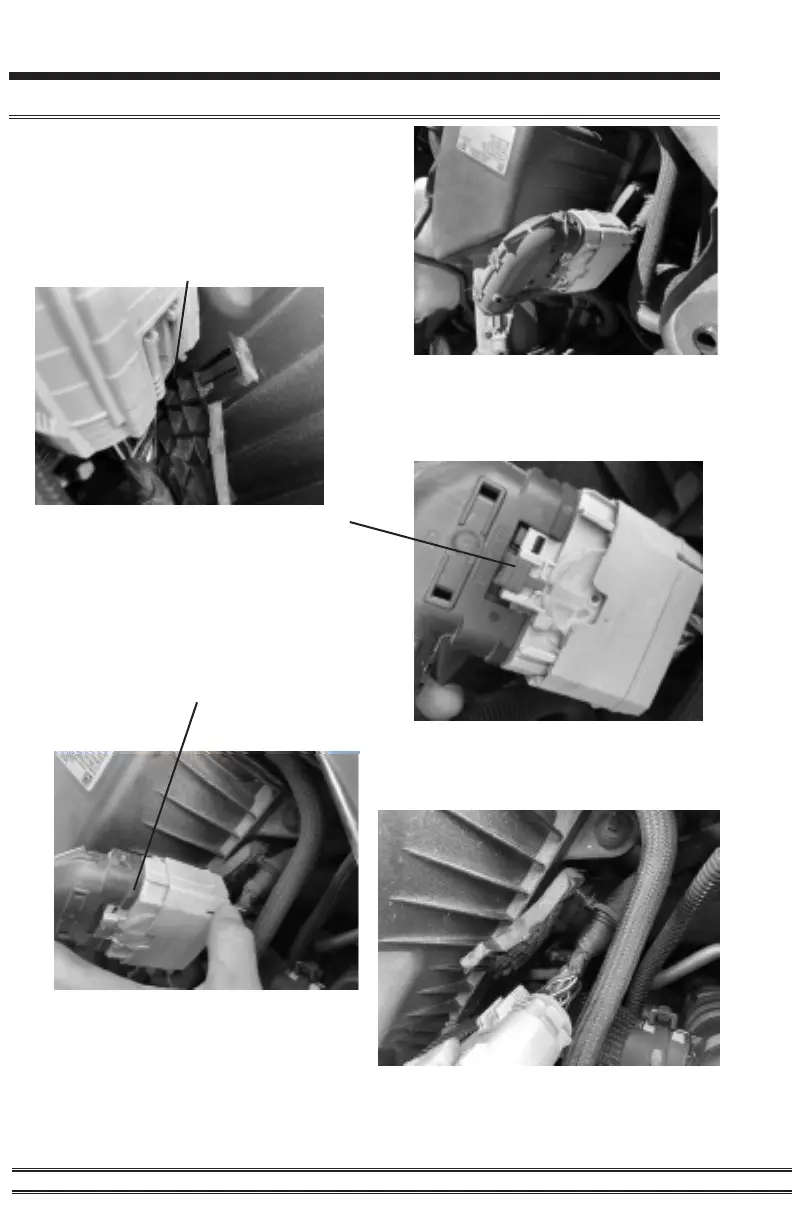
STEP 1 - Before installation, remove the
negative side battery terminal.
STEP 2 - Release the locking tab in the back
of the connector with a pick or small athead
screw driver as shown below.
NOTE: The connector is located
under the hood drivers side by the air
intake as shown in the above image.
STEP 3 - Release red locking tab by
pushing the red tab up as shown in
the right.
STEP 4 - Press the bottom right tab on
the connector inward to release. Then the
connector can slide upwards toward the red
tab to take it apart as shown below.
Pulsar LT Installation
STEP 5 - Remove the zip tie tree
from the bracket as seen below.