3-5
Chapter 3: Setup and Installation
3. Remove the air shroud that covers the DIMM slots.
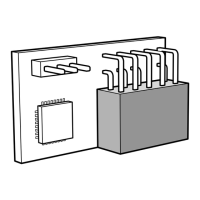
4. Insert each DIMM vertically into its slot, starting with slots A1 and A2. Pay attention
to the notch along the bottom of the module to prevent inserting the DIMM
incorrectly (see Figure 3-4).
5. Gently press down on the DIMM until it snaps into place in the slot. Repeat for all
modules.
6. Replace the air shroud and install the blade module back into the enclosure.
7. Power up the blade unit (see "Powering Up a MicroBlade Module Unit" on
page 3-1).
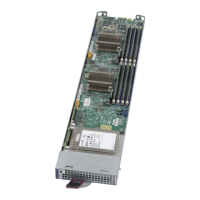
3-5 Hard Disk Drive Installation
Up to two 2.5" SATA3 (6 Gbps) HDD/SSD disk drives (only one per node) can be
installed in the MicroBlade module, and cannot be removed or replaced without
powering down the blade unit they reside in. A blade module needs a hard disk drive
with an operating system installed to operate. RAID 0, 1 and 10 are supported.
3-6 Installing the Operating System
An operating system (OS) must be installed on each MicroBlade module. Blades with
Microsoft Windows OS and blades with Linux OS can both occupy and operate within
the same blade enclosure. Refer to the SuperMicro web site for a complete list of
supported operating systems.
There are several methods of installing an OS to the blade modules.
Figure 3-4. Installing a DIMM into a Memory Slot
To Install: Insert module vertically
and press down until it snaps into
place. Pay attention to the bottom
notch.
To Remove: Use your thumbs to
gently push each release tab
outward to free the DIMM from the
slot.
Note: The notch should align with
the receptive key point on the
Side View
Top View
Notch
Release Tabs

 Loading...