31
Chapter 2: Installation
BIOS LICENSE
BAR CODE
BAR CODE
BAR CODE
BAR CODE
BAR CODE
DESIGNED IN USA
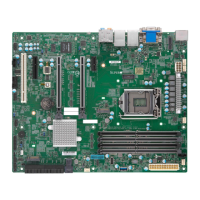
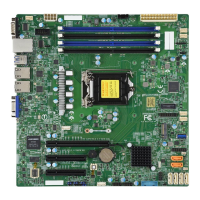
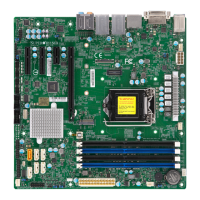
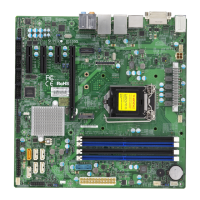
X11SCZ-Q
REV:1.10
CPU
2
1
21
C2
17
1
9
C4
C2
C5A
C1
24
16
8
C5A
A1
A2
A9
A10
B10
B9
B2
A11
B11
B12
B13
A12
A13
B12B1
B11B2
A1
A12
B12
B1
B11
B2
A1
A12
18
19
23
22
21 20
JPW1
2423
22
2
3 1 4
JGP1
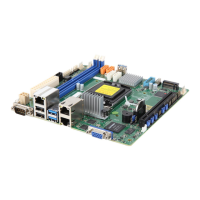
I-SATA0
I-SATA1
I-SATA2
I-SATA3
I-SATA4
I-SGPIO1
JPV1
JIPMB1
4
3
2
1
JPWR1
JPH1
JD1
JSMB1
FAN3
FAN1
FAN2
FAN4
FANB
FANA
JPT1
JPL2
JPL1
JPME2
JWD1
JSD1
JL1
SP1
AC
BT1
BMC_HB_LED1
A
C
LED1
C
SRW6
SRW5
4
95
1
JTPM1
JPAC1
JBT1
JF1
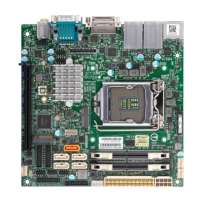
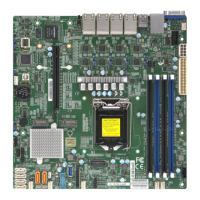
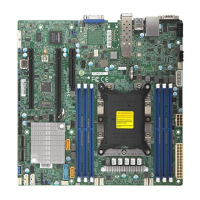
PCH
J18
DIMMA1
DIMMA2
DIMMB1
DIMMB2
JSD1:SATA DOM POWER
COM1/2
COM3/4
M.2:PCI-E 3.0x4
SUPERDOM
Always populate DIMMx1 first
JSMB1:SMBus1
JD1:
1-4:SPAKER
3-4:BUZZER
2-3:ME MANUFACTURING MODE
1-2:NORMAL
JPME2
JWD1:WATCHDOG
2-3:NMI
1-2:RST(Default)
JPG1:BMC VGA DISABLE JUMPER
1-2:NORMAL (DEFAULT)
2-3:DISABLE BMC VGA
JPAC1
1-2:Enable Audio(DEFAULT)
2-3:DISABLE Audio
JL1:CHASSIS INTRUSION
JPT1 TPM Enable/Disable
1-2:ENABLE
2-3:DISABLE
1-2:Enable
2-3:Disable2-3:Disable
1-2:Enable
JPL2:LAN2
JPL1:LAN1
CPU FAN
USB0
USB7/8 (3.0)
USB1/2
USB3/4
USB5/6
JMD1
2280
22110
USB13/14 (3.1)
LAN1/2
DVI-I/VGA
DP++ 1/2
AUDIO
AUDIO FP
PCH SLOT7 PCI-E 3.0x4(INx8)
CPU SLOT6 PCI-E 3.0x16
PCH SLOT4 PCI-E 3.0x4(INx8)
USB9/10 (3.1)
IPMI_LAN
USB11/12 (3.1)
UID SW
UID LED1
BMC
NMI
PWR
LED
X
HDD
LED
NIC1NIC2
OH
FF
X
RST
PWR
ON
JPG1
1
JRF1
1
JPI2C1
2-3:PEG 2x8
1-2:PEG 1x16
JRF1:
DIMM Installation
1. Insert DIMM modules in the following
order: DIMMA2, DIMMB2, then DIMMA1,
DIMMB1. For optimal performance, use
memory modules of the same type and
speed.
2. Push the release tabs outwards on both
ends of the DIMM slot to unlock it.
3. Align the key of the DIMM module with the
receptive point on the memory slot.
4. Align the notches on both ends of the
module against the receptive points on the
ends of the slot.
5. Press both ends of the module straight
down into the slot until the module snaps
into place.
6. Press the release tabs to the lock positions
to secure the DIMM module into the slot.
DIMM Removal
Reverse the steps above to remove the DIMM
modules from the motherboard.
Release Tabs
Notches
Press both notches
straight down into
the memory slot.
 Loading...