MNL-2005-QRG-10b
© 2018 Supermicro Computer Inc. All rights reserved. Reproduction of this document whether in part or in whole is strictly prohibited without Super-
micro's written consent. All Trademarks are property of their respective entities. All information provided is deemed accurate at the time of printing;
however, it is not guaranteed.
Notes
• Graphics shown in this quick reference guide are for illustration only. Your components may or
may not look exactly the same as drawings shown in this guide.
• Refer to Chapter 2 of the User Manual for detailed information on jumpers, connectors, LED
indicators, memory support and CPU/motherboard installation instructions.
Front Control Panel (JF1)
CPU Installation
Heatsink Installation
Back Panel I/O Connectors
A. PS/2 Keyboard/Mouse Port F. USB 3.0 Port 7 K. USB 3.0 Port 8 P. Line In
B. USB 2.0 Port 0 G. 5Gb LAN Port 1 L. USB 3.0 Port 9 Q. Line Out
C. USB 2.0 Port 1 H. USB 3.1 Port 12 M. Center/LFE Out R. Mic In
D. VGA Port I. USB 3.1 Port 13 N. Surround Out
E. USB 3.0 Port 6 J. 1Gb LAN Port 2 O. S/PDIF Out
G
H
I
J
K
L
O
P
A
B
C
D
E
F
N
M
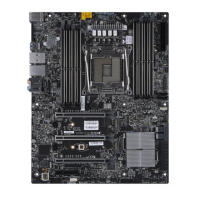
X11SRA
Q
R
Align Socket Keys
OPEN 1st
Screw #3
Screw #2
Screw #1
Screw #4
Power Button
1
NIC1 Activity LED
Reset Button
2
HDD LED
PWR LED
Reset
PWR
3.3 V
3.3V Stby
Ground
Ground
19 20
Power Fail LED
NIC2 Activity LED
3.3V Stby
X
X
NMI
Ground
Red+ (Blue LED Cathode)
Blue+ (OH/Fan Fail)
3.3V
3.3V Stby
 Loading...