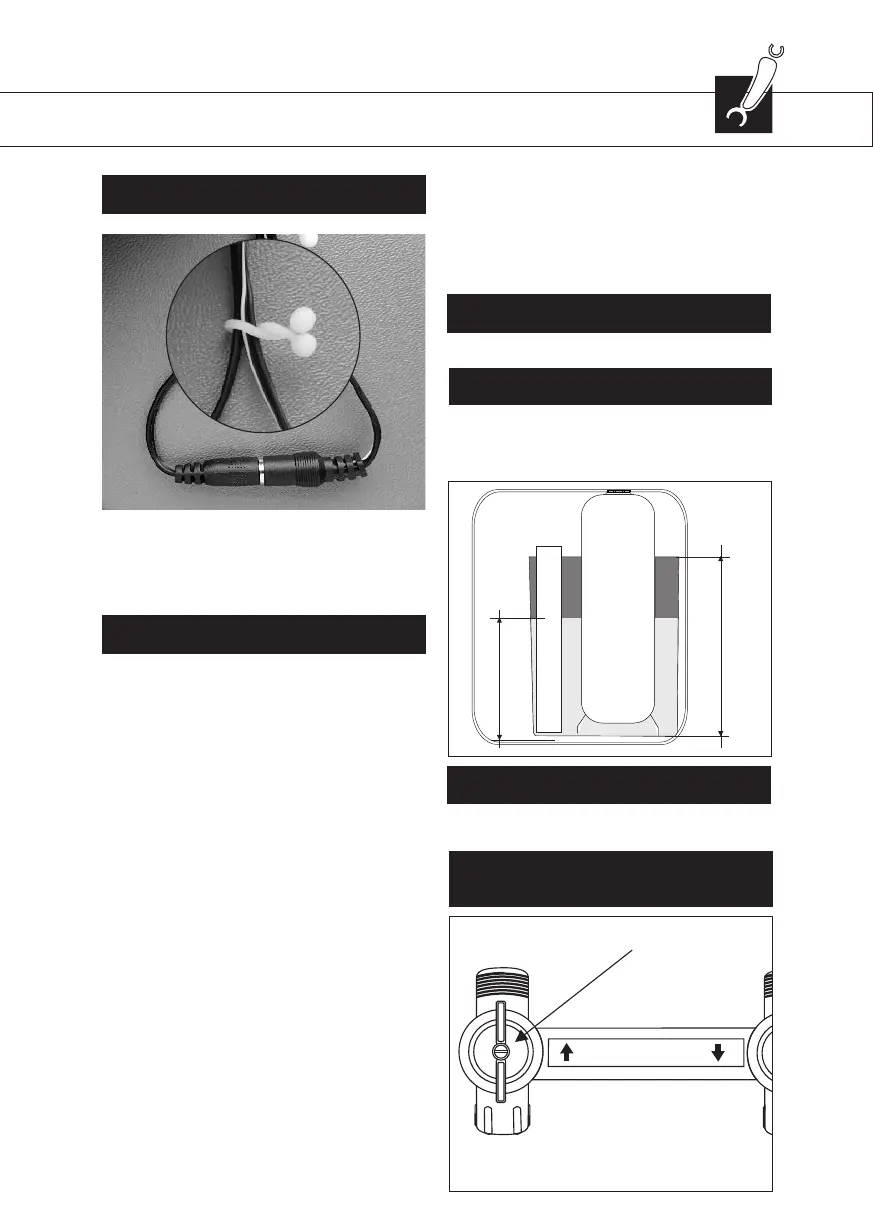
STEP 1. Plug the transformers output lead into the socket
on the appliances power cord; secure it by means
of the TwistLock clamp.
STEP 2. Plug the transformer into an electrical outlet.
STEP 1. Make sure the bypass system is in 'bypass'
position.
STEP 2. Make sure the electronic controller of the
appliance is in service mode.
STEP 3. Open the mains water supply.
STEP 4. Open a cold treated water faucet nearby
the appliance and let the water run for a few minutes until
all air is purged and all foreign material that may have
resulted from the installation is washed out; close the tap.
STEP 5. Gently pressurize the appliance, by putting
it into service:
factory bypass:
1. open the 'outlet' valve;
2. slowly open the 'inlet' valve.
3-valve bypass:
1. close the 'bypass' valve;
2. open the 'outlet' valve;
3. slowly open the 'inlet' valve.
STEP 6. After 2-3 minutes, open a cold treated water
faucet nearby the appliance and let the water run for a few
minutes until all air is purged from the installation
and the resin bed is rinsed (it is normal for the rinse water
to show some discoloration!); close the tap.
ELECTRICAL
8
COMMISSIONING
PRESSURIZING
STEP 7. Check the appliance and all hydraulic connections
for leaks.
After the first regenerations of the appliance, some slight
discoloration of the treated water might occur.
This is totally harmless and will disappear rapidly!
BRINE CABINET
STEP 1. Add water conditioner salt to the brine cabinet.
ELECTRONIC CONTROL PANEL
STEP 1. Program the electronic controller.
NOTE!
Fill the brine tank with salt up to 3/4 of its volume, then fill
the tank with water up to 1/2 of its volume (fill the tank
manually), wait approx. 6 hours until formation of brine
solution.
ADJUSTMENT RESIDUAL HARDNESS
WITH FACTORY BYPASS (optional)