Do you have a question about the Swann HD Pro-Series and is the answer not in the manual?
Default username 'admin' and password '12345', recommendation to change.
Default display mode showing all connected cameras, status, and operation.
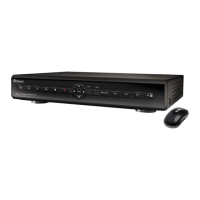
Central control point for DVR functions, playback, export, and firmware upgrades.
Menu items categorized on the left, clicking reveals tabs/sub-categories.
Options for resolution, bitrate, image settings, motion detection, video loss, and privacy masks.
Select which camera to configure settings for.
Access tools to adjust image brightness, contrast, saturation, and hue.
Enable privacy masks and define specific areas to obscure from view.
Define areas to mask for privacy or to minimize false motion triggers.
Select the camera for which to configure encoding parameters.
Configure main or sub stream parameters like resolution and bitrate.
Set the video resolution for the main stream (e.g., 720P or 960H).
Select the camera for motion detection configuration.
Configure the motion detection area for a camera.
Set a schedule for motion detection alerts.
Configure actions upon motion detection, like audio alerts or emails.
Motion detection detects presence and triggers alerts/recording.
Adjust motion sensitivity level (0-50) for different time periods.
Define specific areas for motion detection by clicking and dragging.
Default motion detection schedule is enabled; can be customized.
Recommendations for optimal camera placement for motion detection.
Tips to prevent false motion detection triggers from environmental factors.
Select the camera to configure for video loss alerts.
Set a schedule for video loss alerts.
Configure actions upon video loss, such as audio alerts or emails.
Select the camera for PTZ configuration.
Select the PTZ camera control protocol (e.g., PELCO-D).
Basic steps to control a PTZ camera via the interface.
Position the camera using PTZ controls for a preset.
Name and save a specific camera position as a preset.
Set up automated camera movement sequences using presets.
Associate a created preset position with a patrol sequence.
Access and modify recording settings like schedule and audio recording.
Enable audio recording for cameras connected via audio input.
Enable overwriting of old video files to manage hard drive space.
Enable pre-record function to capture footage before an event.
Set a duration for recording after an event has concluded.
Default recording schedule is motion-based; can be customized.
Configure DVR to record only when motion is detected.
Search and play recorded videos, choosing by schedule, manual, or motion events.
Save important recorded events to a USB storage device.
Select cameras for playback or choose all cameras.
Start playback of selected video (up to 4 channels synchronously).
Create video clips by marking in/out points for export.
Save selected video clips to a USB storage device.
Filter event search by camera or select all cameras.
Select cameras for backup or choose all cameras.
Connect a USB drive before starting the backup process.
Configure DVR settings like resolution, email, password, and Daylight Saving Time.
Perform firmware upgrades when new versions are available.
Activate password protection for menu access.
Choose network connection type: DHCP, Static, or PPPoE.
View DVR settings, options, and logged events for troubleshooting.
View current network configuration details like IP address and gateway.
View S.M.A.R.T. data for technical and performance information of the hard drive.
Access technical details and specifications of the DVR.
| Video Output | HDMI, VGA |
|---|---|
| Compression | H.264 |
| Connectivity | Ethernet |
| Remote Access | Yes |
| Operating System | Embedded Linux |
| Remote Viewing | Yes |
| Motion Detection | Yes |
| Recording Resolution | 1080p |
| USB Ports | 2 |
| Power Supply | 12V DC |