3
Preparation for Assembly
TOOLS NEEDED: Phillips head Screwdriver and a 3/8” open end wrench or a pair of pliers.
LAY OUT AND IDENTIFY ALL PARTS. DO NOT DISCARD CARTON OR PACKING UNTIL YOUR GRILL IS COMPLETELY
ASSEMBLED. READ ALL ASSEMBLY AND SAFETY INSTRUCTIONS IN THE OWNER’S MANUAL BEFORE YOU START.
The extra holes in the side of the bowl are for mounting convenient accessories (side tables and rotisserie).
For easier set-up, follow instructions of each step in the order they are written as you look at the diagrams.
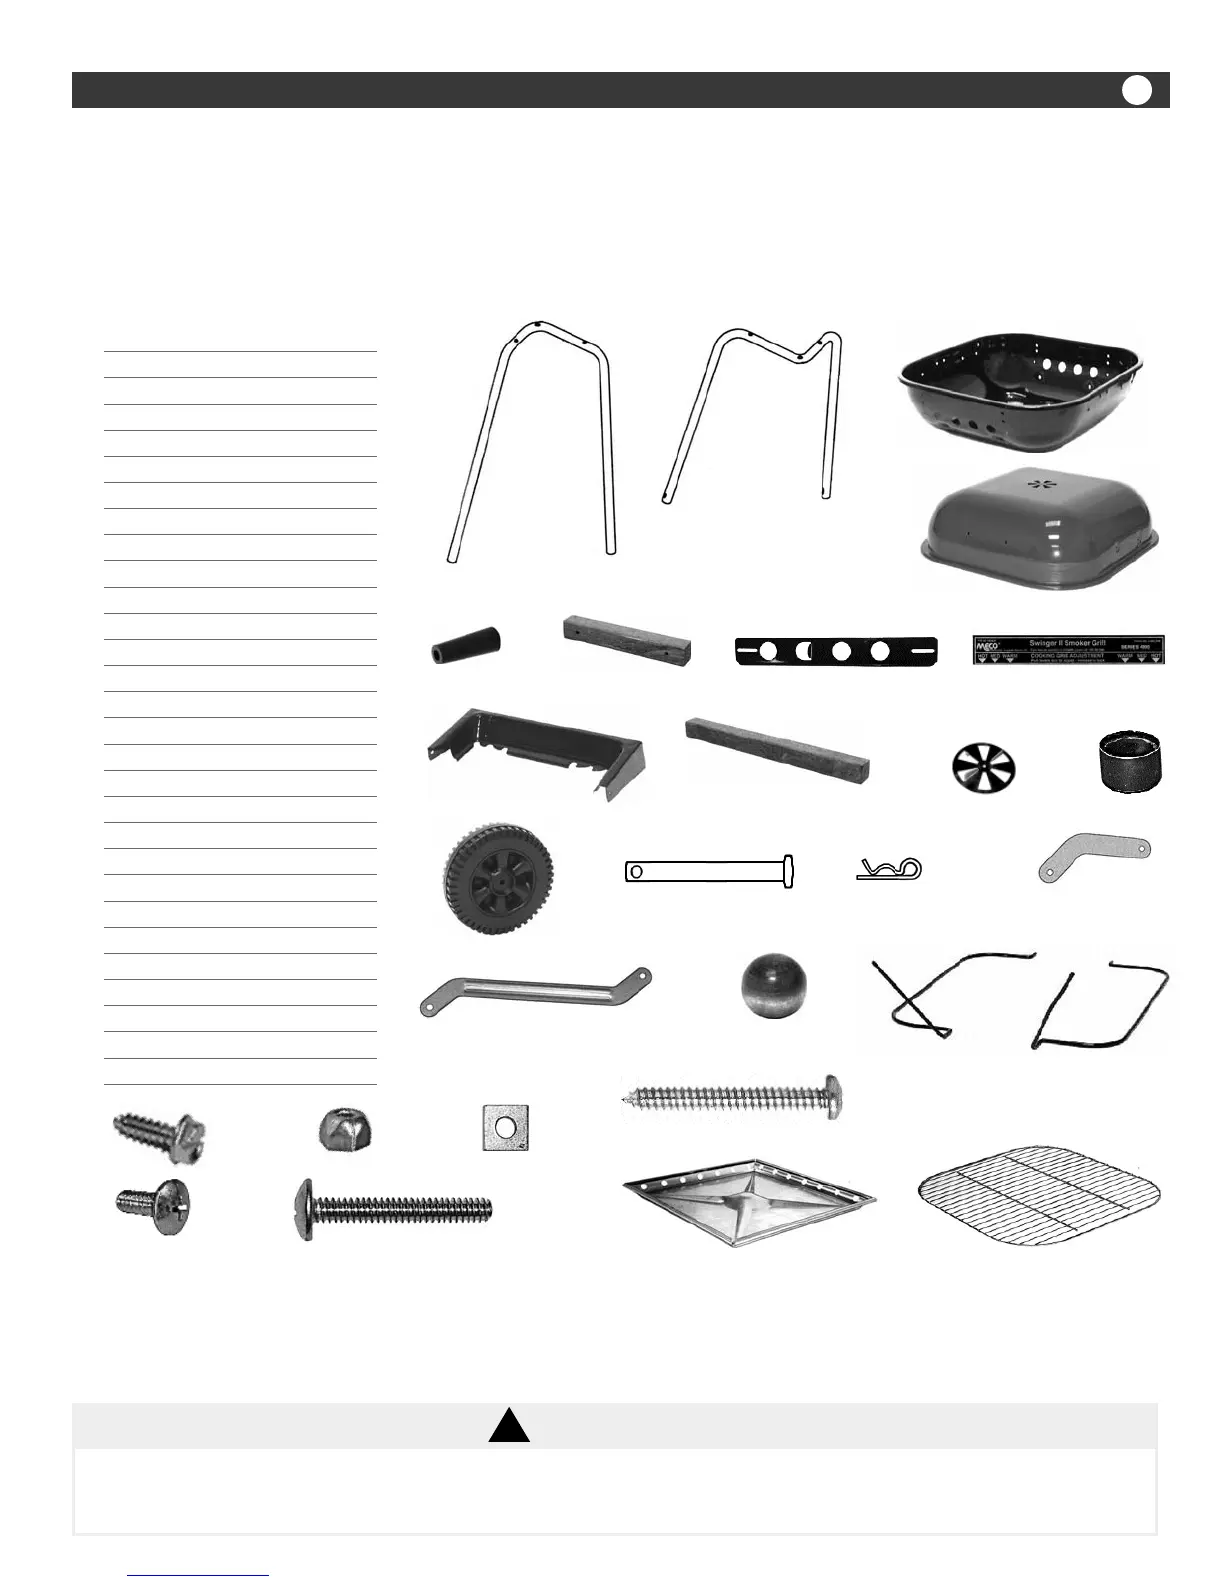
Part# Description Quantity
1 Owners Manual 1
2 Front Leg 1
3 Wheel Leg 1
4 Bowl 1
5 Hood 1
6 Handle Spacer 2
7 Hood Handle 1
8 Slide Vent 2
9 Control Label 1
10 Control Bracket 1
11 Hood Handle 1
12 Hood Vent 1
13 Leg Cap 2
14 Wheel 2
15 Axle 2
16 Cotter Pin 2
17 Hinge, Short 2
18 Hinge, Long 2
19 Knob, Adjusting Rod 2
20 Left Adjusting Rod 1
21 Right Adjusting Rod 1
22 Screw, #8 x 5/8” 2
23 Acorn Locknut 13
24 Square Nut 10
25 Screw #10 x 1 3/4” 2
26 Bolt, 10-24 x 1/2” 17
27 Bolt, 10-24 x 1 1/4” 6
28 Ash Pan 1
29 Cooking Grid 1
15
17
18
To reduce the risk of a cut, pinching or other bodily injury: Wear protective gloves when handling parts that could
have sharp edges, keep hands and fingers away from hinges and pivot points. Read and follow these instructions
to set up your grill.
If you need replacement parts, refer to the Parts Illustrations to find the exact parts you need. If you have any questions
or need help, contact Customer Service at 1-800-251-7558 or go to www.onefiregrills.com. Be sure to have the grill
model number. If you need a replacement part under warranty, a proof of purchase will be necessary. You will
be asked to forward your proof of purchase via e-mail or to fax your proof of purchase to 423-639-2570 and reference
your model number. It is important to register your grill and retain your receipt.
CAUTION
!
2 3
14
13
5
8
16
Note: The Wheel Leg has hole
at the bottom of each end and
is shorter than Front Leg
12
22
23
26
27
28
29
4
24
20
7
9
10
11
6
20
21
19
 Loading...