4
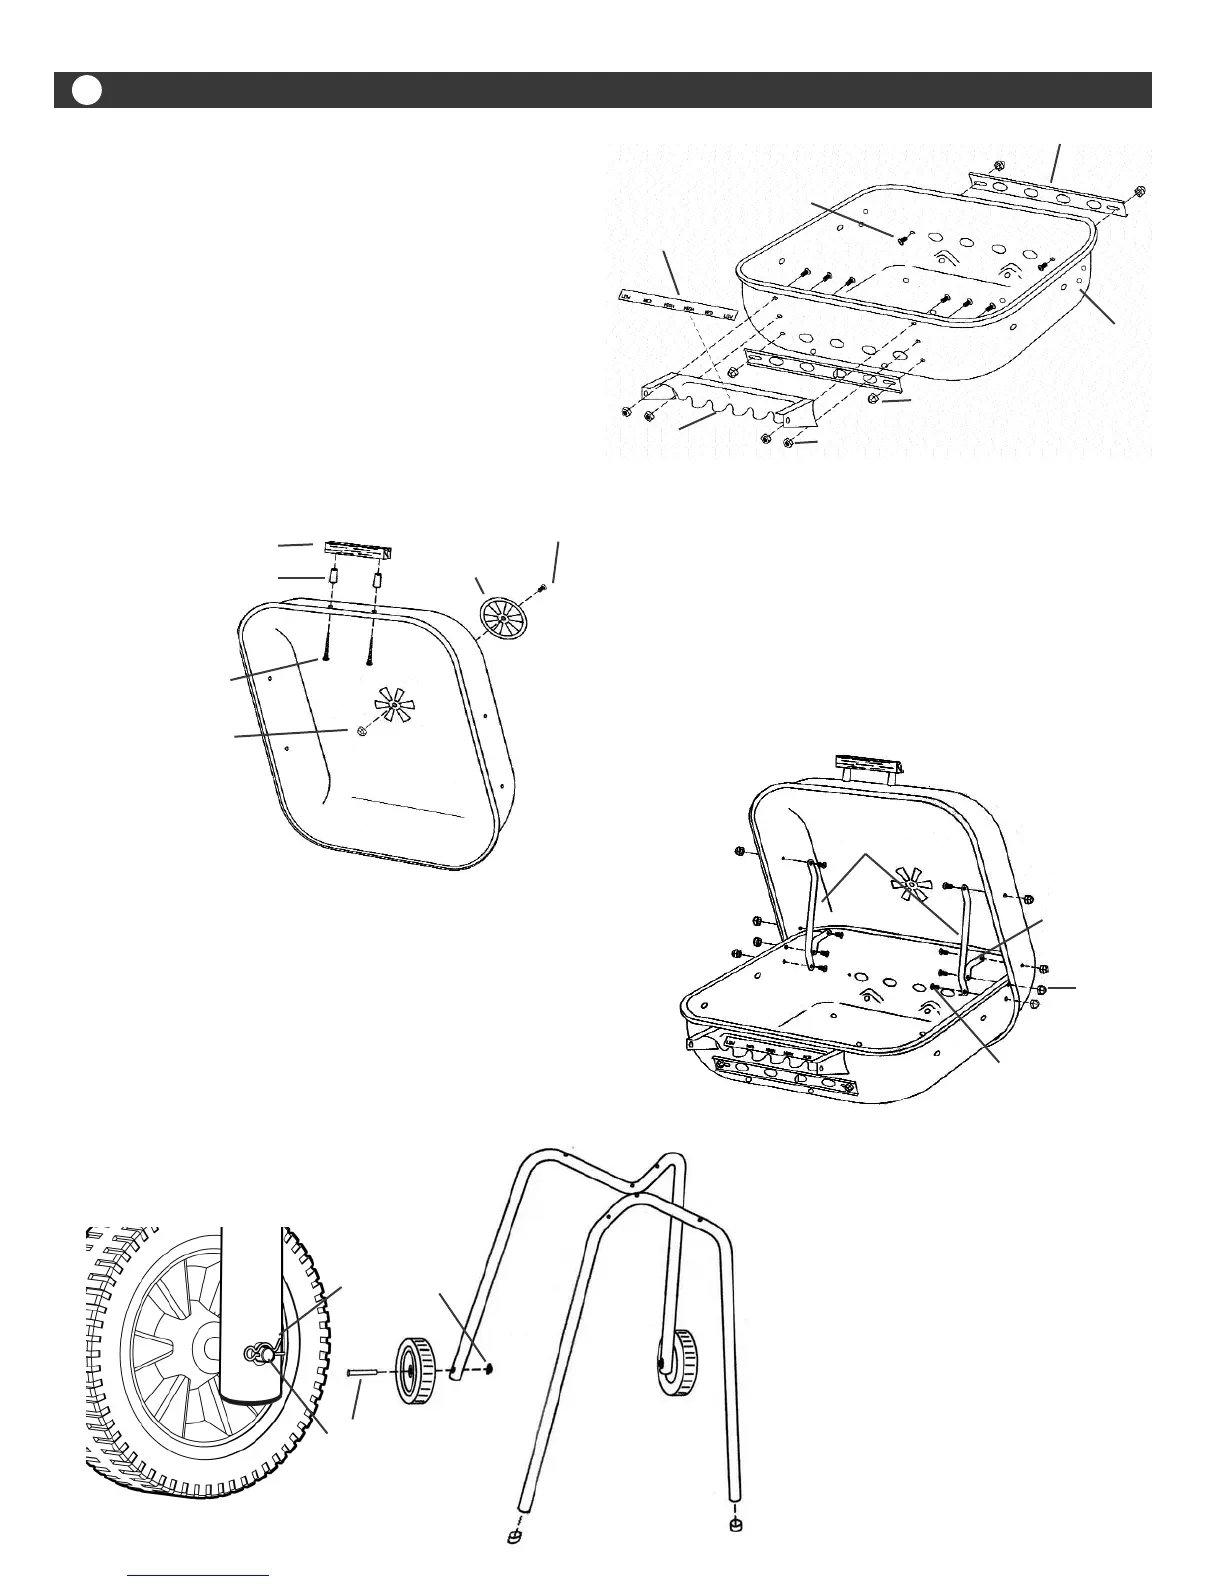
Step 1
Bowl / Slide Vent Assembly
Attach Slide Vent Covers to front and rear of Bowl.
(FIG. 1) Insert 10-24x1/2” Bolts through inside of Bowl
and attach Acorn Locknuts to Bolts from opposite side.
Do not tighten completely so Vent Covers will slide
freely from right to left.
Attach Control Bracket to front of Bowl with four
10-24x1/2” Bolts through inside of Bowl. Attach four
10-24 Square Nuts from opposite side. Peel backing
strip slowly from Control Label and apply to Control
Bracket. Center label on the
bracket and align High, Med and Low indicators with
the notches.
FIG. 1
10-24 x 1/2” Bolt
Control Label
Control Bracket
Square Nut
Acorn Locknut
Hinge holes
to rear of
bowl
Slide Vent Cover
FIG. 2
Hood Handle
Handle Spacer
#10 x 1 3/4” Screw
Acorn Locknut
Hood Vent Cover
10-24 x 1/2” Bolt
FIG. 3
Long Hinge
Short Hinge
Acorn
Locknut
10-24 x 1/2” Bolt
Step 4
Front Leg Assembly
(FIG. 4A) Install Leg Caps on ends of Front Leg
Note: The Front Leg does not have holes at the
end near the Leg Caps.
Wheel Leg Assembly
Insert an Axle through the center hole on the
recessed side of the Wheel. (The opposite side
that is placed against the leg tube has a raised
cone shaped center.) Insert the end of the axle,
that extends through the wheel, through the
hole in the end of the Leg Tube. Fasten in place
by inserting the Cotter Pin through the hole in
the end of the Axle (FIG. 4B).
FIG. 4
FIG. 4A
Cotter Pin
Axle
Step 2
Hood Assembly
Assemble Hood Handle and Spacers to Hood with two
#10 x 1 3/4” Screws from inside of Hood. (FIG. 2) Place
the wide end of spacers toward the Hood surface. Tighten
completely. Attach Hood Vent Cover on top of Hood with
one 10-24 x 1/2” Bolt and Acorn Locknut. Do not tighten
completely.
Step 3
Hinge Assembly
Attach Long and Short Hinges to Hood and Bowl. (FIG. 3) Insert
eight 10-24x1/2” Bolts through Hinge holes from inside Hood
and Bowl. Attach Acorn Locknuts to Bolts from the outside. Do
not install Bolts and Nuts the opposite way. Do not tighten com-
pletely so Hood will raise and lower freely.
 Loading...