SWS Warning Lights Inc. – 7695 Blackburn Pkwy., Niagara Falls, ON, Canada
Tel: 1-877-357-0222 | Fax: 1-905-357-9122 | Email: sales@warninglightsinc.com
300103_Rev.8
1 | P a g e
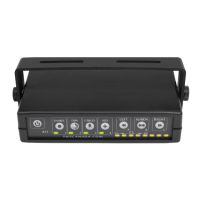
77501 Traffic Director & Arrow Control Box
The following is a list of recommended practices for the installation and operation of your product.
FAILURE TO FOLLOW THESE SAFETY PRECAUTIONS AND INSTRUCTIONS COULD RESULT IN DAMAGE TO
THE PRODUCT OR VEHICLE AND/OR SERIOUS INJURY AND/OR DEATH TO YOU AND YOUR PASSENGERS
Proper installation of this product requires the installer to have a good understanding of automotive electronics,
systems and procedures. You may need to consult a professional for installation.
SWS Warning Lights Inc. recommends the use of waterproof butt splices and/or connectors for all electrical
connections. It is recommended that the use of good dielectric grease be used on all connections where
possible.
If mounting this product requires drilling holes, the installer must be sure that no vehicle components or other
vital parts could be damaged by the drilling process. Also de-burr the holes and remove any metal shards or
remnants. Grommets are recommended for all wire holes.
Do not mount the light close to antennae or radio equipment, as they may cause electromagnetic interference.
After installation of the light, it is necessary to test all electronic equipment simultaneously to ensure that they
operate free of interference from other components within the vehicle.
Never power emergency warning equipment from the same circuit or share the same grounding circuit with
radio communication equipment.
Do not install this product or route any wires in the deployment area of your air bag or areas that interfere with
the operation of the vehicle. Refer to your vehicle owner’s manual for the air bag deployment area and
recommended mounting areas for warning lights and other equipment.
Do not attempt to activate or control the device with the vehicle in motion or in a hazardous driving
environment. The vehicle should be stopped and in park before control of the light is attempted.
Always be aware of the pattern and its effect on traffic when activating the Traffic Directing Device.
Do not stare directly into these lights. Momentary blindness and/or eye damage could result.
Use only soap and water to clean the product. Use of other chemicals could result in degradation and
discolouration of the lens/dome.
Do not use a pressure washer to clean this product.
Inspect and operate this product regularly to confirm its proper operation and mounting condition.
It is recommended that these instructions be stored in a safe place and referred to when performing
maintenance and/or reinstallation of this product.
SWS endeavours to maintain installation instructions for its products according to the latest requirements of
vehicle manufacturers. SWS cannot guarantee, and shall not be held liable for, changes or updates a vehicle
manufacturer may make which render SWS’s products inoperable or otherwise.
SWS Warning Lights Inc. and its subsidiaries are not responsible for any damages due to improperly mounted
or improperly wired lighting equipment.