Do you have a question about the Synology RackStation RS217 and is the answer not in the manual?
Lists the items included in the product package.
Provides a detailed overview of the RackStation's ports and indicators.
Outlines critical safety precautions for handling and operating the device.
Lists necessary tools and components for installing hard drives.
Step-by-step guide for physically installing hard drives into the unit.
Instructions for attaching rack mount kits to the unit for server rack installation.
Guide on connecting power and network cables and turning on the device.
Instructions for installing the DiskStation Manager (DSM) operating system using Web Assistant.
Provides information on where to find additional resources for the RackStation.
This document serves as the Hardware Installation Guide for the Synology RackStation RS217, a network-attached storage (NAS) device designed for data management and storage. The guide outlines the steps for setting up the hardware, installing the operating system, and provides an overview of the device's components and LED indicators.
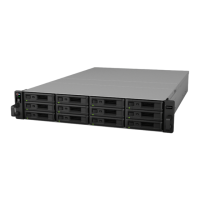
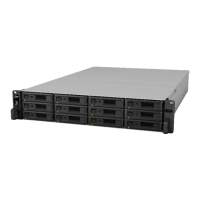
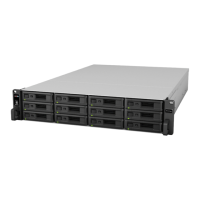
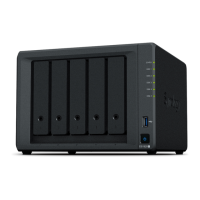
The Synology RackStation RS217 functions as a centralized storage solution, allowing users to store, share, and manage data across a network. It is designed to be rack-mountable, making it suitable for deployment in server environments. The device supports the installation of multiple hard drives, enabling users to create various RAID configurations for data redundancy and performance optimization.
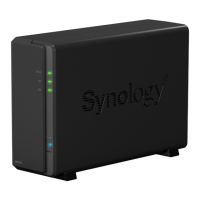
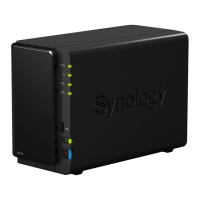
The RS217 is equipped with several ports and indicators to facilitate its operation and connectivity. On the front panel, it features USB 2.0 ports, status indicators for the system and individual drives, a power indicator, and a power button. The power button allows users to power on the RackStation with a single press. To power off the device, users need to press and hold the power button until a beep sound is heard and the Power LED starts blinking, indicating a graceful shutdown. Drive trays are also located on the front panel, providing easy access for installing and removing drives.
The rear panel of the RS217 offers additional connectivity options. It includes a power port for connecting the AC power cord, fan units for system cooling, an eSATA port for connecting external SATA drives, a console port (for manufacturing use only), and LAN ports for network connectivity. The device also features a RESET button on the rear panel, which serves two primary functions. A short press and hold (until a beep sound) restores the default IP address, DNS server, and password for the admin account. A longer press and hold (until three beep sounds) returns the RackStation to a "Not Installed" status, allowing for the reinstallation of DiskStation Manager (DSM). USB 3.0 ports are also available on the rear for connecting external hard drives, USB printers, or other USB devices.
Setting up the RS217 involves a straightforward hardware installation process. Users begin by removing the drive trays, loading either 3.5-inch or 2.5-inch SATA drives into them, and securing the drives with screws. The guide provides clear instructions and illustrations for placing the drives correctly within the trays and tightening the screws. Once the drives are loaded, the trays are inserted back into the empty hard drive bays until they are completely seated. The handle of each drive tray is then pressed inward to secure it, and a drive tray key is used to lock the handle, preventing accidental removal. The process is repeated for all prepared drives. For rack-mounting, two rack mount kits are fixed on both sides of the device using provided screws.
After the physical hardware is set up, the next step is to connect the RackStation to power and the network. The power cord is connected to the power port on the back of the device and then to a power outlet. At least one LAN cable is connected from one of the LAN ports on the RackStation to a switch, router, or hub. Finally, the power button is pressed to turn on the RackStation, making it online and detectable from a network computer.
The device's operating system, DiskStation Manager (DSM), is installed using a built-in tool called Web Assistant. Users access Web Assistant by opening a web browser on a computer within the same network as the RackStation and entering either "find.synology.com" or "rackstation:5000" into the address bar. Web Assistant then searches for and finds the RackStation, which should appear with a "Not Installed" status. Users click "Connect" to initiate the setup process and follow the on-screen instructions. It is important that the RackStation is connected to the internet for DSM installation via Web Assistant and that both the RackStation and the computer are on the same local network.
The RS217 incorporates several safety instructions to ensure proper handling and longevity. Users are advised to keep the device away from direct sunlight and chemicals, and to ensure the environment does not experience abrupt changes in temperature or humidity. The product should always be placed right side up and away from liquids.
For cleaning, the power cord must be unplugged, and the device should be wiped with damp paper towels, avoiding chemical or aerosol cleaners. To prevent the unit from falling, it should not be placed on carts or unstable surfaces. It is crucial to plug the power cord into the correct and stable supply voltage. To completely remove electrical current, all power cords must be disconnected from the power source. The device also includes a battery, and users are warned about the risk of explosion if the battery is replaced with an incorrect type, emphasizing the need for appropriate disposal of used batteries.
The LED indicators provide crucial information about the system's status, aiding in troubleshooting and monitoring. The Status Indicator, for instance, can show if the volume is normal, not created, degraded/crashed, or if DSM is not installed. It also indicates HDD hibernation. Drive Status Indicators show whether installed drives are ready and idle, accessing data, or if there's a drive error/port disabled. The Power Indicator shows if the device is powered on, booting up/shutting down, or powered off. LAN indicators show network connectivity and activity, distinguishing between Gigabit, 100 Mbps, and 10 Mbps connections, or no network. If a fan malfunctions, the RackStation will emit a beeping sound, alerting users to a potential issue that requires attention to prevent overheating. In case of drive errors, users are advised to restart the RackStation or re-insert the drive(s), and then run the HDD/SSD manufacturer's diagnostic tool or the built-in S.M.A.R.T. test within DSM to check the health status of the drive(s). If problems persist, contacting Synology Technical Support is recommended.
| Type | NAS |
|---|---|
| Device class | Home & Home Office |
| Backup features | iSCSI LUN |
| Access Control List (ACL) | Yes |
| Processor cores | 2 |
| Processor model | 88F6820 |
| Processor family | Marvell Armada 385 |
| Processor frequency | 1.33 GHz |
| Certification | EAC CCC RCM KC FCC CE BSMI |
| Internal memory | 0.5 GB |
| Internal memory type | DDR3 |
| AC input voltage | 100-240 V |
| AC input frequency | 50 - 60 Hz |
| Power supply location | Built-in |
| Number of power supply units | 1 |
| Power supply unit (PSU) capacity | 100 W |
| Wi-Fi | No |
| Ethernet LAN data rates | 10, 100, 1000 Mbit/s |
| Supported network protocols | CIFS, AFP, NFS, FTP, WebDAV, CalDAV, iSCSI, Telnet, SSH, SNMP, VPN (PPTP, OpenVPN) |
| Storage temperature (T-T) | -20 - 60 °C |
| Operating temperature (T-T) | 5 - 50 °C |
| Operating relative humidity (H-H) | 5 - 95 % |
| Chassis type | Rack (1U) |
| Cooling type | Active |
| Fan diameter | 40 mm |
| Product color | Black, Grey |
| Number of fans | 3 fan(s) |
| RAID levels | 0, 1, JBOD |
| Storage drive size | - \ |
| Storage drive capacity | 8000 GB |
| Supported file systems | FAT, HFS+, NTFS, exFAT, ext3, ext4 |
| Storage drive interface | - |
| Installed storage drive type | HDD |
| Storage drive sizes supported | 2.5, 3.5 \ |
| Supported storage drive types | HDD & SSD |
| Total installed storage capacity | 16 TB |
| Supported storage drive interfaces | Serial ATA |
| Cables included | AC |
| Fiber ports quantity | 0 |
| USB 2.0 ports quantity | USB 2.0 ports have a data transmission speed of 480 Mbps, and are backwards compatible with USB 1.1 ports. You can connect all kinds of peripheral devices to them. |
| Operating system installed | DiskStation Manager |
| Sustainability certificates | RoHS |
| Depth | 295.5 mm |
|---|---|
| Width | 435.6 mm |
| Height | 44 mm |