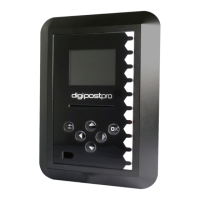
digipostpro with Clocking Module
digipostpro with Clocking Moduledigipostpro with Clocking Module
digipostpro with Clocking Module
Page - 26
Assigning a ngerprint to an RFID clocking card/tag
To assign a ngerprint to an RFID card/tag, the ‘Re-
register’ function needs to be enabled within Clocking
Options (see page 25).
First, place the appropriate RFID card/tag against the ‘tap card’
icon until the blue progress bar is full and you hear a beep (if
sounds are enabled). A screen with a ngerprint icon will then
appear. Place your nger against the ngerprint reader before it
times out (the blue bar acts as a countdown indicator). Attempt to
scan your nger. As your ngerprint is not assigned to the card/
tag, this will fail and you will navigate to the ngerprint failed
menu.
Within the menu, select ‘Re-register’ (if enabled). This will prompt
you to scan the same nger three times. If successful, scan the
card/tag once more before the screen times out to assign your
ngerprint to that card/tag.
Using the device - Clock In/Out and Start/End Break
Place RFID clocking tag or card
against the 'tap card' icon until
the blue progress bar is full and
you hear a 'beep' (if sounds are
enabled). Then scan the nger
with the ngerprint assigned to
that RFID card/tag using the
ngerprint scanner.
If successful, you will navigate to the clocking screen
(see above). Using the arrow buttons, select what you
want to do (Clock In/Out or Start/End Break).
The buttons are congurable (p.29) so
menu may appear dierent to above image
Clock
Out
End Break
Start Break
Clock
In
digipostpro with Clocking Module
digipostpro with Clocking Moduledigipostpro with Clocking Module
digipostpro with Clocking Module
Page - 27
Failed ngerprint authorisation
If a ngerprint fails to read successfully, you will
navigate to the ngerprint failed menu. If all options are
enabled, you have three options:
- Retry - allows you to retry ngerprint recognition.
- Skip (if enabled), allows you to by-pass the ngerprint
conrmation. While this will still allow you to access the clocking
options (to clock in/out and begin/end break), it will also log that
the clocking card was used without ngerprint conrmation.
- Re-register - if enabled, this allows a user to assign a new
ngerprint to that card (see page 30). As with the ‘skip’ function,
this action will be logged.
Please Note: All actions performed by the clocking module will be
sent as a log packet to digiCentral. This means that any incorrect
methods of clocking or failed authorisation attempts will be
recorded.
Server Options with Clocking
It is only possible to upload Clocking logs when using the full
digiCentral server option. Other server options (digiFFS;
digiConnect; and digiCentral XML) will simply discard any
clocking logs if an upload is attempted.
If connected to a network, the clocking logs will be sent
immediately to digiCentral. If these logs need to be forwarded
onto another clocking provider, this will need to be setup on
digiCentral.
If the digipostpro is not connected to a network, the clocking logs
will be sent the next time a connection is established.
 Loading...