M2000-00
T2000-A03/-A04/-A16 Remote Loom Kits
8.16.3
Copyright TEL 31/12/97
T2000-A16 kit: Remove the screw from the control head that secures the control
head ground lead. Discard the ground lead, and use this screw to secure the
remote loom drain wire solder tag to the control head PCB.
Note:
Ensure that the tag does not make contact with any devices in the control head.
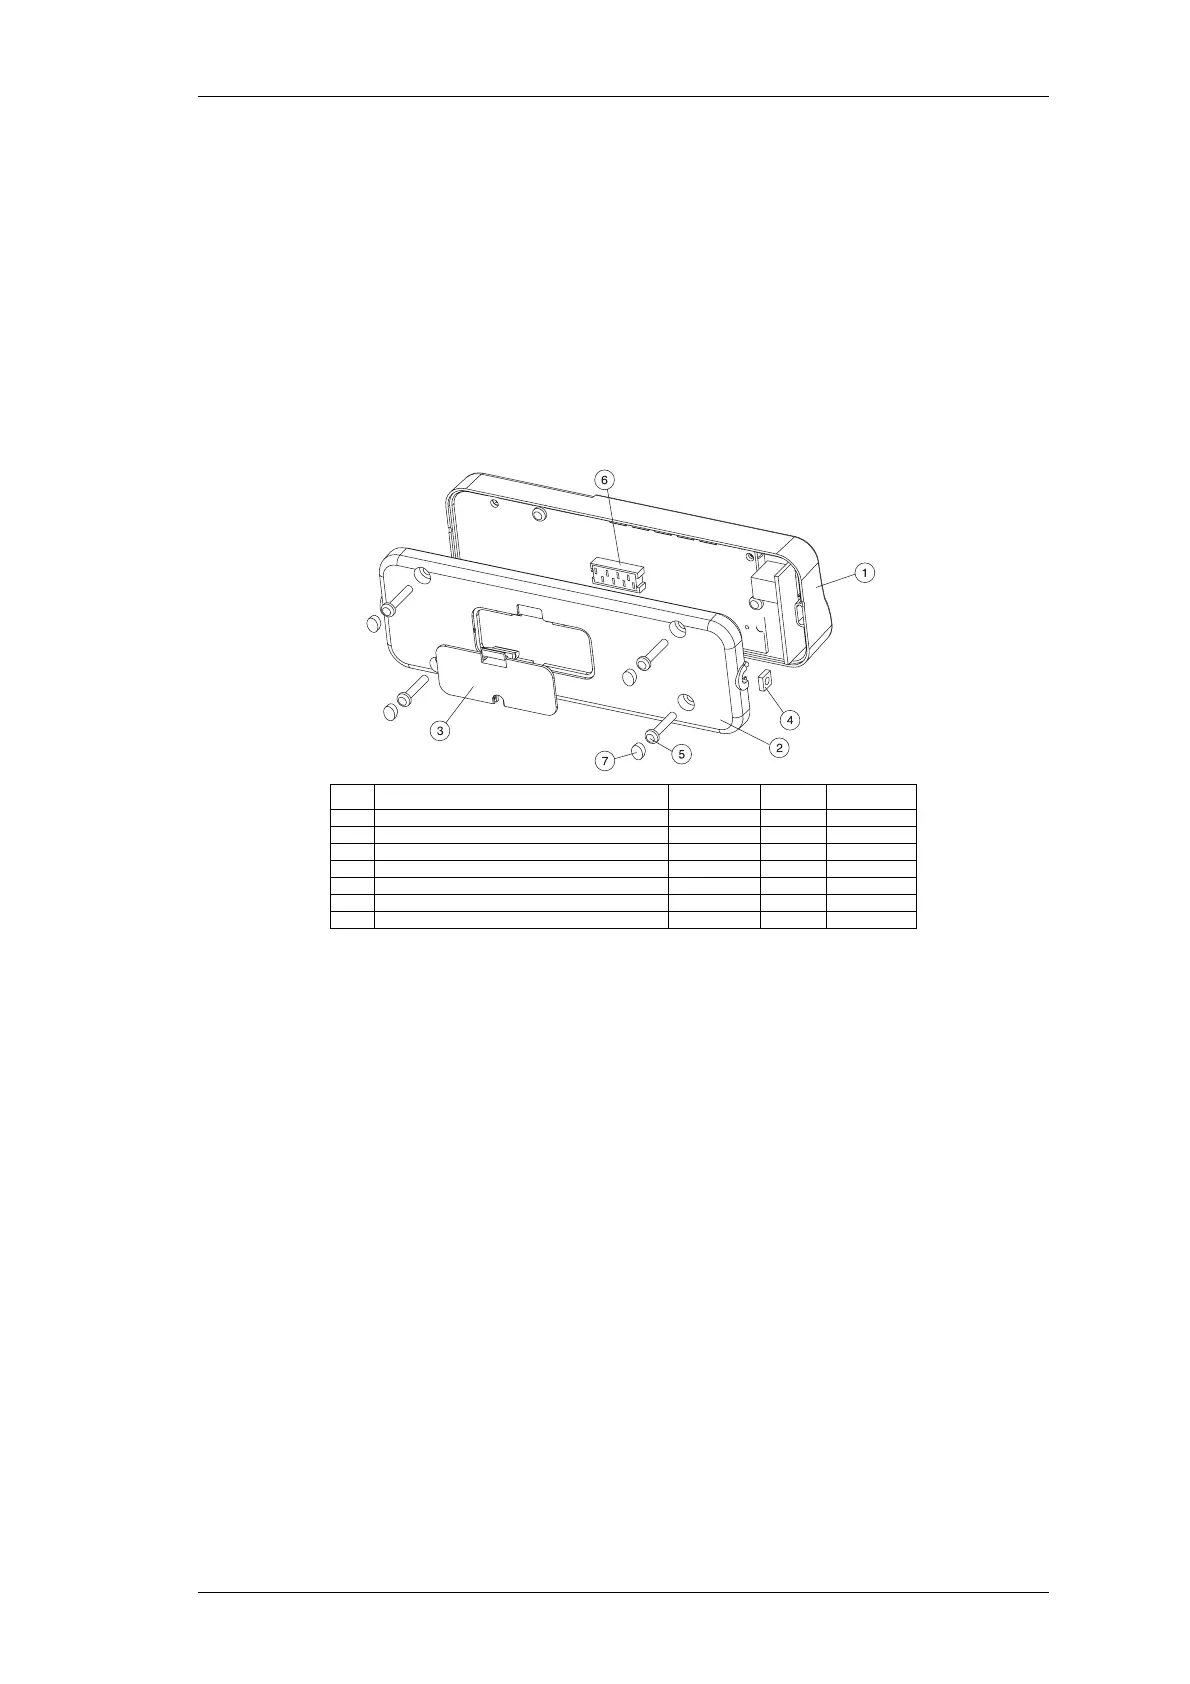
3 Fit the 2 captive M4 nuts (4) into the slots on the remote back panel (2), and mount
the remote back panel onto the control head front assembly (1).
Secure in place using the 4 No. 4x5/8 Plastite screws previously used for the adap-
tor plate, and push the 4 ESD plugs (7) over the screw heads (T2000-A16 only).
Refit the remoting connector cover, pushing the slot in the cover onto the remote
loom cable.
Figure 8.16.1 Remote Control Head Assembly
4 T2000 Series I chassis
Refer to Figure 8.16.2.
Mount the adaptor plate (2) onto the chassis and secure the connector PCB to the 2
chassis pillars, using the 2 M3x6 Taptite screws provided.
As the pillars are not threaded, care must be taken that the screws are not inserted
at an angle.
Pass the logic PCB loom through the slot in the adaptor plate and chassis (7) and
plug the loom onto one of the 8 way connectors (8) on the connector PCB.
Unclip the remoting connector cover (5) from the dummy front panel and pass the
unconnected end of the remote loom through the hole in the dummy head front
panel.
Plug the 8 way remote loom connector onto the 8 way connector (6) on the connec-
tor PCB.
T2000-A16 kit: Secure the remote loom drain wire solder tag under one of the con-
nector PCB screws.
Mount the dummy front panel (1) onto the adaptor plate (2), using the No 4x3/8
Plastite screws (4) provided.
Item Description IPN Quantity Torque (in.lb)
1 CONTROL HEAD FRONT ASSEMBLY 1
2 REMOTE BACK PANEL 316-06432-XX 1
3 REMOTING CONNECTOR COVER 316-85125-XX 1
4 CAPTIVE NUT M4 PRESSED 352-00010-17 2
5 NO 4X5/8 SCREW (REMOTE BACK PANEL SCREWS) 349-00010-24 4 8 (0.9Nm)
6 MICROMATCH CONNECTOR 8 WAY 240-04020-50 1
7 ESD PLUG (OVER REMOTE BACK PANEL SCREWS) 360-01057-00 4
 Loading...