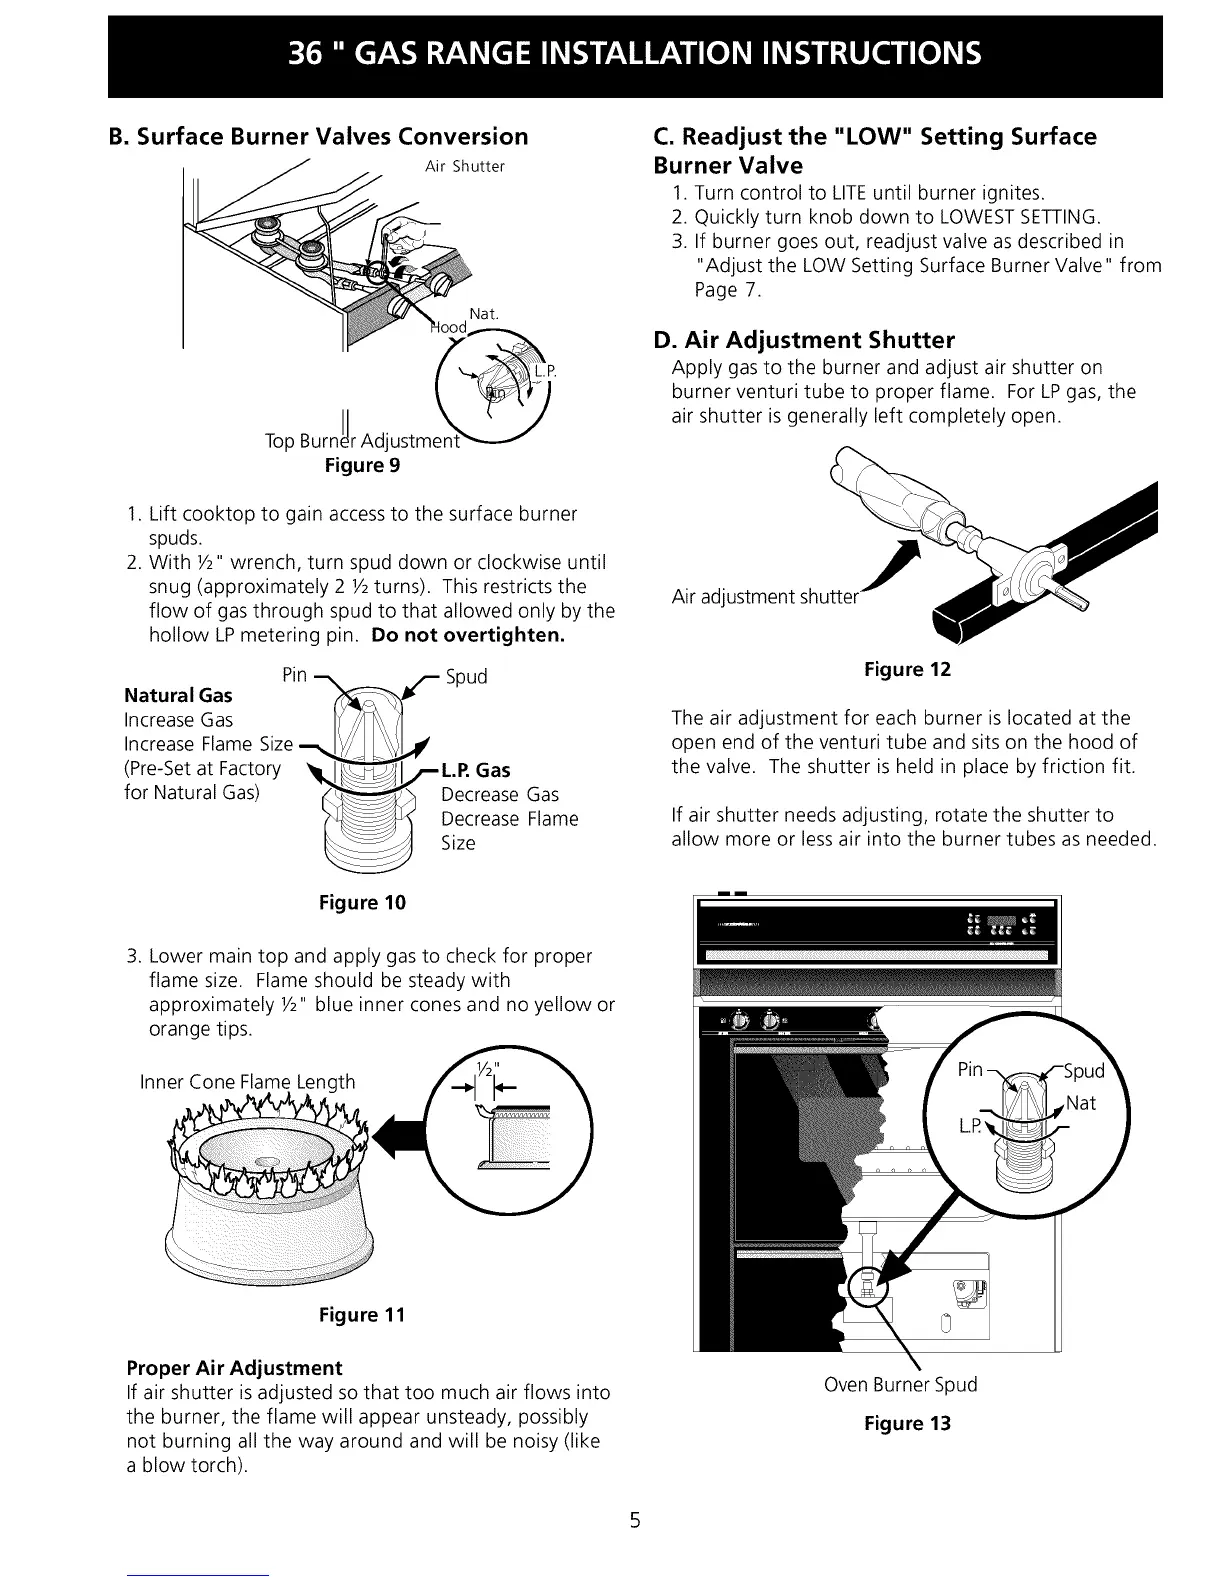
B. Surface Burner Valves Conversion
Air Shutter
Nat.
Top
Figure 9
1. Lift cooktop to gain access to the surface burner
spuds.
2. With Y2" wrench, turn spud down or clockwise until
snug (approximately 2 Y2turns). This restricts the
flow of gas through spud to that allowed only by the
hollow LPmetering pin. Do not overtighten.
Pi_ Spud
Natural Gas _z-
Increase Gas
Increase Flame Size
(Pre-Set at Factory _LI_I/--L.R Gas
for Natural Gas) "_ Decrease Gas
Decrease Flame
Size
Figure 10
3. Lower main top and apply gas to check for proper
flame size. Flame should be steady with
approximately Y2" blue inner cones and no yellow or
orange tips.
Inner Cone Flame Length
C. Readjust the "LOW" Setting Surface
Burner Valve
1. Turn control to LITEuntil burner ignites.
2. Quickly turn knob down to LOWEST SETTING.
3. If burner goes out, readjust valve as described in
"Adjust the LOW Setting Surface Burner Valve" from
Page 7.
D. Air Adjustment Shutter
Apply gas to the burner and adjust air shutter on
burner venturi tube to proper flame. ForLPgas, the
air shutter is generally left completely open.
Air adjustment shutter_
Figure 12
The air adjustment for each burner is located at the
open end of the venturi tube and sits on the hood of
the valve. The shutter is held in place by friction fit.
If air shutter needs adjusting, rotate the shutter to
allow more or less air into the burner tubes as needed.
Figure 11
Proper Air Adjustment
If air shutter is adjusted so that too much air flows into
the burner, the flame will appear unsteady, possibly
not burning all the way around and will be noisy (like
a blow torch).
Oven Burner Spud
Figure 13