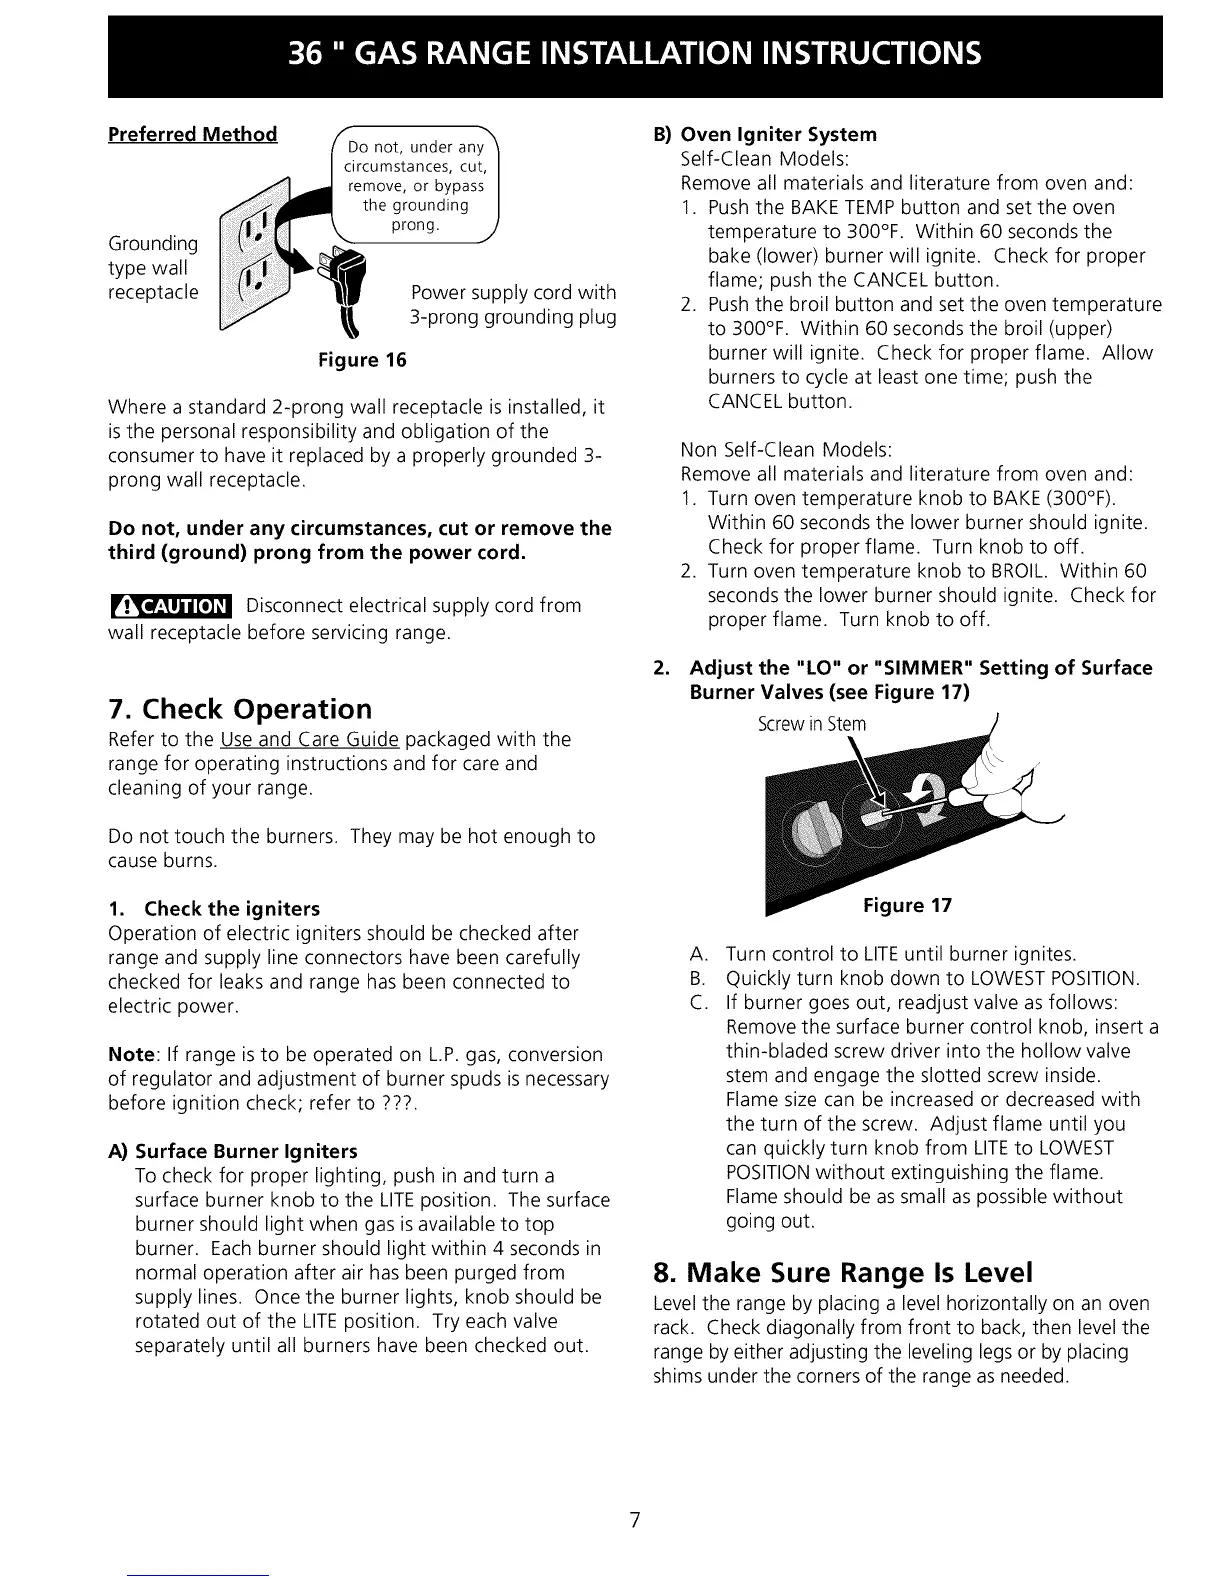
Preferred Method SDo not, under any"X_
I circumstances, cut, I
_ remove, or bypass I
I_t_he grounding J
Grounding _k" prong, j,
type wall
receptacle Power supply cord with
3-prong grounding plug
Figure 16
Where a standard 2-prong wall receptacle is installed, it
isthe personal responsibility and obligation of the
consumer to have it replaced by a properly grounded 3-
prong wall receptacle.
Do not, under any circumstances, cut or remove the
third (ground) prong from the power cord.
Disconnect electrical supply cord from
wall receptacle before servicing range.
7. Check Operation
Refer to the Use and Care Guide packaged with the
range for operating instructions and for care and
cleaning of your range.
Do not touch the burners. They may be hot enough to
cause burns.
1. Check the igniters
Operation of electric igniters should be checked after
range and supply line connectors have been carefully
checked for leaks and range has been connected to
electric power.
Note: If range isto be operated on L.P. gas, conversion
of regulator and adjustment of burner spuds is necessary
before ignition check; refer to ???.
A} Surface Burner Igniters
To check for proper lighting, push in and turn a
surface burner knob to the LITEposition. The surface
burner should light when gas is available to top
burner. Each burner should light within 4 seconds in
normal operation after air has been purged from
supply lines. Once the burner lights, knob should be
rotated out of the LITEposition. Try each valve
separately until all burners have been checked out.
B) Oven Igniter System
Self-Clean Models:
Remove all materials and literature from oven and:
1. Pushthe BAKE TEMP button and set the oven
temperature to 300°F. Within 60 seconds the
bake (lower) burner will ignite. Check for proper
flame; push the CANCEL button.
2. Pushthe broil button and set the oven temperature
to 300°F. Within 60 seconds the broil (upper)
burner will ignite. Check for proper flame. Allow
burners to cycle at least one time; push the
CANCEL button.
Non Self-Clean Models:
Remove all materials and literature from oven and:
1. Turn oven temperature knob to BAKE (300°F).
Within 60 seconds the lower burner should ignite.
Check for proper flame. Turn knob to off.
2. Turn oven temperature knob to BROIL. Within 60
seconds the lower burner should ignite. Check for
proper flame. Turn knob to off.
2. Adjust the "LO" or "SIMMER" Setting of Surface
Burner Valves (see Figure 17)
Screw in Stem
Figure 17
A.
B.
C.
Turn control to LITEuntil burner ignites.
Quickly turn knob down to LOWESTPOSITION.
If burner goes out, readjust valve as follows:
Remove the surface burner control knob, insert a
thin-bladed screw driver into the hollow valve
stem and engage the slotted screw inside.
Flame size can be increased or decreased with
the turn of the screw. Adjust flame until you
can quickly turn knob from LITEto LOWEST
POSITIONwithout extinguishing the flame.
Flame should be as small as possible without
going out.
8. Make Sure Range Is Level
Levelthe range by placing a level horizontally on an oven
rack. Check diagonally from front to back, then level the
range by either adjusting the leveling legs or by placing
shims under the corners of the range as needed.
7
 Loading...