14
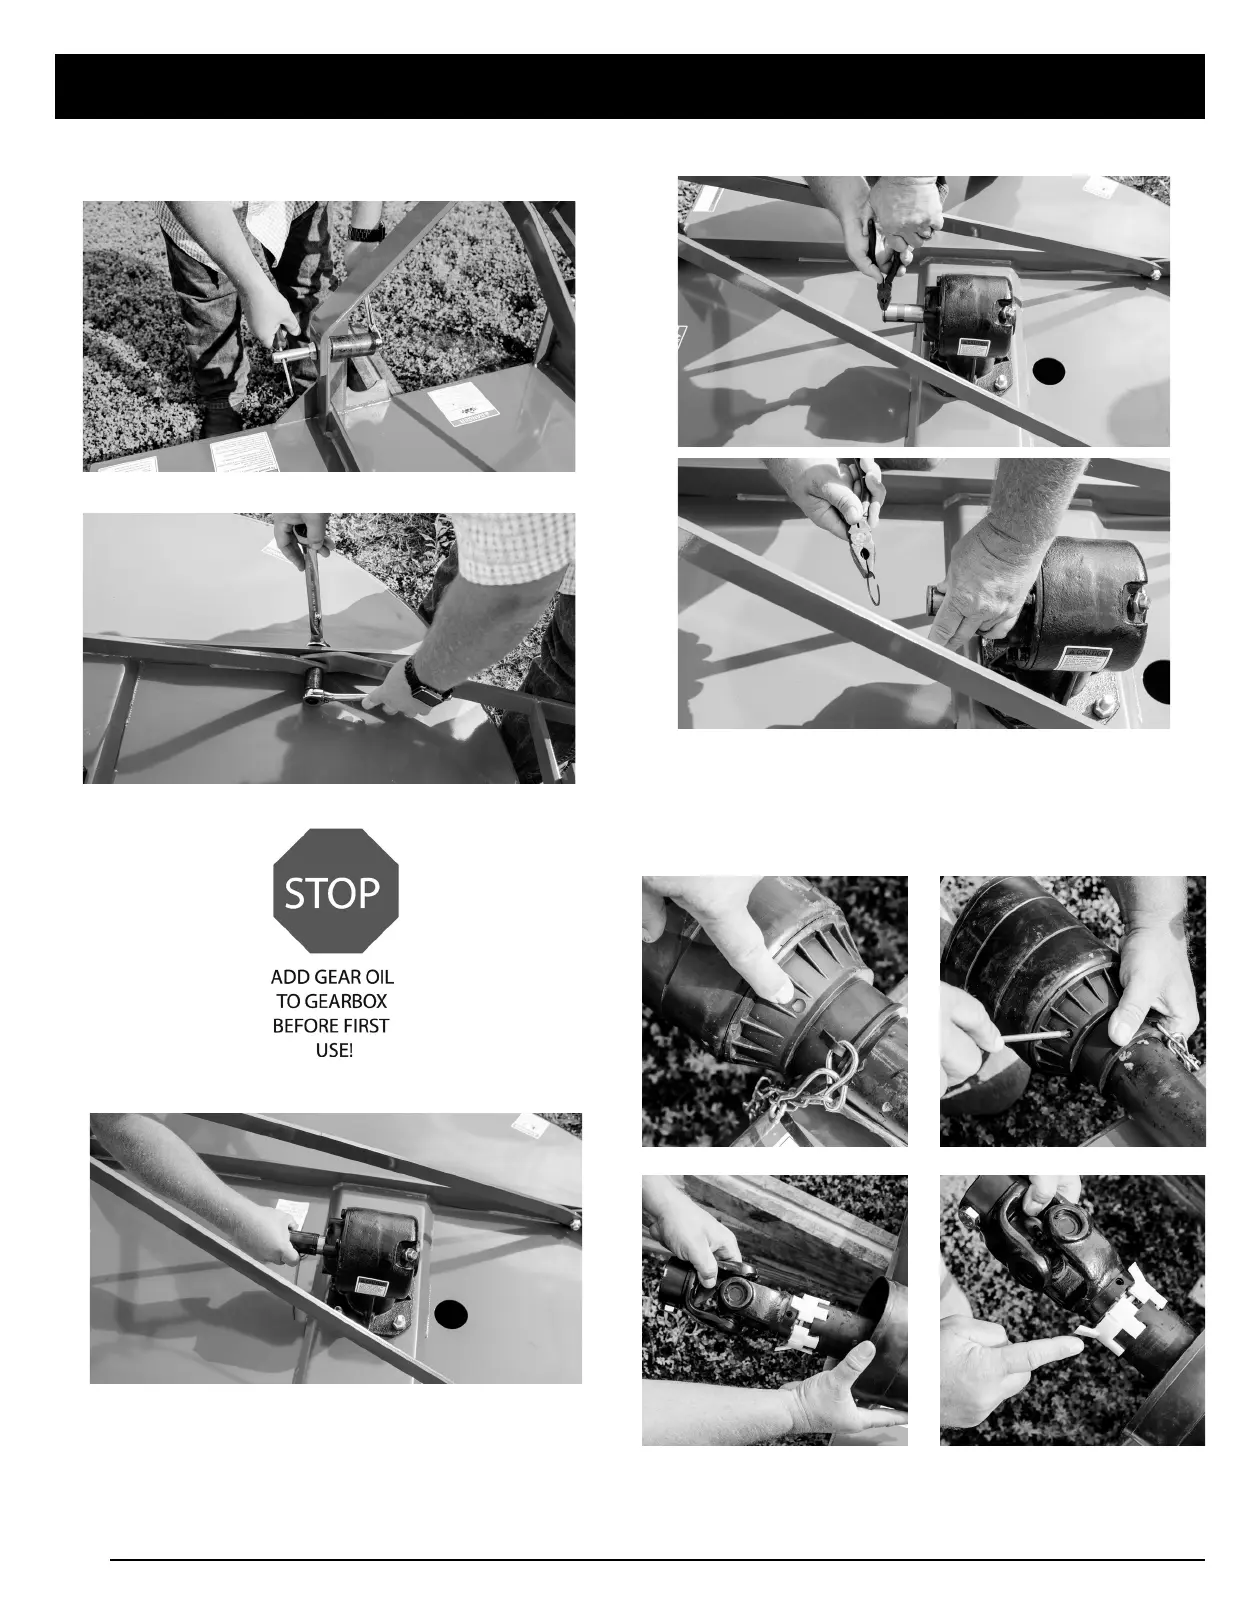
14. Go back and tighten the CAT I pins, on both sides,
using a 1-5/16” wrench/socket.
15. Tighten the nuts on the backstraps.
16. Remove the warning label on the gearbox.
17. Remove the shaft boot on the gearbox.
ASSEMBLY
18. Remove the snap ring.
19. Slide the PTO shield back by using a screwdriver
to apply pressure and release the locking collar.
(There will be 3 tabs on the locking collar) Once
the locking collar is released, slide the PTO shield
back.