EasyManua.ls Logo

Tascam DA-P1 - Mechanism Disassembly - Part 2; Solenoid Bracket and Solenoid Removal; Solenoid Position Adjustment

Tascam DA-P1
59 pages
Print Icon
To Next Page IconTo Next Page
To Previous Page IconTo Previous Page
Loading...
DA-P1
4-3.
Disassembly
of
the
Mechanism
Base
Unit-2
443.
メ
カニ ズム
・
ベ
ー
ス
・
ユ
ニッ
ト
の
分
解
一
2
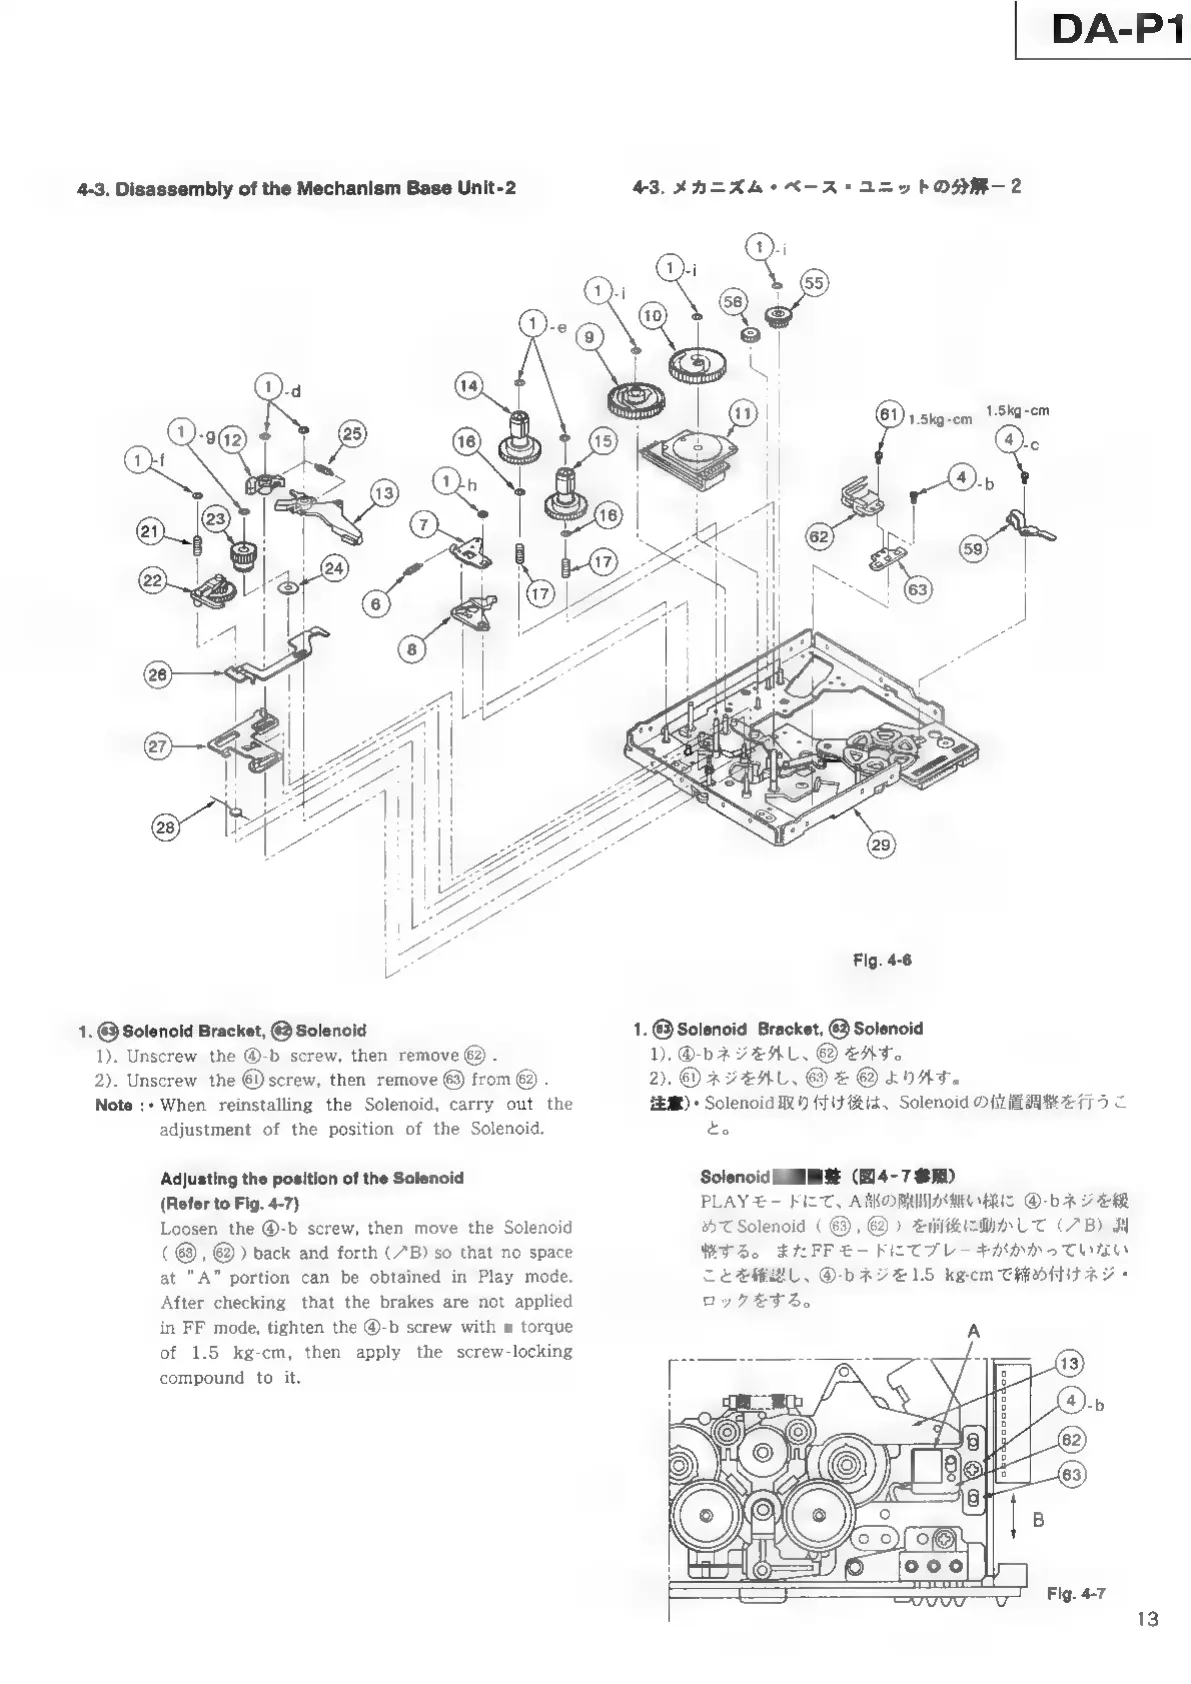
Fig.4-6
1.
@
Solenoid
Bracket,
@
Solenoid
1).
Unscrew
the
@-b
screw,
then
remove
(2)
.
2).
Unscrew
the
Gi)
screw,
then
remove
(63)
from
@
.
Note
:+
When
reinstalling
the
Solenoid,
carry
out
the
1.@
Solenoid
Bracket,
@
Solenoid
1.
G-bk
FEAL,
@
EAT.
2).
⑥)
ネジ
を
外し
、
©
£ ⑯》
より
外す
。
注意
)・Solenoid
取り
付け
後 は
、Solenoid
の
位置
調整
を
行う
こ
adjustment
of
the
position
of
the
Solenoid.
Adjusting
the
position
of
the
Solenoid
(Refer
to
Fig.
4-7)
Loosen
the
@-b
screw,
then
move
the
Solenoid
(
69),
62)
)
back
and
forth
(/B)
so
that
no
space
at
"A"
portion
can
be
obtained
in
Play
mode.
After
checking
that
the
brakes
are
not
applied
in
FF
mode,
tighten
the
@-b
screw
with
a
torque
of
1.5
kg-cm,
then
apply
the
screw-locking
compound
to
it.
to
Solenoid
位
置
調整
(
図
4-7
参照
)
PLAY
モ
ー
ド
に
て
、A
部
の
隙間
が
無い
様
に
④-b
ネ
ジ
を
緩
め
て
Solenoid
(
63),
62
)
を
前
後に
動か
し
て
(
ブ
B)
М
整
する
。
また
FF
モー
ド
に
て
ブレ
ー
キ
が
か
か
っ
て
いな
い
こと
を
確認
し
、④-b
ネ
ジ
を
1.5
kgrcm
で
締め
付け
ネジ
・
ロッ
ク
を
する
。