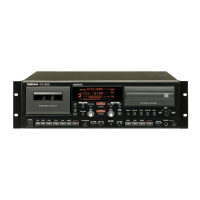
TASCAM GB-10 1
GB-10
Release Notes
Updates
Always use the most recent rmware for this device.
Please visit the TASCAM web site at http://www.tascam.
com to check for the latest rmware.
Maintenance items
V1.01 Fixes
If you pressed and held the
•
Ô or button to
search backward or forward at the very beginning or
end of a song, the speed would return to normal. This
issue has been xed.
If the
•
AREA
item on the
PLAY MODE
screen was
set to
PLAYLIST
, and you set IN (starting) or OUT
(ending) points and then made a move in the playlist
or otherwise edited it, the IN and OUT points would not
be saved correctly. This issue has been xed.
If the
•
AREA
item on the
PLAY MODE
screen is set to
PLAYLIST
, and you select a le not added on the
PLAYLIST
screen and then use the LOOP button to
try to set an IN (starting) or OUT (ending) point, the
following pop-up message will now appear.
File not in PLAYLIST
Confirmation of firmware version
Conrm the rmware version of your GB-10 before
conducting a rmware update.
1 Turn the unit’s power ON.
2 Press the MENU key to open the
MENU
screen.
3 Use the §/BROWS or ¶/ button to select
INFORMATION
menu item (highlight the item),
and press the Á or ¯ button to open the
INFORMATION
screen.
4 Use the §/BROWS or ¶/ button to open the
SYSTEM (3/3)
page and confirm the
System
Ver.
(firmware version) is displayed.
You do not need to update the unit’s rmware if
the version shown is the same as or newer than the
version that you intend to use for the update.
Firmware update procedures
NOTE
When you updated the rmware, make sure that the
batteries have enough remaining power or use an optional
AC adaptor (PS-P520). The program has been set so that the
update will not be conducted if battery power is insucient.
1 Download the most recent firmware from the
TASCAM web site (http://www.tascam.com).
2 Turn the unit’s power ON and use the included
USB cable to connect it with a computer. This unit
will be recognized as an external drive (external
storage device) by the computer.
3 Copy the downloaded firmware to the UTILITY
folder on the GB-10.
4 After copying has completed, disconnect the
unit from the computer following the correct
procedures, remove the USB cable and turn the
unit power OFF.
5 While pressing and holding both the Ô and Á
buttons, turn the unit power ON.
The unit starts up in update mode, and the update le
appears on the screen.
NOTE
If this screen does not appear, turn the power OFF. Then
•
while pressing and holding both the Ô and Á buttons,
turn the unit’s power ON again. Continue to press and
hold the Ô and Á buttons rmly until this screen
appears.
When rmware has been copied to this unit’s UTILITY
•
folder from a Mac, in addition to the rmware le itself,
another le with “._” added to the beginning of the
rmware name is also shown. Use the le without the “._”
at the beginning of the name.
This screen shows a list of the rmware update les inside
•
the UTILITY folder of the unit. Also, the screen shows the
rmware copied at Step 3 above. “No Update File” appears
if there is no update le in the UTILITY folder.
The screen shown is an example. The actual display diers.
•
6 Select the firmware (highlight the item) then press
Á button.
The following screen appears.
The current version appears on the left and the
updated version appears on the right.
NOTE
The screen shown is an example. The actual display diers.
7 Press the Á button to start the update.
8 When the update is complete,
Update
Complete
appears at the bottom of the screen and the power
turns OFF automatically. Turn the power ON again.
D01141400A