Do you have a question about the Tascam M-50 and is the answer not in the manual?
Details the balanced mic input connector and phantom power supply for microphone inputs.
Describes tape inputs for channels 1-8, their routing to channels and AUX systems.
Covers stereo tape inputs for channels 9-12 and their use in monitor sections.
Explains INST, PHONO, and LINE inputs for channels 1-8, providing alternative signal sources.
Details LINE inputs for channels 9-12 for use with AUX systems and separate routing.
Explains the Trim control for adjusting MIC and RMX/LINE input levels to prevent overload.
Describes the switch for routing MIC, TAPE, or SECONDARY inputs to the channel.
Identifies the Pre Out jack as a preferred point for creating Cue mixes.
Explains the Overload LED function and how to adjust gain to keep it off.
Describes the Access Send/Rcv jacks for connecting external signal processing devices.
Details the adjustable EQ section with variable frequency and gain controls for each channel.
Explains the switch to bypass the channel's EQ section, with an LED indicator.
Describes the PFL switch for monitoring individual channel signals before the fader.
Explains the primary fader control for adjusting input signal levels.
Describes the Mute switch function to silence a channel, with an LED indicator.
Explains the Pan pot for adjusting the stereo signal placement across busses.
Describes the Solo button for isolating a channel's signal in the monitor.
Describes jacks for integrating external SOLO systems with the mixer.
Explains switches used to assign input channels to specific buss outputs.
Describes switches to select PRE or POST fader signal routing for AUX A and AUX B systems.
Explains the dual concentric gain controls for adjusting signal levels in AUX A and B systems.
Describes the mute switch for silencing AUX A or B signal paths.
Explains the dual concentric pan controls for stereo placement within AUX systems.
Describes RCA jacks for inputting line-level signals into the AUX systems.
Explains the master faders that control the overall output level of AUX A and B stereo mixes.
Describes the stereo output jacks for the AUX A and B mixes.
Describes inputs for adding external buss signals to the mixer's main busses.
Explains the internal summing amplifiers that combine signals on the master busses.
Describes jacks for connecting external effects or devices to the master busses.
Explains the faders that control the overall output level of each of the eight master busses.
Describes the main output jacks for busses 1 through 8, carrying the final mixed signal.
Details the function and response of the eight VU meters for signal level monitoring.
Explains the Peak LEDs that indicate signal levels 10dB above VU, showing transient peaks.
Describes switches for selecting which signal sources are displayed on the meters.
Explains switches to select the signal source (BUSS, OFF, or TAPE) for the monitor mix.
Controls the signal level selected for the 8x2 MONITOR mix.
Determines the stereo placement of signals in the 8x2 MONITOR mix.
Describes jacks for inputting external signals into the 8x2 MONITOR mix.
Allows selection of various signal sources for stereo outputs and headphones.
Provides signal isolation for the monitor section from subsequent connections.
Allows independent adjustment of the headphone output volume.
Describes the stereo output jack for connecting headphones.
Controls the overall output level of the stereo master busses ST MSTR A and B.
Describes balanced output connectors for coupling to long lines without signal loss.
Describes output jacks for sending signal to power amps and loudspeakers.
Describes alternative output jacks for studio feeds or secondary recording.
Describes the built-in talkback microphone and its assignment controls.
Controls the level of the talkback mic to the BUSS, AUX A, and AUX B switches.
Controls the level of the talkback mic exclusively to the TALKBACK switch.
Selects output for slate, test tone, or turns the oscillator off.
Selects test tone frequencies for system calibration and alignment.
Switches for assigning talkback or test tone signals to various outputs.
Output jacks providing access to the test tone oscillator signal.
Illustrates a fundamental patching setup for 8-track recording and production workflows.
Describes using the Direct Out for effects mixes and integrating with an accessory mixer.
Explains using the Pre Out for providing cue signals when using an accessory mixer.
Details using ACCESS SEND/RCV as a pass-through for expanding system connectivity.
Describes using an accessory mixer to expand the 2 Track Return Inputs 11 & 12.
Describes a simple method for checking recorded signals without corrective EQ.
Explains how to set up cue mixes for overdubs, combining playback and mic signals.
Describes the PB-64 Patch Bay accessory for efficient signal routing and management.
Discusses the importance and benefits of using high-quality audio cables.
Explains the advantages of low capacitance cables for signal integrity.
Offers essential advice on balancing levels and tone during the mixdown process.
Lists recommended books and resources for further study in audio engineering and acoustics.
Provides specific instructions for UK customers regarding AC plug installation and wiring.
| Brand | Tascam |
|---|---|
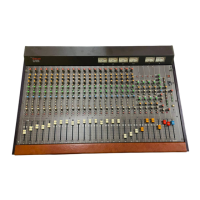
| Model | M-50 |
| Category | Music Mixer |
| Language | English |