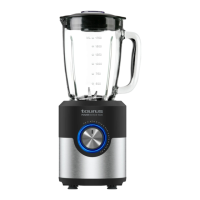
• Puttheingredients,afterhavingrstchoppedinto
smallpieces,intothejarwithliquid(donotexceedthe
maximummarker).
• Putthelidonthejar.Makesureitisproperlyxedin
place.
• Put the measuring cup on the lid.
• Connect the appliance to the mains.
• Choose the desired speed and start blending.
• If you wish to add more ingredients, pull out the
measuring cup.
• Add the ingredients and replace the measuring cup.
• Tostoptheappliance,setthespeedbackto“0”.
• Turn the appliance on by selecting the desired speed in
the speed selector.
• The illuminated ring comes on. (H).
• Toavoidaercestart-up,itisadvisabletostartofffrom
the lowest speed position and, once the appliance has
been switched on, progressively increase the speed to
the desired position.
ELECTRONIC SPEED CONTROL
• The speed of the appliance can be regulated by using the
speedselector(I).Thisfunctionisveryuseful,asitmakes
it possible to adapt the speed of the appliance to the type
ofworkthatneedstobedone.
ONCE YOU HAVE FINISHED USING THE APPLIANCE
• Stop the appliance, selecting position “0” on the speed
selector.
• Unplug the appliance from the mains.
• Lift the jar from the motor body.
• Clean the appliance.
“PULSE / ICE CRUSH” FUNCTION
• Theapplianceworksatthehighestspeedtoachieve
optimal performance.
• Press this button to operate and release the button when
you wish to stop operating.
• Thisfunctiongivesoptimalresultsforice-crushingupto
desired snowy level.
• Werecommendworkingbypressingthebuttonincycles
of 3 seconds, and repeating the operation until you obtain
the desired result.
SUPPLY CORD COMPARTMENT
• This appliance has a supply cord compartment situated
on its underside.
CLEANING
• Disconnect the appliance from the mains and allow it to
coolbeforeundertakinganycleaningtask.
• Clean the equipment with a damp cloth with a few drops
ofwashing-upliquidandthendryit.
• Do not use solvents or products with an acid or base pH,
such as bleach, or abrasive products, for cleaning the
appliance.
• Do not let water or any other liquid get into the air vents to
avoid damage to the inner parts of the appliance.
• Never submerge the appliance in water or any other liquid
or place it under running water.
• Duringthecleaningprocess,takespecialcarewiththe
blades, as they are very sharp.
• It is advisable to clean the appliance regularly and
remove any food remains.
• If the appliance is not in good condition of cleanliness, its
surfacemaydegradeandinexorablyaffecttheduration
oftheappliance’susefullifeandcouldbecomeunsafe
to use.
• The following pieces may be washed in a dishwasher
(using a soft cleaning program) or soapy hot water:
- Jar
- Lid
- Measuring cup
• Then dry all parts before their assembly and storage.
SELF-CLEANING FUNCTION
• Putwaterandasmallamountofwashing-upliquidinthe
jar.
• Select the function “Pulse”.
REMOVABLE BLADES FOR EFFECTIVE CLEANING
• Loosenthebladexingringbyturningitinaclockwise
direction.(Fig.3).Removethebladexingring,bladeset
and sealing ring, and clean them. (Fig. 4).
• After cleaning, replace the blade set and turn the blade
xingringintheoppositedirection.
 Loading...