17
Change suction foot, quick
release
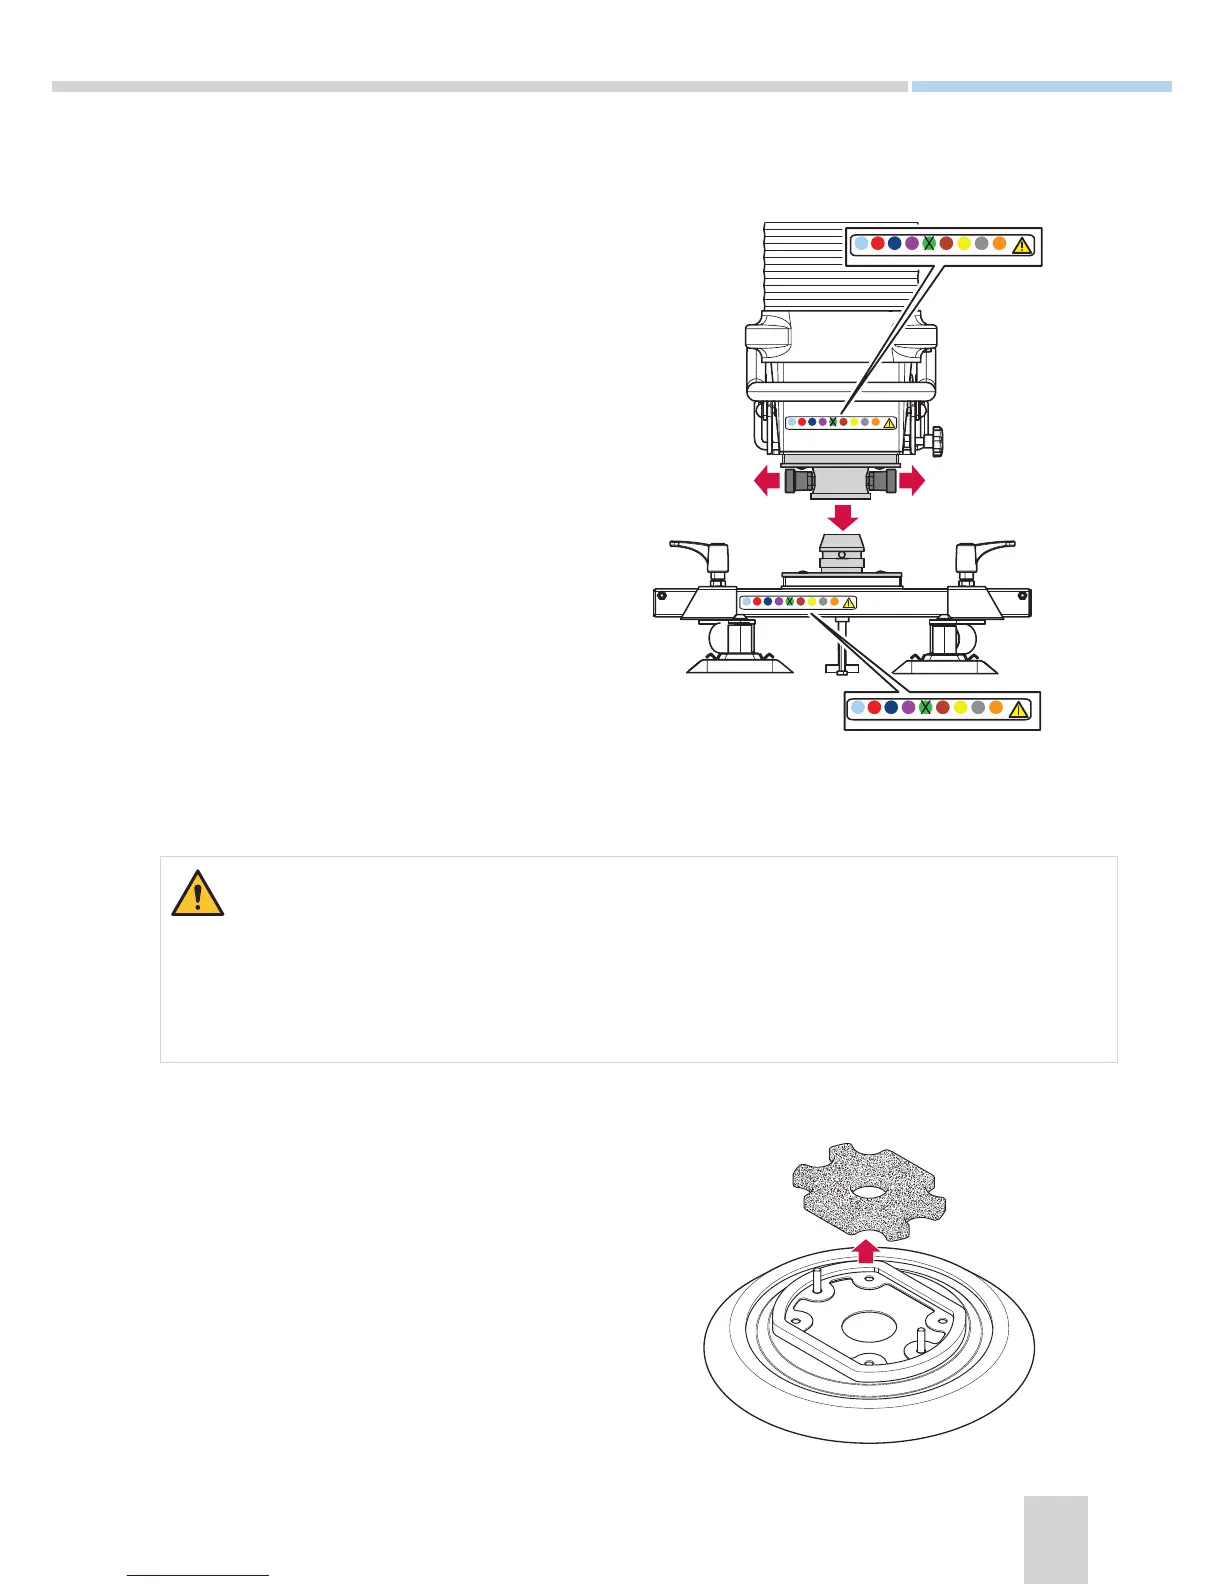
The lifter can be equipped with optional tools for
dierent load types. The quick change attachment
enables easy tool changes.
1. If not done, mount the quick change attachement
on the suction head and foot according to the
instructions for Install suction foot and touch bolt on
page 10.
2. With the suction foot resting on a rm surface and
the vacuum pump turned o, pull and hold the
spring-loaded pins.
3. Remove the suction foot.
4. Verify that the suction foot is correct for your
model and the colour code matches (see warning
below).
5. Connect the new suction foot to the suction head
by rmly pressing it in the quick change attach-
ment until the spring-loaded pins engage.
6. Verify that the suction foot is rmly connected to
the suction head and that it does not rotate.
7. Verify that the lift unit hangs and moves freely so
that unneccessary wear is avoided.
8. Verify function of the lifter.
Note the colour code system for safe assembly of lift unit to suction foot/accessory. Each colour
corresponds to a specic VacuEasylift model. ONLY PARTS WITH MATCHING COLOUR CODE
MARKING MAY BE ASSEMBLED! Some suction feet/accessories may be used with several lift mod-
els (indicated by the colour code). Incorrect combinations of lift unit and accessory may cause seri-
ous injuries.
Clean suction foot lter
The suction foot air lter should be cleaned regulary
(once a week, more often if the environment requires).
1. Remove the suction foot.
2. Carefully clean the air lter using reduced com-
pressed air.
3. The lter inset MUST be replaced when dirty or
damaged.
4. Fit the suction foot with two or four M6/M8 bolts
to the suction head, see Install suction foot and touch
bolt on page 10. Use a torque between 2-3 Nm
for the bolts.
5. Verify function of the lifter.
VM100
VM120
VM140
VM160
VM180
VM200
VM230
VM250
VM300
VM100
VM120
VM140
VM160
VM180
VM200
VM230
VM250
VM300
VM100
VM120
VM140
VM160
VM180
VM200
VM230
VM250
VM300
VM100
VM120
VM140
VM160
VM180
VM200
VM230
VM250
VM300